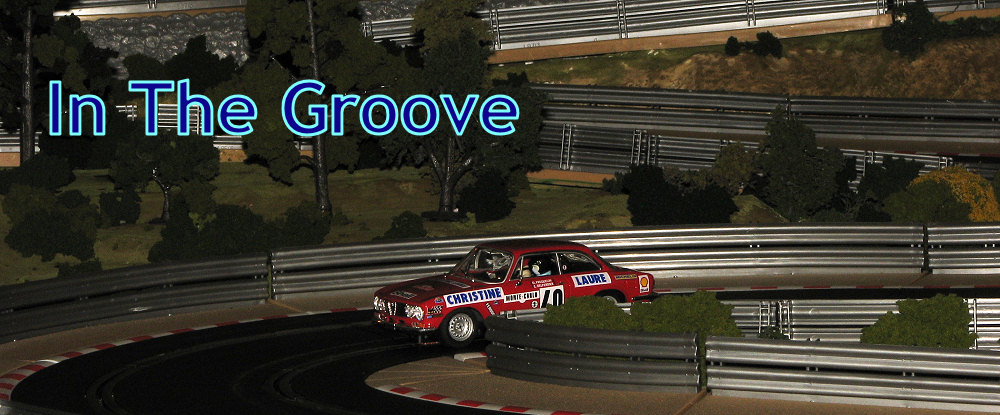
In the last several months, I've been fussing around with several things on the track. As you can see in the header shot, I've been slowly adding more and more shrubbery to the layout. Every once in a while, I'll take a period of time to add in some grass or a tree or some underbrush or larger bushes. Most all of this is using Woodlands Scenics material which you can find at any place which sells model railroad stuff or even at your local hobby shop.
But the big thing over this time is
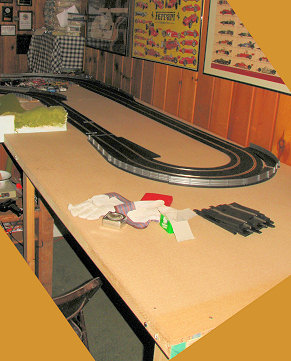
that I tacked up another 4x8 to the layout. This now means I've used 5 sheets of
1/2 inch particle board and have a lap length of around 135 feet. Here is a
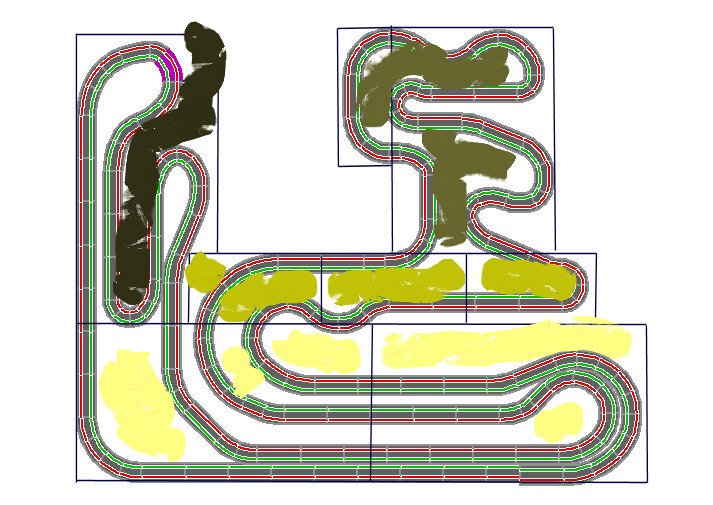
diagram of all the various upgrades made to the track system. By now many would
have probably
 built
a custom track and routed the lanes, but I like the ability that plastic track
has to make changes until one is satisfied with the end result. Aside from the
part that I've heavily landscaped, the track is able to be changed as I see fit,
and I've done so over the months. Even the diagram to the left is not exactly
how the track is configured today, but it does show the various stages of
construction.
built
a custom track and routed the lanes, but I like the ability that plastic track
has to make changes until one is satisfied with the end result. Aside from the
part that I've heavily landscaped, the track is able to be changed as I see fit,
and I've done so over the months. Even the diagram to the left is not exactly
how the track is configured today, but it does show the various stages of
construction.
This additional sheet has meant a couple of things. One is that I've had to be careful on how I've designed the additional trackage as some of the track cannot be reached from the outer edges. Keeping this in mind, the bits far away are basically straight sections which rarely are a cause for a de-slot. I also slowly added on additional straight track leading up to the hairpins in this section of track.
It meant that some sections wouldn't have borders as the distance between track would be too tight. However, Ninco makes various wall sections that I found quite useful. These simply snap to the lip of the track. There are two types. One is a fake stone wall section as you can see in the background of the header shot. The other is a 'solid' wall with a fence atop it. This is particularly handy at the end of a fast straight as the additional height will keep cars from flying off the track and onto the floor. I put this at the end of the long straight section that I added against the wall. It has saved several cars from probable damage already. These latter bits are tacked to the outside of the borders. Fit here isn't quite as good as the stock fence attachments interfere, but one can work around most of them with a bit of trial and error.
This additional piece also allows for the possibility of expansion along the left side, which would make for an even longer back straight section, once I can figure out what to do about the stuff that is in the way!
For those wondering about cost, the most expensive part of this is the track, however, once one makes up one's mind about expanding, then one can get bits and pieces over time and slowly expand things. That is what I did with the new addition. I first bought the particle board and some 2x2s for the frame work. I had 2x4s for the legs already so that wasn't a great cost. The lumber for this was only about $35.00 and the lumber yard even cut the notch section that I needed to fit it in place for me (if you look at the lower right of the new addition, you'll see the notch).
After that, it was simply a matter of attaching the framework and lifting the board into place while drilling the holes for the legs. This actually was a bit more work than it sounds as even particle board is heavy. One thing that helped was that I had drilled and bolted the framework to the existing track sections first (that part on the lower section and lower right of the old track. That way, I had a 'lip' on which to rest the new section. After the four new legs were attached (and I use 1/4 inch bolts for all the attachments), I was able to screw the board into the 2x2 lips with particle board screws (these have a very coarse thread). Somehow I got a bit of a drop in the new section so that when cars go down the new long stretch, they have a slight drop-off that looks pretty neat. It is not so noticeable coming back up the inner section to the new hairpin.
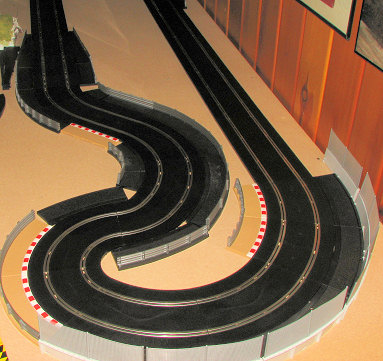
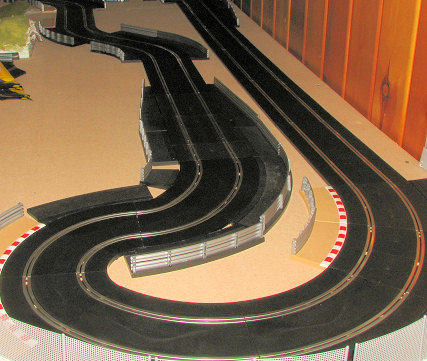
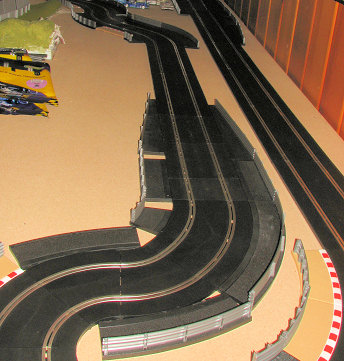
Here is a look at how things
progressed over the months as I added track and changed configurations. You'll
see that I also had to remove old landscaping to have things fit. This was not
bad as though I thought I did well when I put it up, it looks pretty lame
compared to later landscaping attempts. Pictures are left to right where you see
multiples on the page. You can also see the high fence Ninco barrier sections
and how I have even changed the hairpin at the end of the straight by swapping
two sections of track. It is this flexibility that I really like about sectional
track. 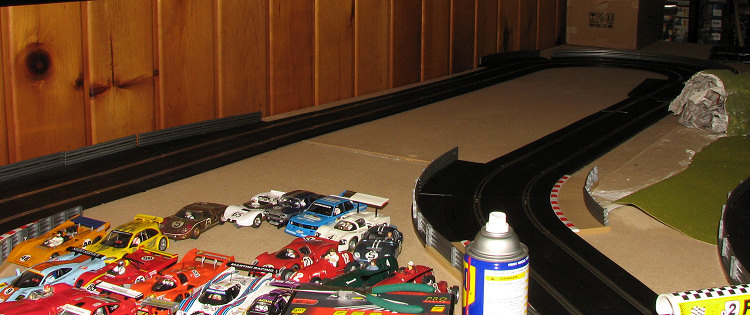
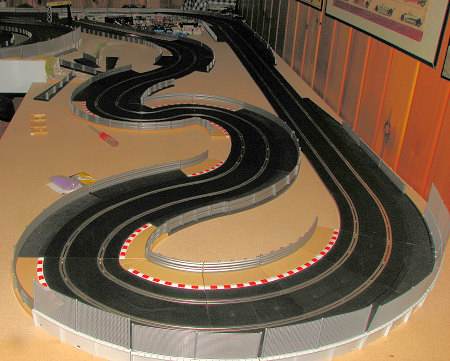

One thing about all the new curve
parts is that not only do they all have at least one section of R1 track (the
tightest turn available), but they are all different in terms of the radius of
track in them. This really adds to the interest a lot more than constant radius
turns. It also means that for one
 turn
in particular, the cars have to get really slow to make the corner. For that
reason, I extended the track leading to it so that it would be easier to reach
deslotted cars. I also adjusted the turn going onto the older section of the
track to make it slower as I was finding a lot of times I'd go too fast through
the gentle sweeper there. Forcing cars to go slower has not only decreased the
number of de-slots, but has made it bit more enjoyable and challenging. The
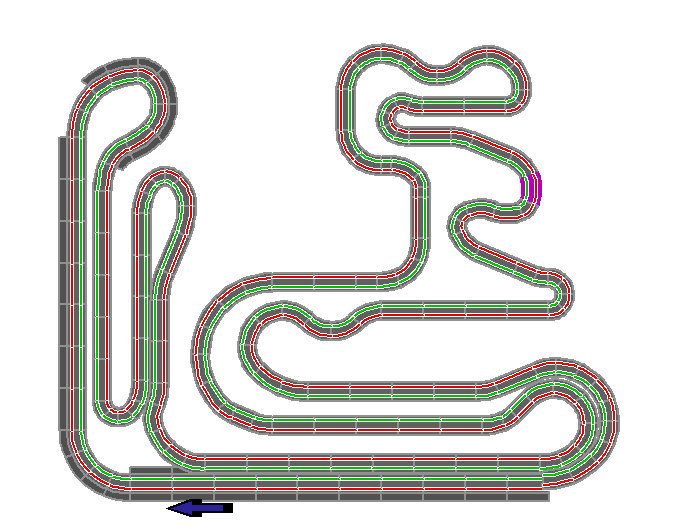
diagram to the right shows the track in its current configuration. You can see
the slight change I mentioned just above the direction arrow and how much deeper
the far left hairpin has been extended.
turn
in particular, the cars have to get really slow to make the corner. For that
reason, I extended the track leading to it so that it would be easier to reach
deslotted cars. I also adjusted the turn going onto the older section of the
track to make it slower as I was finding a lot of times I'd go too fast through
the gentle sweeper there. Forcing cars to go slower has not only decreased the
number of de-slots, but has made it bit more enjoyable and challenging. The
diagram to the right shows the track in its current configuration. You can see
the slight change I mentioned just above the direction arrow and how much deeper
the far left hairpin has been extended.
For those interested, the average lap time is in the 14-15 second range. The very fastest cars will just dip into the 12s.
Well, that is about it for this session. I hope you learned a bit and if you have any questions or wish to share your experiences or images of your track, I'd like to hear from you on the subject so please e-mail me at mmreaders@aol.com.
Scott