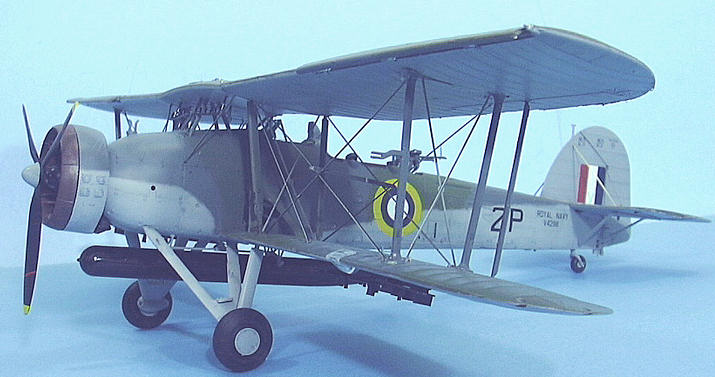
| KIT #: | 3207 |
| PRICE: | $124.95 MSRP |
| DECALS: | Two options |
| REVIEWER: | Tom Cleaver |
| NOTES: | Xtradecal 32-015 “Swordfish Mk.I 1941-1944" used |

| HISTORY |
Aboard "
Aboard the aircraft carrier "Ark Royal," sent from 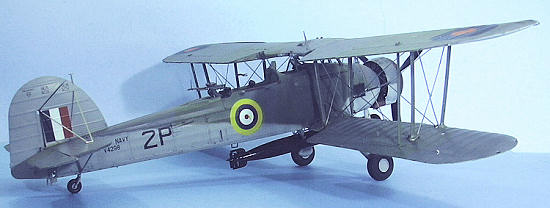 through
a 30-foot arc?
Within the hour, in deteriorating weather, fifteen Fairey Swordfish
biplanes - half from 810 Squadron, the other half from 818 Squadron - launch
from the heaving flight deck. The first eight carry only a torpedo due to deck
length. They are sent on their way as the bow reaches the limit of downward
travel, the angle providing extra speed to throw the antique biplanes into the
air on the upswing. Their mission is simple: slow "
Approximately 33 minutes later, the Swordfish find their target in the
last light of
The attacking Swordfish isn’t spotted in the gloom until the final
moment. The ponderous biplane turns away as its torpedo heads toward the target.
"
Unable to steer, all "
No other carrier-based strike aircraft of any navy in the world could
have gotten off the deck of "Ark Royal" in the sea conditions of that
strike, and at least as important was the fact that all aircraft were recovered
safely in the gloomy twilight with the stern rising and falling through a 40
foot arc.
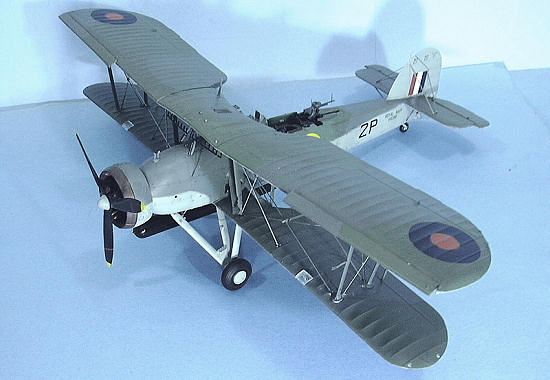
When Fairey Aviation Co., Ltd., first began design of a private-venture
Torpedo-Reconnaissance aircraft for the Fleet Air Arm in 1933, the concept of a
3-seat biplane with open cockpits was already ten years out of date.
Fairey presented this to the Their Lordships of the Admiralty as an
alternative to the S.9/30, which had been designed in response to an official
requirement and was powered by a 525 h.p. inline Kestrel, while the private
venture design utilized a 635 h.p. Bristol Pegasus IM.
The T.S.R. I - as the private-venture design was called by Fairey - first
flew on
With Fairey committed to production of several FAA aircraft,
By the time war broke out in September 1939, the Swordfish was considered
obsolete. Yet it would be one of five aircraft in first line service of all
combatants in 1939 that would still be in first line service in 1945, the other
four being the German Bf-109 and Bf-110, and the British Spitfire and Hurricane.
Thirteen squadrons were equipped with the Swordfish at the outbreak of
war and an additional thirteen would equip with it during the war, making it the
most widely-used aircraft in the FAA wartime inventory.
The Swordfish went into combat for the first time on
The Swordfish was in action against the Italians from the moment
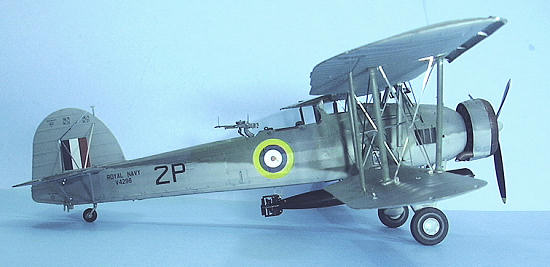 In July, 1940, 12 Swordfish from “Ark Royal” crippled the French
battleship “Dunkerque” in the famous attack against
The crowning achievement of the Swordfish came on
The Swordfish would eventually gain fame as the “good shepherd” of the
Amazing as it may seem to look at the ungainly Swordfish, it is the most successful naval strike aircraft in history. Its exploits are the stuff of legend.
| THE KIT |
Tamiya released a Swordfish in 2000 that is considered one of the best
injection-plastic kits ever released.
The good news here is that Trumpeter has essentially pantographed the
Tamiya kit up to 1/32 scale. The
surface detail is a bit more accentuated than the Tamiya kit, and there are no
underwing racks or ordnance provided, but this is not a problem.
The kit also follows the Tamiya kit in not having separate Handley-Page
slats on the upper wings.
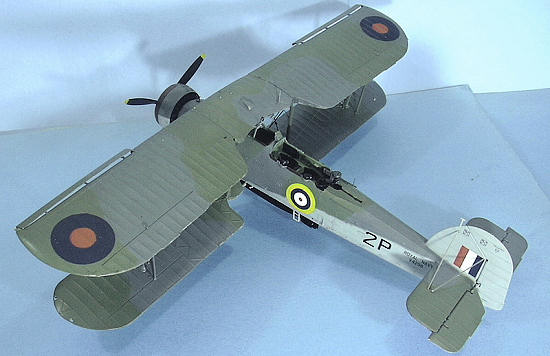 The decals include markings for an early-production Swordfish I flown by
810 Squadron aboard “
Fortunately, Xtradecal is just releasing two decal sheets for this kit
that solve all these problems.
Sheet 32-014 gives markings for two prewar Swordfish, while Sheet 32-015
provides markings for an early Swordfish I with bright pre-war roundels, a
Swordfish from 818 Squadron on the “
| CONSTRUCTION |
As was the case with the Tamiya kit, this is definitely a model that
starts with the cockpit. The instructions are clear, the parts work, and there
are no difficulties encountered in putting together the sub-assemblies and
fitting them into a well-detailed interior.
There is even superior fit of the cockpit assembly into the fuselage than
was the case with the Tamiya kit.
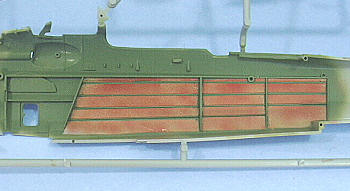 Modelers should note that in painting the Swordfish interior, the fabric
exterior was covered in red primer. Depending on how well the primer was worked
into the fabric, it would be seen in the interior as blotchy red through the
doped fabric, which is generally a light tan. I accomplished this by air
brushing Tamiya “Buff”, then “blotching” Gunze-Sanyo H-414 "RLM Rot23," a light
brick-red color, which the picky-picky modelers at the Aerodrome have determined
is a good representation of doped fabric. The fabric area was masked off when
dry and the rest of the interior was painted with Xtracrylix “British Interior
Green” with details painted with Tamiya “Semi-Gloss Black on all metal items.
The painting instructions are clear and should be followed.
Just before I started in on assembling the cockpit, I saw a post at
Britmodeller.com which pointed out that the two rear seats only had a strap
around the crewman’s waist that was chained to the airframe as a “seatbelt,” and
that this was not seen when the airplane was on the ground.
I therefore only used Eduard’s 1/32 photo-etch Sutton Harness on the
pilot’s seat.
I decided to scratchbuild the underwing racks and separate the upper wing
slats and convert them to extended slats as is seen with all Swordfish on the
ground.
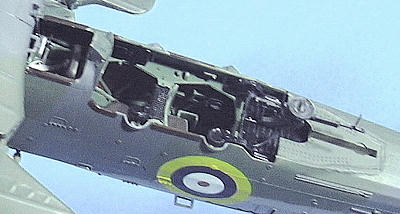 I cut out the slats before assembling the upper wings, and made the
interior leading edge using Evergreen sheet.
The cut-off slats were assembled and then the interior was thinned to the
proper shape, with some Bondo putty used to give a smooth interior surface.
I also noted that Trumpeter correctly made the torpedo sight in injection
plastic, but then neglected to add the sight markers.
I made those from thin Evergreen strip and glued them in position.
The wings go together easily. You must decide at the point you assemble
the upper center section which way you are going to display the model: wings
folded back or wings deployed. A main spar in the upper center section becomes
the main support of the wings when deployed unfolded.
Once the wing sub-assemblies and the fuselage had been finished, it was
time to go to the paint shop.
| COLORS & MARKINGS |
Painting:
I first pre-shaded the model with black airbrushed along panel lines.
I also painted the propeller, the assembled engine and the interior of
the rear cowling wit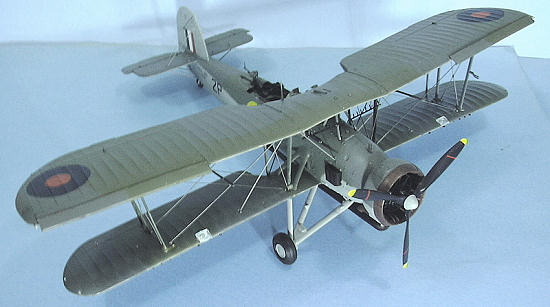 h
Semi-Gloss Black. The collector
ring and exhaust were painted a “burned metal” color created by mixing Tamiya
“Flat Copper” with “NATO Black.”
The Xtradecal sheet shows the 818 Squadron airplane with Sky lower
surfaces, which I do not think is correct, for reasons detailed below:
When the paint was dry, I gave the sub-assemblies a coat of Testor’s
Model Master Sealer.
Decals:
The Xtradecals went on without problem.
I used the markings for the 818 Squadron Swordfish that was flown on the
“
| CONSTRUCTION CONTINUES |
The model was washed to get rid of any dried decal solvent, then I
gave it an overall coat of Xtracrylix Flat Varnish.
When that was dry I attached the underwing bomb racks and flare
racks, and the upper wing leading edge slats, and the torpedo.
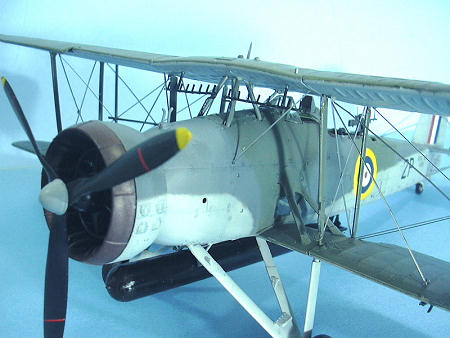 I then assembled the rubber wheels and attached them.
For those who claim that rubber wheels are a disaster waiting to happen -
and I have experienced that with the
I attached the torpedo sights and then assembled the bracing wires
between the inner and outer struts. The model needs control wires which are not
provided, but I was temporarily out of .008 brass wire painted gloss black, so
this will await another day.
I then assembled the wings and attached them. At this point, I discovered that Trumpeter had positioned the aileron control strut incorrectly, with the lower attachment point being ahead of the aileron rather than on it. I cut off the mounting base, put it where the hole was, painted that (thank goodness Xtracrylix dry the same color whether hand-brushed or airbrushed) and attached the strut in the correct position.
| CONCLUSIONS |
It’s the Tamiya kit, only bigger.
For those who feel “biplane challenged,” this kit is easy to assemble
with a modicum of experience. The
Swordfish may be one of the most ungainly-looking airplanes to fly, but its
story is such that it has a certain beauty that no other World War II airplane
can compete with. Did I mention
it’s really impressively big when finished?? Highly recommended.
Thanks to Stevens International for the review
kit. Thanks to Hannant’s for the
decals.
June 2009
If you would like your product reviewed fairly and quickly, please contact me or see other details in the Note to Contributors.