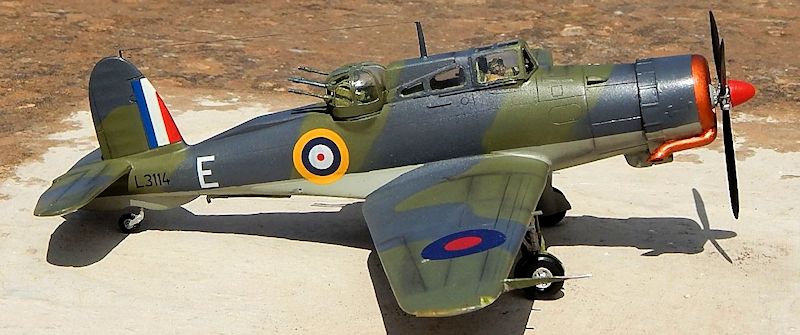
Warrior Models 1/48 Blackburn Roc
| KIT #: | ? |
| PRICE: | $44.95 when first released |
| DECALS: | One option |
| REVIEWER: | Carmel J. Attard |
| NOTES: | Resin kit with metal and vacuform parts |

| HISTORY |
 wider
aft fuselage to accommodate the Boulton Paul electrically-driven turret with
four 0.303 guns. Fleet Air Arm ordered 136 production Rocs straight from the
drawing board.
The layout of the dive bomber
was retained with the exception of the wings which had two additional
degrees of dihedral to do away with
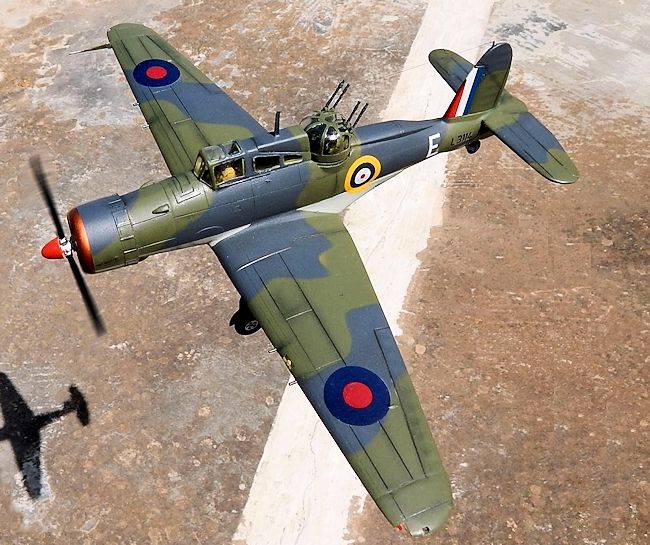
the up-turned wing tips of the Skua. The power operated turret was situated
just aft of the pilot’s cabin and the decking fore and aft of it was made
to lower down into the fuselage to allow better travel and fire area all around,
except forward. The fixed wing guns were retained.
The performance of the Roc was found to be lower than calculated owing to the
greater weight and turret drag. Operational service of the Roc Mk.1 began in
1939. The Rocs fought with the 800th and 801st FAA over
Norway and over Belgium in May 1940. As with the Defiant however, and after a
brief service the realities of war soon exposed its short comings and the Roc
was relegated to second line FAA duties as target towing and air – sea rescue
role, and to second-line FAA units where they served, with the turret removed,
as trainers. By the middle of 1940 the Fulmar came into the scene and with the
arrival of the Sea Hurricane all remaining Rocs went to the breakers.
It is doubtful if the Roc had ever been aboard a flight deck of a carrier during
its short career. One example was fitted with floats to specification 0.20/37
but the design did not proceed further than the prototype stage. It is however
of interest to the modeler who wants to build something really exotic.
| THE KIT |
There are two known kits of the Roc to the scale of 1/48. There is the Special
Hobby one and the Warrior Models Roc both of which come in decals L3114 ‘E’of
759 squadron. This review concerns the Warrior Models Roc which is a multi media
resin kit. The tan colored resin Roc appears to be developed from their e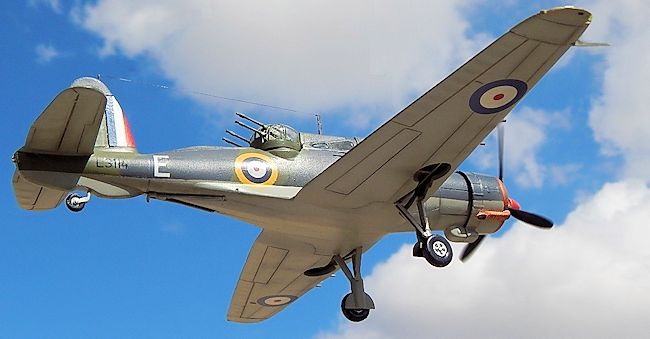 arlier
release kit of the Skua. The resin
appears generally free from pores, having smooth finish and has good surface
detail. Paintwork however did reveal small clusters of pores at two areas over
the wings. The kit contains very clear vac formed cockpit and turret canopies
which also include a spare set; there are two pairs of short metal tube wing
guns; and white metal browning guns for the Boulton Paul turret;
tail and main wheels complete with legs that contain detail; wing aerial
and dorsal antenna mast; cockpit aiming site; arrestor hook and a huge three
bladed propeller. The rest of the kit parts are in resin.
The kit comes with a decal sheet for Roc L-3114 which appeared to be of good
quality with correct colors and register. More on decal later. There is ample of
intricate detail to go inside the cockpit which include side panels complete
with ample of side instruments and gadgets, there is a compass, detailed control
column and rear side tanks, central fuel tank that fit at the rear of cockpit
bulkhead, and an aiming site. Other resin parts cater for the B P turret. No
crew figures are provided but I normally add one which gives indication of scale
of the aircraft and also the kit can be pictured in flying configuration. I
managed to dig out the type of figure for the Roc out of my spares box.
| CONSTRUCTION |
The instructions depict every single kit part and place where it goes on the kit
however, careful planning and dry assembly is encouraged as this will show where
and which part needs cleaning or minor adjustment to ensure perfect fit. In
doing so one will estimate the amount of excess resin that needs to be removed
off the riser block area. To preserve the surface fine engraving I also masked
areas close to where there was to be filling up with small amount of filler
followed by subsequent smooth
sanding. The cockpit floor and central
 ‘A’
bulkhead required to remove 1/16” from width in order to allow fuselage halves
to close.
I found that the fuselage section was thick enough to allow scraping off resin
on the inside so that the rear cockpit bulkhead could fit inside as well as
fitting the Boulton Paul lower turret inside the fuselage. One simply requires a
good pointed exacto blade to scrape away excessive resin as required.
Beng a resin kit the mating parts have no locating pins or dowels and
there has to be some form of guides when fixing the parts together as
cyanoacrylate glue do not give a second chance to relocate the parts if
incorrectly mated. I have added plastic tabs on the inside of the fuselage that
self aligned the halves when glueing together.
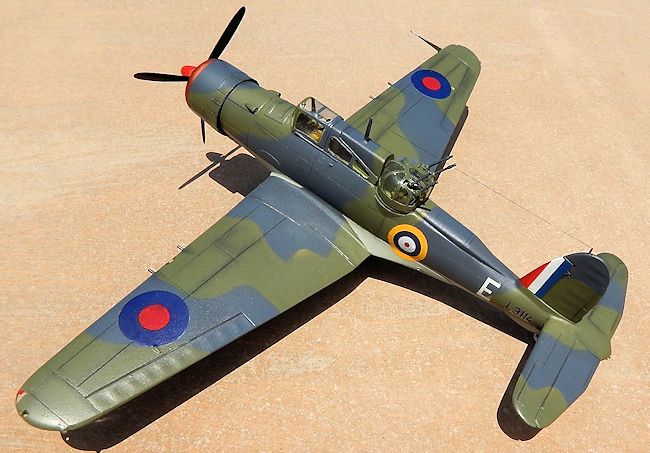
Before closing the fuselage halves, the cockpit office and detail parts inside
are assembled. The rear top decking was also fixed in lowered position so that
the rotating turret could have nothing in its view when sighted towards the
rear. The lower part of the turret was also inserted before the fuselage was
closed. The turret clear part had two slot openings cut an exacto saw. These
slots allowed correct fitting of the guns and the slots were long enough to
allow gun vertical travel. The metal guns appeared to contain good surface
detail when closely examined. I have made the gun arrangement to swivel by
adding a metal pivot in form of a tube which fits to the side gun gears and a
hole drilled inside the gun fitting block so that the tube is free ti rotate
inside allowing the guns to be swung at a different angle. This appeared to be
beneficial when placing the clear gun turret piece as the guns could be rotated
almost vertically allowing easy insertion through the open ports. A pilot crew
figure was added inside the cockpit
from spares box. This was painted in FAA drab gear.
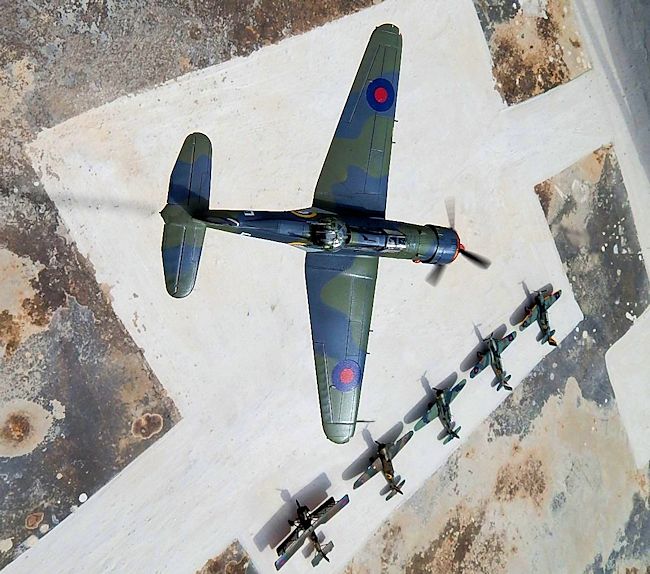 Coming to
the wing parts there was absence of wheel well detail and this is where I added
internal wing spars that could be viewed from the well apertures. These were
made from narrow strips of plastic card that are stuck running parallel along
the length of the wings. The wings come in four parts, requiring little cleaning
at the periphery. On one wing part it was 1/8” shorter at the root and this was
corrected by inserting a piece of plastic strip.
The engine cowling and gills were fixed together
and attached to the fuselage
front. The radial engine was then slid inside the cowling half round core print
followed by the cowling front ring
fixed in place. The long exhaust pipe was then fixed to the lower starboard side
of the cowling. Three pieces of metal wire in the shape of a triangle were added
detail to the front of radial engine inside the cowling.
| COLORS & MARKINGS |
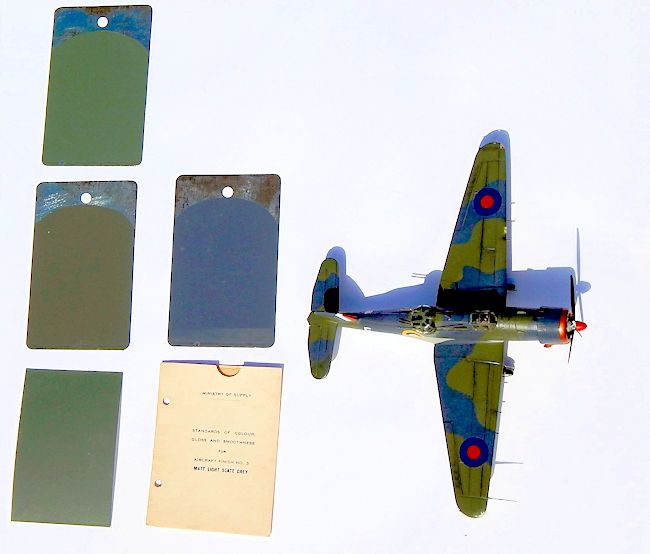 All interiors were cockpit green, the radial engine was mainly silver with light
grey central caps. Model was airbrushed in extra dark sea grey and dark slate
grey on all upper surfaces while lower surfaces were sky grey. I have noticed
through experience that the dark, and the light slate grey in particular had
many shade variations. This causes a dilemma among modelers in shade variations
arising from weathering conditions. Fortunately I happened to have samples
acquired from ‘Ministry of Supply’ for the standard colours, gloss and
smoothness. These are FS595a equivalents for the Fleet Air Arm. The dark slate
grey is FS34096 and the extra dark sea grey is FS36099. The underside sky grey
is FS36463. I have used fresh tins of Compucolor paints which ran smooth during
airbrushing in spite that they were bought 30 years ago. Accompanying photo
shows true standard samples and the variation
of slate grey variety between one supplier
to the British ministry and another. This is not taking consideration on
how the slate green in particular could fade in the extreme hot weather in the
Mediterranean where many of FAA aircraft also operated.
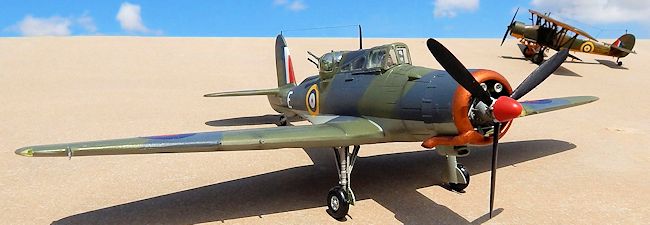 Model was
given a coat of Klear and the decals were applied on the model. As for the
decals I could only use the seral number and letter ‘E’ from the kit decal and
also the fuselage roundel but the wing roundels were grossly oversize. I used
replacement roundels from my spare decal
box. Finally the model was given an overall coat of semi gloss Model
Master lacquer. The cowling ring and exhaust pipe were in bronze color giving
the burnt metal texture mixed with other shades of brown.
| CONCLUSIONS |
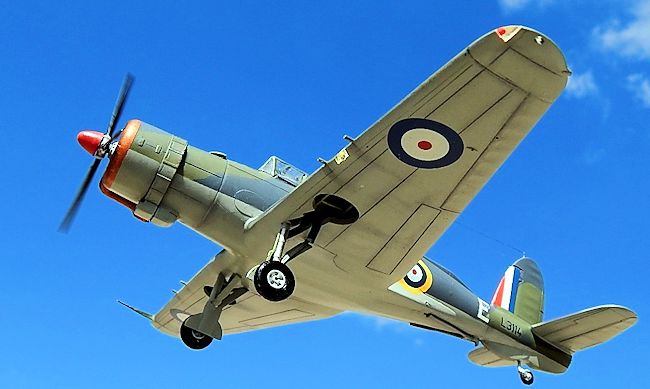 The kit is
accurate and should appeal to those keen on FAA aircraft types. It was fun
building this Roc in spite that the type lacked popularity due to its poor
performance during the war and utilized on training duties during most of the
war years. It is a resin model and required some skill in putting it together
and therefore recommended to experienced modelers.
June 2014
Thanks to Brian Watkins of N J for the kit.
If you would like your product reviewed fairly and fairly quickly, please contact the editor or see other details in the Note to Contributors.