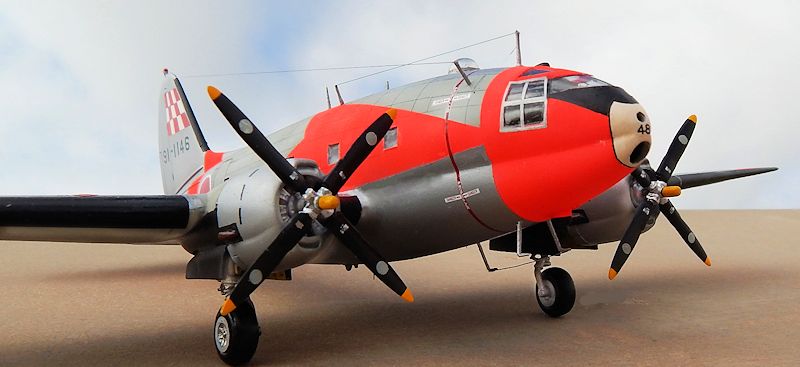
| KIT #: | 72346 |
| PRICE: | $46.00 |
| DECALS: | Four options |
| REVIEWER: | Carmel J. Attard |
| NOTES: |

| HISTORY |
On 26th March 1940 Curtiss Wright
flew the prototype of a 36-seat commercial airliner which had the Company
designation CW-20. Its large capacity fuselage aroused the US Army interest in
the type for cargo/transport and casualty evacuation. A militarised version with
2,000 hp Pratt and Whitney R-2800-43 engines was ordered into production under
the designation C-46 and named Commando.
 The C-46A,
which followed, had a large cargo door on the port side of the rear fuselage, a
strengthened cargo floor, and folding seats for 40 troops. Pratt and Whitney
R-2800-51 engines of equivalent power replaced the R-2800-43 of the C-46s, there
having performance at altitude. This proved of great importance and the C-46A
‘humping’ vital supplies over the Himalayas to China from India after the loss
of the ‘Burma Road’ were found to have better performance than the C-47 at
altitudes involved. They made a vital contribution to the success of the airlift
of essential war materials into China. The crew who manned cargo flights were
the unsung heroes who kept the essential war and logistic supplies reaching the
war zones in the right moment and played an important part for the positive
outcome of the war in Asia.
| THE KIT |

The kit is packed in a robust box having a
cover art depicting a C-46 flying over clouds and a coastline. It carries WWII
style US star and bars and the black numbers 2968093 positioned on tail fin.
Otherwise it is overall bare metal apart from the black de-icing boots to
leading edges and tail fin. Decals
also includ
| CONSTRUCTION |
 interior
seats with crew figures added, instrument panel, control wheels these were
barely visible through the otherwise clear canopy that was also treated with
Klear before fitting in place.
The spacious wheel wells were almost bare and
adding structural webbing from strips of plastic card made a difference. The
only areas that required a little filler were the wing roots and around the
cockpit canopy. For the Japanese aircraft I had to drill a round opening to take
the top astrodome that I also molded from clear acetate.
With the model now in one
piece, I gave the
model an overall coat of light gray, which also revealed a few surface marks
that required a little filler and the necessary sanding, and polish and all was
done. Careful study of photos of the type revealed exact position of a number of
aerials and antennas all around the forward fuselage. Engine exhausts were
drilled at their ends and cowling flaps were carefully marked and scribed.
Realizing how heavy the kit was I went for a set of SAC robust metal legs that
replaced the kit plastic ones. This was beneficial in view that the continual
handling of the model in subsequent elaborate masking could easily have snapped
if the kit plastic ones were used.
| COLORS & MARKINGS |
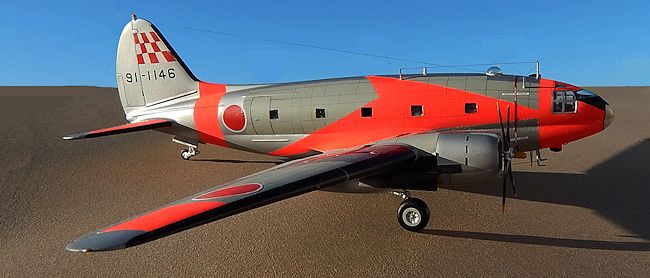
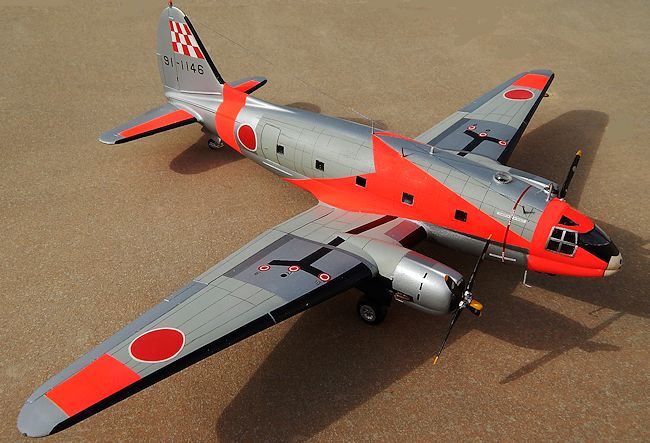 white, the
arrow was marked with a paper arrow pattern at each side of fuselage and proper
Tamiya masking tape marked the outline. Having completed the airbrush work on
the day-glow areas the model was allowed to stand for a couple of days.
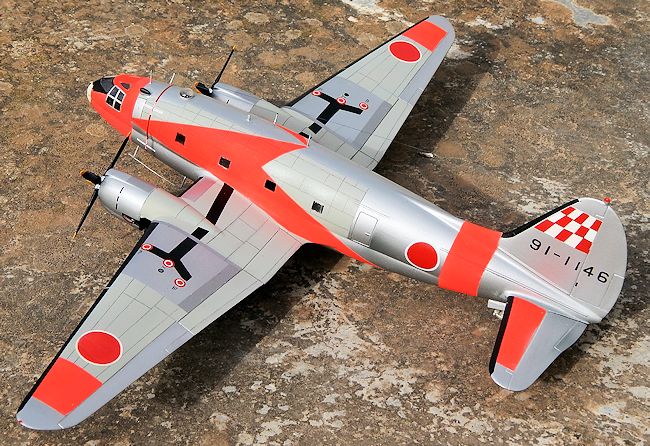
For the large Japanese insignias I used rubber
and insertion washers as blanks to provide the red centre when these were placed
on white decal sheet. Thus I was able to
produce three double sets of different size for all that was required. The tail
decal motif of red and white chequers was also designed and hand painted.
The complex areas around the engines were
airbrushed black. Wheel wells were zinc chromate. All areas painted so far were
now masked and a coat of light gray applied. This was again allowed time to set.
Following that the gray areas masked and the final silver mix air brushed. One
can only imagine how time consuming the delicate masking was to be.
| CONCLUSIONS |
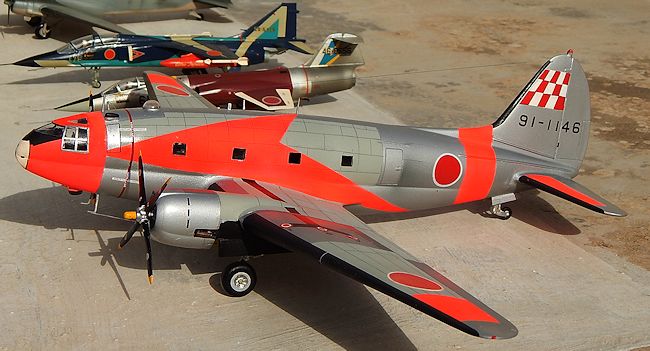
A long painting process on a rare type, which
I think was worthwhile as the final result turned out into a pleasing model.
Looking hindsight I could have made a C-46 ECM with additional nose and ventral
and dorsal radomes but there it was less colourful. A C-46D in same livery now
stands as a plane guard at the Hamamatsu Air Base, Japan.
January 2015 If you would like your product reviewed fairly and
fairly quickly, please
contact
the editor or see other details in the
Note to
Contributors.