Tamiya 1/48 P-47D Razorback
|
|
61086 |
|
PRICE: |
$
48.00 MSRP – about $ 36.00 Retail |
|
DECALS: |
Aero Master SP11 & SP13 P-47’s of the 405th F.G. |
|
REVIEWER: |
|
|
NOTES: |
A kit build or a decal review |

|
HISTORY |
 When
fully loaded, the P-47 weighed up to eight tons. The P-47, based on the powerful
Pratt & Whitney R-2800 Double Wasp engine, was very effective in high-altitude
air-to-air combat and proved especially adept at ground attack.
The P-47 was one of the main United States Army Air Forces (USAAF) fighters of World War II, and served with other Allied air forces such as France, the UK and the USSR. Mexican and Brazilian squadrons fighting alongside the U.S. were equipped with the P-47.
The sturdy and rugged aircraft was designed by expatriate Russians
Alexander de Seversky and Alexander Kartveli. The armored cockpit was roomy
inside, comfortable for the pilot, and offered good visibility. A modern-day
U.S. ground attack aircraft, the Fairchild Republic A-10 Thunderbolt II, takes
its name from the P-47.
|
THE
|
For a
look at what's in the box,
see the preview.
The
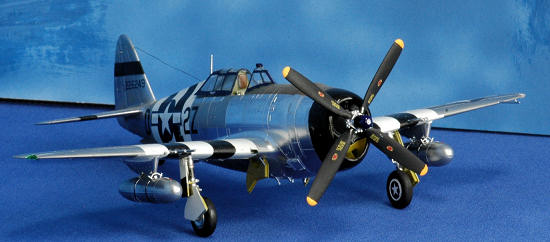
Tamiya P-47 1/48th scale series of Razorback and bubbletop’s are one
of those kits that makes every modeler feel their skill level is improving. The
final result is always something to be proud of. The model is so pleasant to
build that after I built the first one I followed up with a ten aircraft
project. The biggest problem you will have with the Tamiya P-47 is deciding on
which colorful
 decal and
painting combination, O.D. or NMF to use. There are plenty of aftermarket decal
choices and lots of resin if you feel the need for even greater detailing.
The
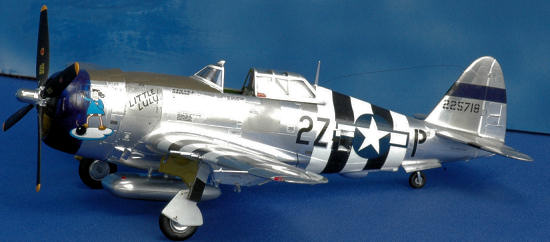
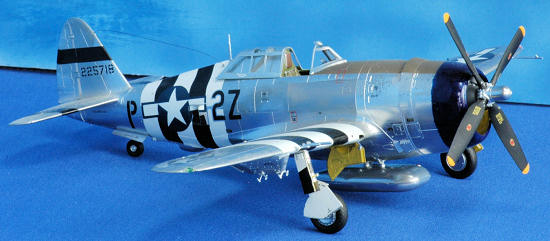
real focus of this build is the decal sheet, or should I say book because I used
decals from the AeroMaster special release “SP” series, # 48-11 and 48-13 for
the markings. These represented colorful aircraft from the 405th F.G.
and research from Norris Graser who is a Jug-A-Holic.
The release featured an 8 ½
by 11 inch illustrated booklet, tables for modeler concerns like which prop to
use, featured Cartograph for decal printing and the booklet used color printing.
This was rare in the June 1999 and January 2000 time frame when they were
released. I remember lamenting how the price of modeling was now exponentially
increasing but did I ever enjoy the decals. I paid about $15.00 for each release
and considering there were about four full sized decal sheets included it was a
bargain! The AeroMaster sheet was released before the Tamiya kit was issued (in
2002). They noted the Hasegawa P-47 Razorback was the best in scale (in 1999),
except for a lack of depth in the fuselage. This flaw was fixed by Tamiya. While
the Hasegawa kit is nice, the Tamiya is superb.
|
CONSTRUCTION |
It
is a very simple kit to build. Just follow the instructions. Hey, it's a Tamiya
kit. As Tom Cleaver once said:
“Unless you are too illiterate to read the instructions, and too ham-fisted to
touch the parts without breaking them, it is impossible for you to not "get it
 right" by
following the instructions.”
Paint all the interior parts for the cockpit and the engine area, wheel wells,
etc., and set those aside to dry for a day. The cockpit is so good you may not
need a resin replacement. I added an Eduard color zoom set for the seat belts
and other nice bits. The next day start your cutting and gluing and detail
painting.
If
you follow the instructions you will have the kit assembled in about 2 hours of
enjoyable work. There are no problems to worry about like gaps or seam filling.
The production design of the kit is as
good as the Corsair and the other Tamiya
releases - what more needs be said?
I left on the flaps and landing gear for ease of painting. There are
wonderful extra color painting notes for each color scheme detailed in the
AeroMaster instructions. I found this to add a great deal to the satisfaction of
the build.
|
COLORS & MARKINGS |
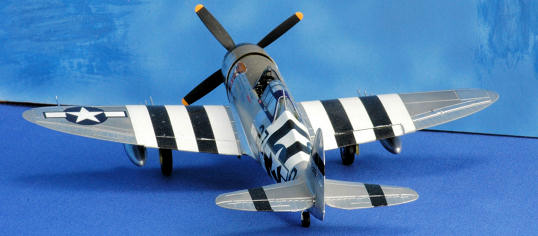
 I used
SNJ enamel metallic’s in a variety of shades. It was painful to cover over most
of the wings on the NMF aircraft because the finish turned out to be flawless. I
started with a shiny aluminum then added other aluminum shades using post-em
notes to isolate individual panels. The markings went on flawlessly. They were
printed by Cartograph and are perfect in register. If Cartograph could use the
paints that Microscale uses they would be exceptional. Cartograph produces a
very thin, perfectly printed decal but they easily tear. I like Microsoft
printed decals because they are not as brittle and take movement or placement in
stride. The only detraction in Microsoft printing is the stencils are incomplete
or not as clearly printed as Cartograph’s. It appears Microsoft decals are silk
screen printed and perhaps the resolution is limited. Cartograph may be using a
direct offset printing method to obtain the improved resolution.
|
FINAL CONSTRUCTION |
I
attached the wheels, pitot, gun tubes and used some Tamiya weathering master
drybrush effect. A bit of touchup on areas where the paint went under the
masking tape and that was it. Yes, you can mask SNJ metallics!
|
CONCLUSIONS |
I
really enjoyed this build. I still have a goal of at least ten Tamiya P-47
Razorbacks. I have several Hasegawa, Monogram, and Otaki/Arii Razorbacks in the
stash. The Tamiya is the best overall. Was it a Tamiya kit build or an
AeroMaster Special decal release review?
|
REFERENCES |
P-47 Thunderbolt by Warren
M. Bodie 1994
P-47 Thunderbolt Vol. I to
IV Kagero Books
P-47 Thunderbolt In Action #
1018, 1067 & 1208 Squadron Signal Books
P-47 T-Bolt In Detail &
Scale Vol. 54# SS8254
Squadron Signal Books
Republic P-47 Thunderbolt
'Bubbletop' # 6128 Mushroom Model Books
P-47 Thunderbolt Aero Detail
#14 Model Graphix Aero Detail Books
P-47 Thunderbolt Warpaint
Special #1
P-47 Thunderbolt
International Air Power Review Vol. 1 2001
October 2011
Copyright ModelingMadness.com. All rights reserved. No reproduction in part or in whole without express permission.
If you would like your product reviewed fairly and fairly quickly, please contact the editor or see other details in the Note to Contributors.