| KIT #: | ? |
| PRICE: | $ |
| DECALS: | Two options |
| REVIEWER: | Michael Rohde |
| NOTES: |

| HISTORY |
In 1932 Grumman began the development of a new utility amphibian which would combine the better features of the successful Grumman FF-1 Navy fighter and the Loening OL a amphibian utility aircraft , which was in Navy ( and US Army )service for about 10 years already.
 Later that year Grumman
submitted its proposal for review by the US Navy. This resulted in the award of
a contract for the supply of one XJF-1 prototype.
This aircraft flew for the first time on 4th
May 1933. Flight testing found no serious
problems., and an evaluation by the US Navy resulted in the initial production
order for 27 JF-1's, the first of these being delivered in late 1934.
The JF-1's were intended to fulfil a general utility role and the type replaced the aeging Loening OL-9 observation and general purpose aircraft in service with the US Navy, and it was not until 1936 that the JF-1's began to reach VJ squadrons. The Grumman JF-1's performance by comparison with the Loenings was quite staggering indeed. Maximum speed, rate of climb and service ceiling all increased by 40 %, 50% and 65% respectively.
The design featured significant aerodynamic improvements. The single bay biplane wings were of equal span, the basic structure of light alloy and fabric covered. Frise type ailerons on both upper and lower wings provided good roll control. The fuselage was a conventional stressed skin / light alloy structure with the large moncoque central float built integrally. The landing gear was attached to , and retracted into, recesses in this float structure. Stabilizer floats were strut mounted beneath each lower wing. A crew of two or three could be carried in the tandem cockpits.
The power plant of the
prototype and the first batch of JF-1 production aircraft consisted of a 700 hp
Pratt & Whitney R-1830 Twin Wasp radial engine. The contract which followed was
for 14 JF-2 's for the US Coast Guard, these having equ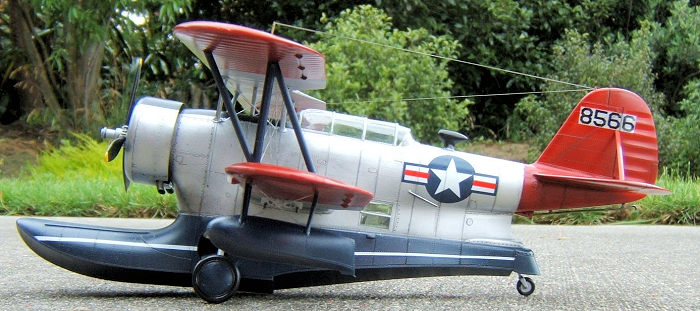 ipment changes and 750 hp
Wright R 1820 Cyclone radial engines. Four of these were subsequently
transferred to the US Navy and five more were aquired under the designation
JF-3.
The basic design was such that there were few major changes in later production examples( ie the JF-3 and JF-4) and nine JF-2's operated by the US Marines were equipped with machine guns and carried underwing bomb racks. The last version to be built was ordered in 1940 and comprised 144 J2F-5's which were to carry the official name 'Duck'. Generally similar to previous utility models, they were powered by the 850 hp Wright R 1820-50 engine. Most Grumman 'Ducks' remained in service throughout WW 2, operated both from carriers and land bases in a variety of roles , including patrol, photo survey, AS rescue and target towing.
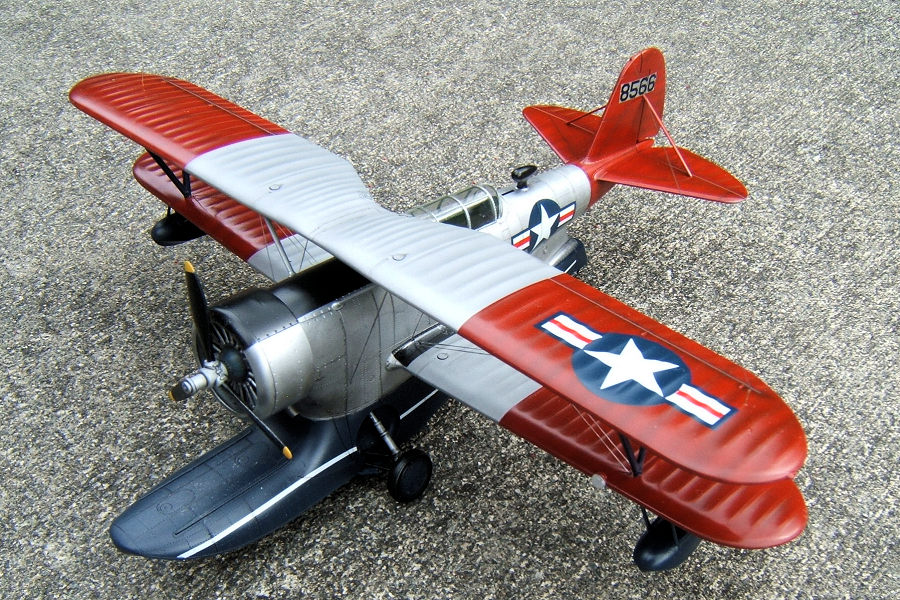
The OA-12 ( the model depicted in this article). In 1942 a single Navy Grumman Duck entered Army Air Force service under the designation OA 12, serving mostly in the North Atlantic, stationed at Newfoundland and Fort McAndrews, Nova Scotia. Later OA-12's were drawn from surplus US Navy stocks and overhauled at Warner Robins AMC, Georgia, for Arctic operations. Five OA-12's ( serial numbers 48-563 to 567) were assigned to the 10th Air Rescue Squadron as part of the Alaskan Air Command. These aircraft operated from Elmendorf AFB in Anchorage and at Ladd AFB in Fairbanks from 1948 well into the 1950's.
| THE KIT |
 The Merit J2F-5 Kit comes
in a sturdy box containing 5 sprues of light grey plastic parts ( 80 in total)
and on clear sprue with a on piece canopy and two windows. The clarity of these
parts is excellent.
Cockpit details are quite simple ( esp the radio equipment) but with the one piece canopy in place this does not matter too much. Surface detail in general is quite nice. The overall fit of the parts is very good and no problems during assembly. The main wheels are not correct . These are a bit 'thin' compared to what we can see on period photos. No diagram is provided for the rigging of the aircraft and there are no provisions for the attachment points either. The modeller has to look at photo walk arounds to establish these during the build.
The instructions are easy to follow and broken down into 10 stages. The decal sheet offers two versions : Argentinian Naval Aviation Observation Squadron and Fleet Air Photographic Unit Atlantic Three. An extra sheet in colour print is provided as a guide for painting and decalling the model.
| CONSTRUCTION |
This rather uncomplicated kit was started following the instructions to prepare and assemble the cockpit. Using Tamiya XF 71 (JN cockpit green) for the entire interior except the instrument panel and radio equipment ( which was painted black) details were dry brushed and weathered with Tamiya flat Aluminium and Tamiya panel line accent colour black and brown.
Step 2 brings us to the engine and the propeller:The engine consists of 7 parts. I dryfitted all the components to make sure that the parts aligned nicely. Must say that the fit was really good and needed virtually no adjustment. The engine crank case and reduction gear dome was painted a with Tamiya medium blue toned down with a bit of flat black. Cylinders got a coat of gun metal and the cylinder heads were painted in flat aluminium.( as were the push rod tubes) The ignition leads are moulded onto the cylinders and were painted black. Carburettor intake tubes were painted with flat aluminium and the exhaust system was painted black and got a good dusting of red brown pastel to create the effect of surface rust.The engine was weathered using AK engine wash and some dry brushing.
 The propeller blades were
painted black with yellow tips and the hub in flat aluminium using accent panel
liner to bring out the details. Propeller leading edges were dry brushed with
Tamiya chrom silver to create the effect of worn blades. The complete assembly
fitted nicely into the cowl ring with a good press fit and did not even need
glue to stay in place. I forgot to mention that a small modification to the cowl
ring was to insert a small fillet into the cutout for the carburettor intake on
the upper cowl. The OA -12 did not have this feature.
Step 3 and 4 on the instructions brings us to the assembly of the landing gear. As per plan one is supposed to install the complete landing gear into the wheel wells before the fuselage is closed up. I thought I skip this step and install the landing gear at a later stage.
In step 5 I carried on with inserting the cockpit ,the side windows and moved to closing the fuselage. The fit of both shells was excellent. The seams needed only minute amounts of filler to clean up. The lower wings and the horizontal tail plane followed suit( steps 6,7,8, 9) and – again – no issues there. At this point I took great care to test fit and glue into place the N struts and cabanes to the upper wing. Small adjustments were required to ensure easy insertion of the struts into their respective recesses. That also applied to the recesses in the lower wing.
When that was done I dry fitted the upper wing assembly and checked the alignment of upper and lower wing and the contact areas of the cabane struts where these touch the fuselage. The fact that the N struts were seating into their positions with a mild press fit , made the test fit rather easy . The cabanes had good contact to the fuselage and minute adjustments made sure that any gaps were minimized. At this point I drilled all the holes for the rigging wires. That done I dry fitted the one piece canopy and glued it into place.
Step 10 : The stabilizer floats and bomb racks went together easy. These parts were all painted before attaching these to the lower wing.
| COLORS & MARKINGS |
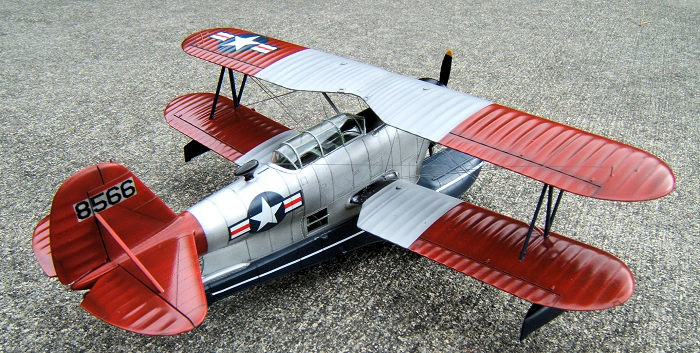
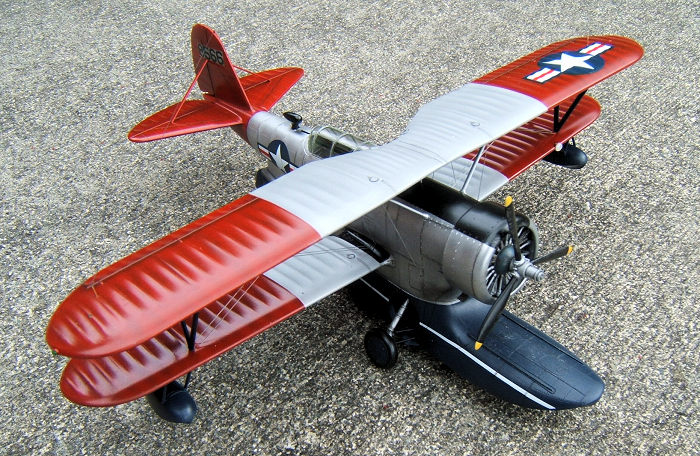
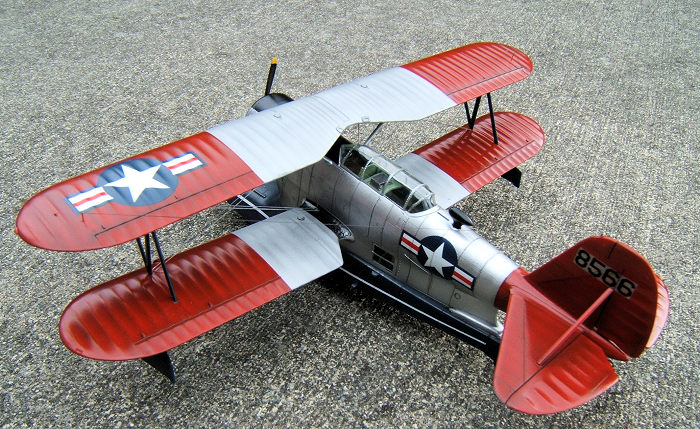
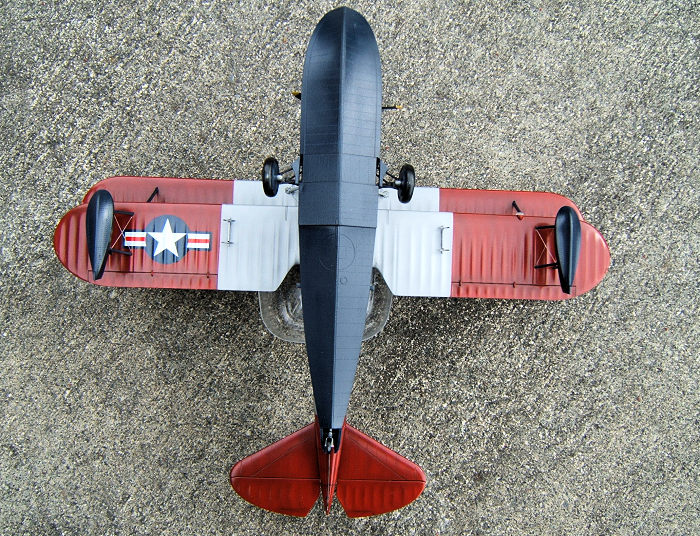
After masking off the clear parts I started with pre shading all the bits and moved on to painting the floats and all the struts in Tamiya dark sea blue and left to dry. Then I masked the center float, the wings and the struts and air brushed Tamiya red onto the tail plane , fin and the outer wings. This was followed by masking off the red painted areas and airbrushing of the inner wing portions with Tamiya flat aluminium.
After the paint had dried
and,while the upper wing was still separate ,I started to do what I call 'pre
rigging'. This meaning that I attached all the rigging wires to the upper wing
only. By doing that at it will be much easier
 to do the rest after the upper
wing is glued into place. There are rigging wires on the stabilizer floats as
well and I did the same 'pre rigging 'procedure.. After the floats were glued to
the lower wing, it was a piece of cake to connect these wires to their
attachment points on the wing surface.
The anti glare black on the upper fuselage and cowling was painted and masked off before I moved on to paint the rest of the fuselage and cowl with AK extreme metal polished aluminium. The landing gear units , tail wheel and the landing hook were installed after painting the fuselage.
This whole process of masking, painting and rigging process stretched out over a couple of days and after removing a good handful of masking tape ( except for the clear parts) the model received an final coat of Tamiya gloss clear as a base for the decals . The complete upper wing assembly was glued into place with Ca glue and all the rigging wires were attached to the lower wing and fuselage with the help of tini drops of CA glue. I made myself a small applicator out of stretched sprue to control the amount of glue applied into the holes.
Obviously I did not use the kit decals, but utilized decals out of my decals collection and applied the marking for a OA-12 A (serial no 48566) of the 10th Rescue Squadron., Alaska Air Command. A photo of this particular aircraft can be found on page 44 in Squadron /Signal Publications booklet Mini No 7 in action Grumman JF Duck.
| CONCLUSIONS |
Highly recommended to all you modellers out there who like amphibian aircraft. The Merit kit is easy to build and also less experienced modellers would be able to create a nice result.
4 February 2019
Copyright ModelingMadness.com. If you would like your product reviewed fairly and fairly quickly, please
contact
the editor or see other details in the
Note to
Contributors. Back to the Main Page
Back to the Review
Index Page
Back to the Previews Index Page