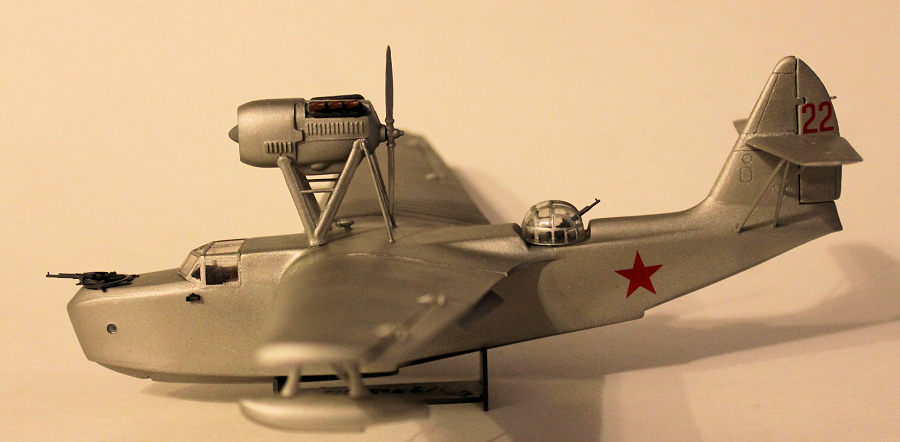
Avia 1/72 Beriev MBR-2
| KIT #: | 72001 |
| PRICE: | $20.00 or so |
| DECALS: | 14 options |
| REVIEWER: | Brian Baker |
| NOTES: | Probably first issue from Model Group Dnieper just after 2000. |

| HISTORY |
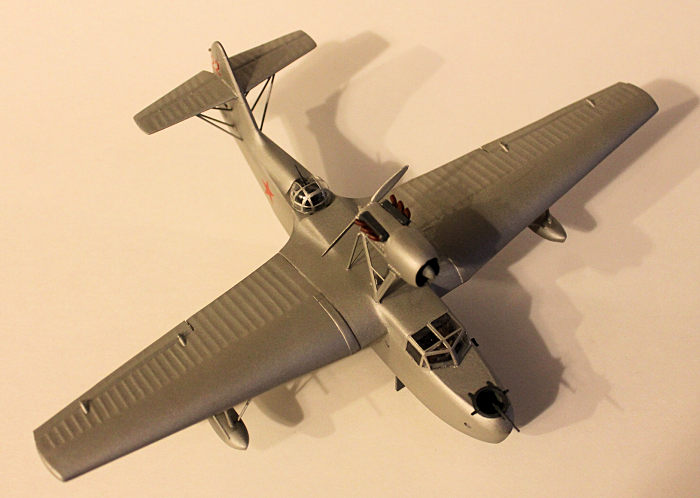 An early flying boat reconnaissance plane
designed by G. M. Beriev, the first prototype flew in 1931. Although the
wings were all metal, the fuselage and other components were wood, and the
engine, on the early MBR-1’s, was a 680 hp. M-17 twelve cylinder liquid
cooled unit mounted above the fuselage center section, with a pusher
propeller
. The MBR-2 had larger fuel tanks, and the MBR-2bis had an 850 hp. M34 powerplant and was armed with two 7.7 mm. machine guns in bow and dorsal positions, and racks for bombs or depth charges underneath the wings. Over 1,500 were produced, production ending in 1942, and the type was used by the Soviet Navy for a variety of missions. In addition, a small number of light transport versions were produced, designated MP-1. Some were equipped with wheeled landing gear for specialized uses, and a few survived the war for postwar service. In addition to Soviet service, the type was flown by the North Koreans, and captured examples were used by Finland.
There is not a lot of information available on this aircraft, although some appears on line. And there is a small section in William Green’s War Planes of the Second World War, Flying Boats, Volume Five, giving a basic background and description of the airplane.
| THE KIT |
 The kit consists of seven grey-brown sprues of
styrene plastic, and one clear sprue. The main sprue contains the fuselage
with a float bottom, two side, and one wing panel. The second sprue has the
other three wing sections and three fuselage top sections, including the bow
section, main wing attachment, and rear fuselage top. The other, smaller,
sprues include the engine, struts for the engine and floats, tail units,
wheel attachments, and landing gear struts. The clear sprue has the pilot’s
cockpit glass and dorsal gun turret. There are small round pieces of plastic
for the circular windows in the fuselage sides, but I just dabbed in some
Krystal Clear, which did the same job and was a lot less work. The decals
provide enough markings for all of the aircraft shown in the color guide.
This kit has also appeared under the name Eastern Express, but the reviews I have seen on line look like the same kit. It may have been issued in 2000. My Avia kit was built in 2004. The instructions come printed on three standard typewriter sized sheets which are not numbered, but which must have been intended to have been stacked three deep. The first sheet, consisting of four sections, includes a historical account of the aircraft’s career, several period photos, a sprue diagram showing all seven sprues with identification numbers, a color guide, and a repeat historical account in Russian. The second sheet shows the basic fuselage assembly, wing assembly, and the detail assembly of the fuselage. The third sheet gives color information for no less that fourteen different color schemes possible for this kit, showing decal placement and an explanation of the colors required. There are captions in English and Russian, and some kind of short explanation of something relating to the airplane in Russian and English, relating to the design of the airplane 65 years ago, but its exact meaning is unclear to me.
| CONSTRUCTION |
When starting to assemble a kit of this type, I
usually paint the interior and detail parts first. The instructions for interior
painting and rather unclear, and appear to show nearly all of the inside parts
painted a rust color. Why a wooden airplane would have a rusty interior is a
mystery to me, and since after
 the canopy and turret are installed, you can’t
see much of the interior anyway, I decided on a medium sea grey color, which
made more sense to me. There are two seats in the cockpit, along what goes as an
instrument panel, and a control wheel assembly, all of which are mounted to the
cockpit floor. The forward gun position in the nose also has a floor, as well as
a gun mount and machine gun, while the rear turret has a gun ring and a single
machine gun facing the rear. Once these parts are assembled, it is time to
attach the wing. The main fuselage, being wood, is perfectly smooth. There is no
problem with seams, and it all goes together easily. The wing assembly,
illustrated in step VIII, goes together smoothly. The upper and lower wing
sections are joined, after which the ailerons and flaps can be attached. I left
the flaps down on my model, although most of the photos of the airplane on the
ground or water show them retracted. There is some rather heavy fabric detailing
on the wing surfaces, but I wasn’t too concerned about that. There is some
interior detail on the upper sides of the flaps, so they look kind of neat in
the lowered position. As a matter of fact, however, next t
 ime you are near an
airport, look at the airplanes on the ramp, and you will probably notice that
the flaps are retracted on nearly all of them. That’s the first thing they tell
you to do after landing, “Retract the Flaps!”. Nuff said.
After the wing center section is attached to the outer wing panels, the whole thing can be attached to the fuselage. There will be a slight amount of filler needed to fill in the joints in the upper fuselage, but this wasn’t a problem.
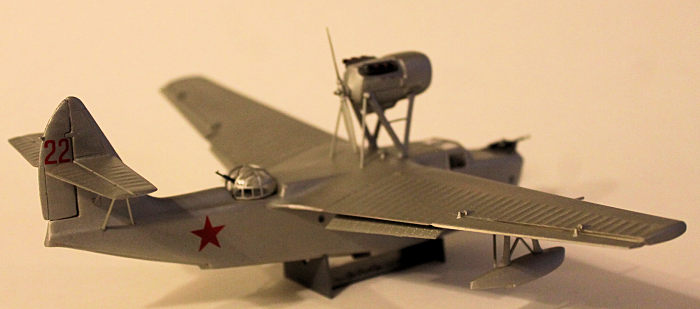
The tail unit, shown in Assembly Drawing III, is a snap to assemble. Again, no seam problem, and everything is very easy to line up. The engine consists of about 8 parts, and is nicely detailed. The exhaust stacks are especially nice, and the prop looks very good also. This unit is attached to the wing center section with a set of struts, but these, again, are well designed, and should present even an inexperienced modeler with little problem.
| COLORS & MARKINGS |
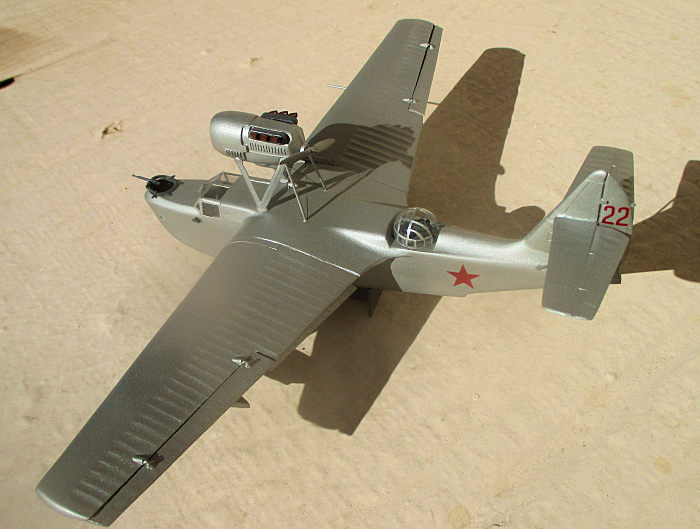
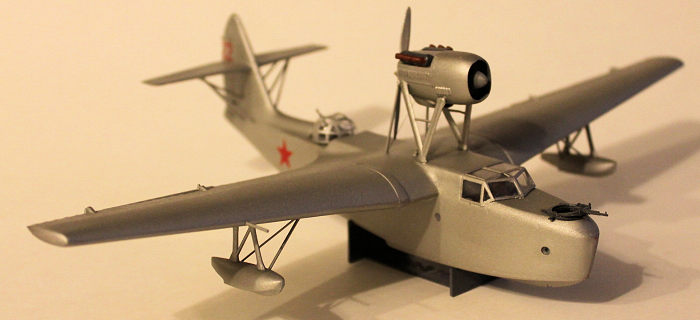 I decided to paint my model overall aluminum, as “Red
22” , operating with the Black Sea Fleet, during 1941. I therefore could attach
just about everything, except the engine exhaust system and machine gun rings,
before painting. I mashed off the turret and cockpit canopy, and put my old
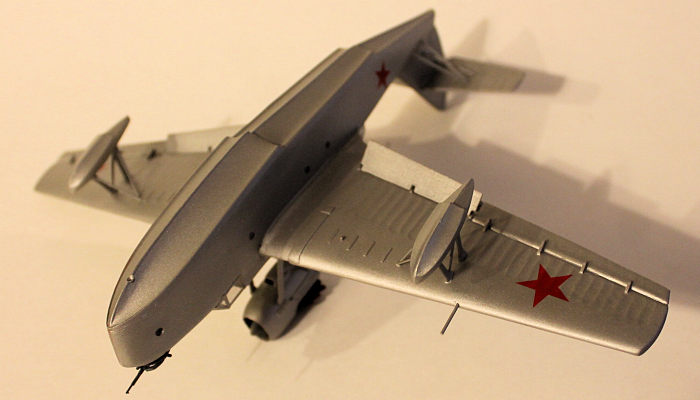
Pasche to work. After painting, I put on the decals, including the red stars
under the wings and on the fuselage sides, and the red “22” on the rudder. For
whatever reason, not many Soviet military aircraft had red stars on the upper
wing surfaces. I then attached the engine exhausts, I decided to just mount the
airplane on the mount provided in the kit rather than use the wheels provided.
There was no indication as to what kind of radio antenna was mounted on the
airplane, although I would assume that it must have had a radio. The photos just
don’t show it.
| CONCLUSIONS |
This is a very nice little kit of a little known but important Russian airplane. This is one that belongs in any collection of Russian World War II airplanes, and since there are so many alternative paint schemes, probably two or three would be more appropriate. I built my model just after it appeared on the market, in 2004, and I think it is still an impressive model. There are several versions of this kit mentioned on line, but I think they are pretty much all the same kit. It is certainly worth getting several of, especially as they aren’t all that expensive. Go for it! Highly recommended.
13 April 2020
Copyright ModelingMadness.com
Thanks to
for the review kit. You can find this one at your favorite hobby shop
or on-line retailer. If you would like your product reviewed fairly and fairly quickly, please
contact
the editor
or see other details in the
Note to
Contributors. Back to the Main Page
Back to the Review
Index Page
Back to the Previews Index Page