|
KIT: |
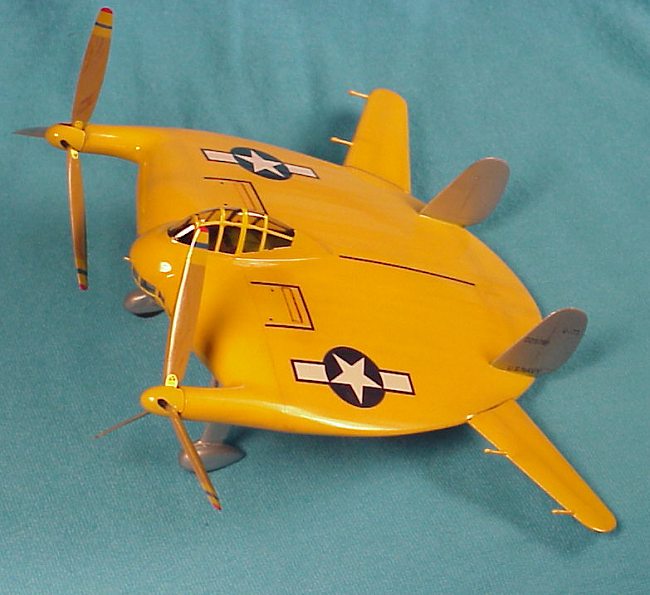
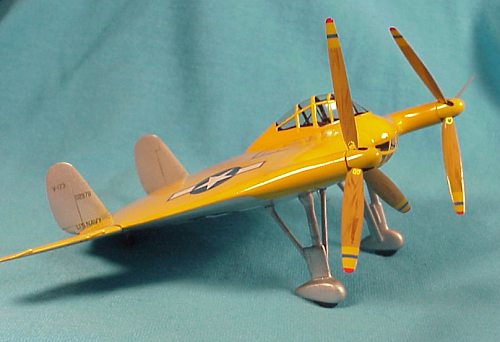
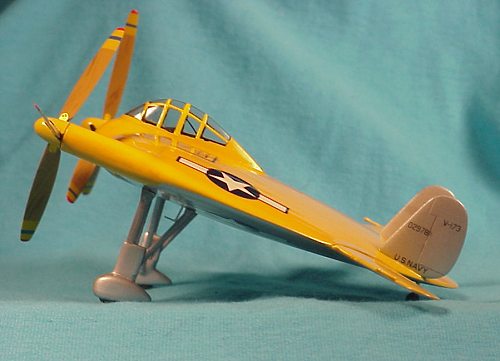
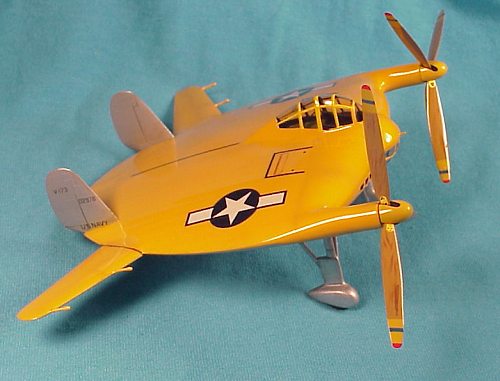
Sword 1/72 Vought V-173 |
|
KIT # |
720181 |
|
PRICE: |
$18.98 |
|
DECALS: |
One aircraft |
|
REVIEW & |
|
|
NOTES: |
Short run with resin parts and vac canopy |

|
HISTORY |
The brainchild of Charles H. Zimmerman, the F5U was intended to perform
well as a fighter plane while being able to remain in flight at extremely low
airspeed, making it easier to operate from carriers. The F5U's unusual
appearance owed to a very low aspect ratio wing without a fuselage, which
resulted in something looking like a flying saucer. This shape, combined with
powerful engines driving large propellers, could plow through the air at low
speed (40  mph!), since the
whole airframe is immersed in the prop wash. As a result, short takeoff and
landing (STOL) performance was possible. At the other end of the performance
envelope, the low aspect ratio and lack of fuselage would decrease drag,
maintaining a high maximum speed. Maneuverability at all speeds would be
improved by a small reduction in wing loading compared to conventional
fighters, combined with a more compact shape and prop wash going over all
control surfaces.
In 1941, Vought began building a low-power, full-scale demonstrator of wood and fabric construction, the V-173 (Bu. No. 02987), first flown on November 23, 1942, by Vought test pilot Boone T. Guyton. Other than test pilots Guyton and Richard Burroughs, the V-173 was also flown by Charles Lindbergh. In some 200 test flights, the V-173 proved Zimmerman right, having a low stall speed, relatively high maximum speed considering the powerplants, and being impossible to stall or put into a spin.
|
THE KIT |
It's a great day when something as esoteric as a one-off flying demonstrator gets made into an injection kit. But more and more odd balls are getting injected by smaller company's cause it just might sell, and just might be interesting enough to get people to stop building the same old kits. Haven't you thought when you go on line to click up your favorite web-zine ," Oh my god, not another _______ kit again". These odd ball kits are what keeps this recreational hobby alive. And the V-173 is an easy kit to build too!
Impressive is the polished plastic main pieces; the molding has improved greatly from Sword. Another indication of quality is the resin moldings; a very clever interior piece highlights the bag. Decals are in register and thin, with an option, sort-of, for two versions. Sort-of because one version is an early paint job and the other is the livery that was worn through-out it's test flying, although the earlier version cannot actually be modeled without major surgery to the landing gear.
|
CONSTRUCTION |
 First things first, the
resin cockpit needs a small bit of help to make it fit perfectly into the
fuselage, I suggest sanding the plastic fuselage top and bottom before cutting
down the resin piece. Once in place, it's best to put a piece of plastic behind
the series of air intakes in the leading edge to hide the see-through look. Both
top and bottom 'wing' come together perfectly matched, although my kit had some
warpage which needed some clamping while the glues set up. Some of you might
like to consider modeling the ailerons in a more natural position, this would be
easy to do. Place the rudders on and there you have it! The right side rudder as
well as the Ailerons is missing the prominent trim tabs, one might like to add
them for added realism.
For the most part this kit is very well executed and looks to follow all drawings I have on the subject. A bit on the design of the landing gear is perhaps the only area, which was not fully executed well. The spats on the gear allows us to only model the later version of the test vehicle which use the stars and bars decals, one would have to do a bit of scratch building to model the original roll out version.
All clear parts are vacuformed very nicely and they fit were they are supposed to! However, looking back at how mine was masked prior to painting it might have been better to use thin strips of painted decal material instead of fully masking. The thin strips would have been much easier to replicate than the tedious and trying masking.
|
PAINT & DECALS |
Once all painting was completed, decals applied and sealed with Future wax, a couple further coats of wax insured an overall glossy finish. I'm pretty pleased with the kit as it looks, but another example would certainly come out looking better. I think I'll try my hand on the newly re-released Hasagawa XF5U-1 to complete the set.
|
CONCLUSIONS |
This kit rates an 8 out of 10 for excitement, 7 for ease of assembly, and a 9 for a darn cool look! My hat is of to Sword for making this one-off proof of concept aircraft!

If you would like your product reviewed fairly and quickly by a site that has thousands of visits a day, please contact me or see other details in the Note to Contributors.