|
KIT: |
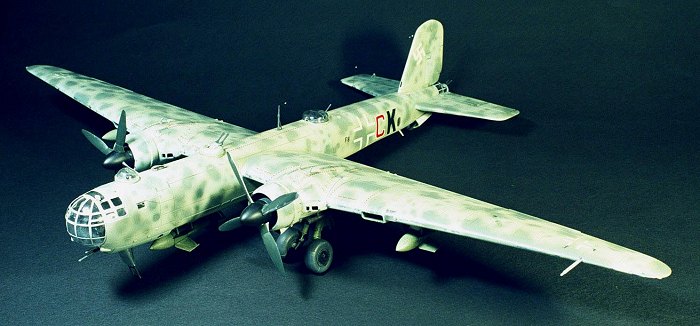
Revell of Germany 1/72 He-177A-5 |
|
KIT # |
4616 |
|
PRICE: |
$16.00 |
|
DECALS: |
Two aircraft |
|
REVIEW & |
Valentin E. Bueno |
|
NOTES: |
New tool 'Grief'. Toss the Airfix kit! |

|
STORY |
The continuing adventures of Ichabod Pung Min Siu:

Reality bites. This snowstorm is getting worse and if I don't find shelter soon, I'm going to be tall dark and frozen, nevermind ugly. With the wind driving the snow, I can't see very far ahead. All I know is that I'm heading uphill. Hopefully I can climb above the storm. Geez, it's colder than my mother-in-law's handshake. I wonder what Eckhardt is going to have for dinner?
I started out early this morning, hiking Mt. Pilatus in the Swiss Alps in search of the legendary Golden Greif rumored to have landed on a high plateau. The crew diverted the aircraft from its original destination, Argentina, into neutral Switzerland in hope of getting out of the war. On board the Greif were several million Marks worth of gold bullion (it's a bomber, it can handle the weight). They reportedly abandoned the plane intact after camouflaging it with some loose brush.
They got down from the mountain and lived among the German speaking population until they died of old age. Selling off the gold in small quantities and amassing a fortune, they bought the land the bomber had landed on. Over the years, they slowly built a hanger around the fallen Grief to help protect it and the gold. One particular crewmember, Erich Mächer, was a manic mechanic. He maintained the bomber in working condition, starting up the engines once in a while just to keep the parts lubed and the batteries charged.
The location of the hanger however was a secret known only to the bomber crew. Just before the last crewmember, Öberleutnant Gerry Zinefeld passed away, he divulged this secret to his grandson, Eckhardt (typical storyline so far, no?). Öberleutnant Zinefeld wanted his grandson to search for the fallen bomber and retrieve a locket his mother had given too him before the war. He wanted the locket buried with him, but before he revealed the location of the bomber, he was gone.
With his grandfather's last wish on his mind and as an avid model builder with the Revell 1/72 scale He 177 in his loft, Eckhardt contacted me and we decided to go look for this long lost Heinkel. I guess it pays to be independently wealthy. Thanks Armway (now you know this is a fantasy).
With a few words of advice on aircraft archeology from Don Hinton, I set off to Switzerland and met up with Eckhardt in Luzern. It seems the German crew had flown further south than I thought and had landed near Mt. Pilatus, just north of Luzern. Luzern itself is about 65 km south of Zurich. We would use the Pilatus-Ka Hotel at the top of Mt. Pilatus as a basecamp and explore the mountains from there. On the third day of our meandering about the mountains, Eckhardt fell and broke his foot, clumsy oaf. We had two more plateaus to explore and I decided to go out on my own. Today started off sunny and clear when this storm sudd-
PRANG!
Ouch, What'd I hit? I was concentrating on my footing and not really looking up to see where I was going. I had hit something metallic, but all I see are trees. Putting my hand forward I felt a cold hard smooth surface behind the leaves. I still couldn't see more than three meters away, so I just continued to feel around until I found a doorknob in the brush.
I turned the doorknob and pushed open a metal door, the hinges screeching loudly against the roar of the storm. Could this be it? Pulling out my trusty X-File brand flashlight as I entered the building, I peered around. The room was large and the flashlight wasn't powerful enough to reach all the way across. Darn those cheap X-File brand flashlights. Next time I'm bringing a Mag Lite! As I walked towards the center of the room, I felt a huge shadow loom over me. I turned the flashlight upward to be greeted by a huge cross on a light blue field. The wing of the bomber! The rivets and panel lines of the lower wing surface were clean and clear. I followed the wing until I found the fuselage and the forward access hatch. I tried hatch latch and it opened easily. Too easily if you ask me. I popped my head up into the fuselage and looked around.
I was in the fuselage of an intact and very well preserved Heinkel He 177-A5 Greif, Yeeehaaaa! I pulled out my Olympus C2100UZ Digital Camera and started snapping pictures of everything I could. I had three 128-MB memory cards and tons of batteries with me, so I should be able to get enough pictures. After taking a hundred photos of the cockpit and fuselage, I proceeded to walk around the aircraft and shoot everything I could see. In the bomb bay, I found several containers that didn't look like official Luftwaffe equipment. One of the cases was on the ground where it had been lowered from its shackles. I pointed my cheap X-Files brand flashlight into the opening at the top of the case.
The warm glow reflecting off of the golden bars almost blinded me. The bars were small, about 5cm by 10cm. I picked one of the bars up and wasn't surprised to see a familiar insignia. I guess the Third Reich won't be missing these anytime soon. I pocketed two bars to show Eckhardt later and proceeded around the aircraft.
I jumped up on the wing and checked out the engines, turning over the props manually to see if Herr Mächer the manic mechanic had really kept this aircraft in flying condition. He did. Checking my handheld GPS unit, I marked the position and proceeded to a window near the door of the hanger. The window was encrusted with snow and ice, so I opened it and noticed that the storm had stopped.

I walked through the hanger doors onto a small clearing in front. It was about 40 meters across and 100 meters long. Opposite the hanger, the far side of the clearing ended in a precipice above the clouds. A smile of satisfaction crossed my face. I returned to the cockpit and sat back in the pilot's seat to relax and get a bite to eat. The pilot's parachute was still in the seat so I put it on out of curiosity. Attached to the parachute was the locket that Eckhardt had told me about. I snaked it into my pocket and sat back for a nap.
I don't know how long I slept. Hours? Minutes? I felt more than heard the low frequency rumbling start off to my left. As it grew louder the seat started shaking like a horny Tahitian dancer. Hurriedly getting out of the aircraft, I sprang to the window. I turned as ashen as my dark skin can get when I saw a white wave was rushing down the mountain.
Avalanche.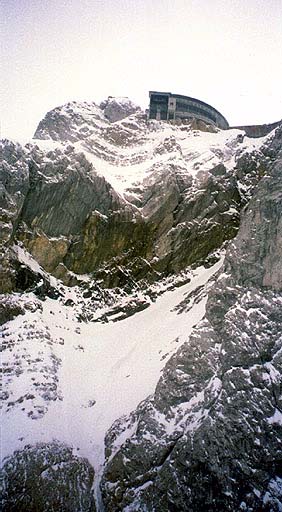
Damn! I had just stumbled upon one of the greatest finds in aircraft archeology and now it was about to be destroyed. I bolted out the hanger door and ran as fast as my fat legs could pump. I still had the parachute strapped on and all my gear was with me. I ran straight for the cliff and with my heart in my mouth, swan dived over the edge. Out of the corner of my eye I could see the snow envelop and crush the hanger where I had been 14 seconds before. I yanked the ripcord on the chute hoping that it would still work after 50 years. I closed my eyes and wondered what Eckhardt was having for dinner……
My eyes opened to a bright light shining into my eyes. A cool pool of drool had collected on the instruction sheet of Revell's new Heinkel He 177 A5 that I had been studying. I lifted my head from the paint-splattered desk and looked out at the gray rain beyond my window. A cold northern wind was blowing some of the rain in through the window, but I didn't care. The Heinkel wasn't real. It was only a dream, a fantasy.
Reality bites.
I got up from my seat to close the window a bit when something fell from my hand. It was a locket.
|
THE KIT |
Anybody saw that pig fly by? I once thought that I would never see a new mold Heinkel He 177 kit in 1/72 scale. But the modeling gods have smiled upon us and Revell of Germany has finally released one. My first feeling upon sliding the parts out of the box was one of sheer joy. As I inspected the parts and compared the cockpit to the old Airfix kit, that joy became giddy excitement (you can feel giddy without a drink or two, it's all right). The detail on the parts is superb. The cockpit instrument control panels and side consoles all have raised detail. The cockpit alone is comprised of 20 parts. I won't need to replace those rudder pedals with photo-etched. The plastic ones are beauties all on their own. The main instrument panel is molded in clear plastic, why I don't know. Various areas in the fuselage also have internal ribbing, but these appear to become invisible once the fuselage halves are put together and all the turrets are in place.
The wings are beautifully molded with the engine nacelle integral with the wing. All I have to add on is the front radiator for the two buried DB605 engines. The Germans considered the He-177 to be a twin engined aircraft due to the fact that they counted the twin DB605's as a single DB610 engine. The propellers blades are molded separate from the spinner, which allows you to assemble and sand the spinners without breaking off the prop blades. Good going Revell! There are two oil cooler radiators in the wings, one per side. Each has a scribed panel and trunking for the intake side of the radiator. The exhaust side is blank and has no trunking. The instructions don't mention this area, or what colors to paint it, so don't say I didn't warn you!
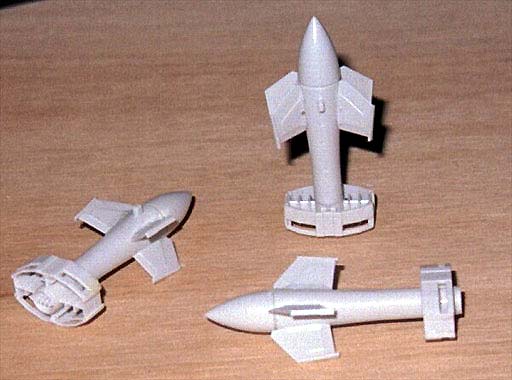 The model comes with enough bombs to fill the bomb bay, or you can use the
Fritz X guided bombs hung externally on the He-177. As the scans show, the Fritz
X bombs are very detailed. They are comprised of 8 pieces each. Look at the
detail on the tail end of the bombs! I have had bigger models with less detail
and parts.
The funny thing about this model is that in all the pictures of the model in the instructions and on the box shows bulged bomb bay doors. The kit does not feature this bulge. All the pictures in my books do not show any bulge. But there is a part of the bay center wall that protrudes from the bottom of the aircraft. Anybody at Revell Germany care to explain the bulges? Bueller? Bueller?
The clear parts are only OK at best. They could have been a little clearer. Oh well, nothing a dip in Future can't remedy. Besides, with all that cockpit detail, you're going to want to show it off somehow.
I'm going to need about three of these buggers. One to build Out of the Box, one to detail the hell out of (with both DB610 exposed to the wind) and one just to keep for a rainy day. I am currently putting one together and will have in-progress shots up as soon as I get the photos back from the developer. I gotta get me a Digital Camera. If any modeling philanthropist are reading this I'm open to donations of an Olympus C2100UZ …………
|
CONSTRUCTION |
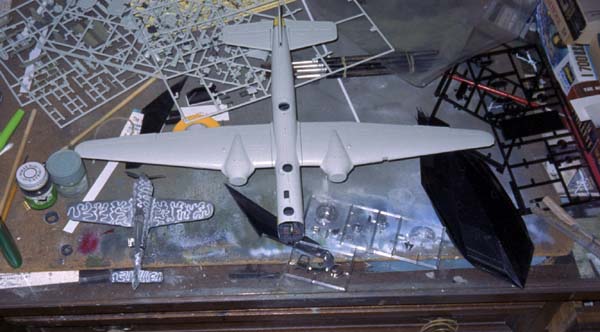
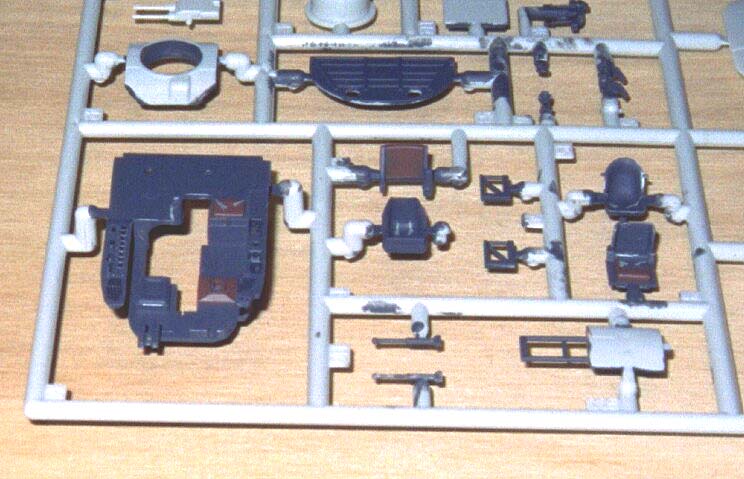
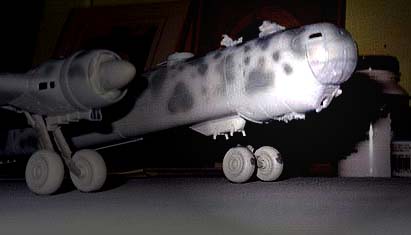
Naturally, the first step is painting. Polly S RLM 66 scale black was used on all the interior surfaces and cockpit parts. A silver pencil was used to highlight all the detail and the part edges. The seat cushions was picked out in Polly S Red Brown, seat belts with RLM 02. I assembled everything that didn't stick out from the forward edge of the fuselage, sidewalls, seats, rudder pedals and central instrument console. Everything else would be added just prior to the canopy being glued down. The tail wheel bay was painted RLM 02 and added. The bomb bay could be added after the fuselage was glued together, so it was painted RLM 02 on the inside of the bay and RLM 66 on the outside. The outside side is visible from the cockpit and rear turret station.
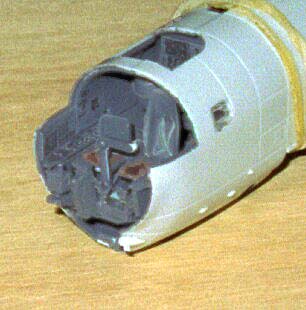
After all the interior pieces were properly positioned and glued in place, the fuselage halves were glued together. No real problems were encountered here. While this was setting up, the wings were assembled. Open the flashed over holes for the wing mounted Fritz-X pylons and paint the interior of the oil coolers, intakes and wheel well bay RLM 02. Here I noticed that Revell had added ribbing on the inside of the upper wing part. These ribs lined up with the closed gear bay doors on the lower wing. I guess someone early on thought the bay doors would be open when the landing gear is down. When I researched this detail, I saw no landing gear bay doors open when on the ground except when maintenance was being performed on the landing gear. Kudos to Revell for doing their research. I glued the wings together at this time. Good fit too. The seams were sanded and the wings set-aside for later attachment to the fuselage.
The radiator cowlings are a two piece affair. The spinners are also a two piece affair with the propeller blades attached at a later stage. These were assembled and sanded smooth. They were inserted into the front cowlings and the shaft ends heat mashed to allow the spinners to spin without falling off. The sprue attachment gates on the cowlings were rather thick and I messed up when I removed the parts from the trees. This resulted in some filling and sanding when the cowls were attached to the cowl flaps. The cowl flaps are molded closed, but it would have been nice if we had been supplied with open flaps as well.
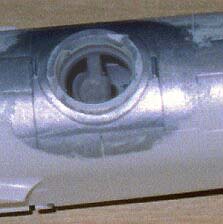
The turrets have fuselage inserts in the upper fuselage. I'm not sure if this allows other versions to be built or if it was a way for Revell to get around a mold engineering problem. The fit on most of the inserts was OK, but I had trouble with the forward turret insert. I think the part shifted as I applied the super glue. It was a horror trying to get that seam smooth while retaining the raised detail around it. I ended up rescribing some panel lines and adding a few to make the disappearance of some of the raised detail make sense. The turrets were modified to allow them to be inserted after painting. Revell has you put them in when you put them in with the inserts. This creates a masking and seam cleaning horror if you ask me
(you did ask, right?)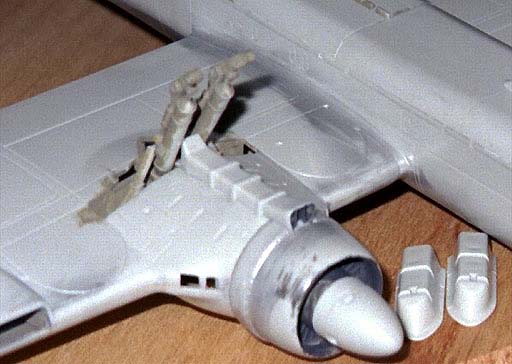
There are several recessed circles in the upper fuselage with the seam running right through them. I couldn't sand inside the circles and decided to scribe an extra line perpendicular to the seam. This made the seam look like it was supposed to be there. The Anything-Goes-School-of Lazy-Model-Making strikes again. The bomb bay was added at this time and the bay doors glued shut. This makes you wonder why I painted the interior of the bay. I wonder that myself. The upper edges of the bomb bay have a ledge that sticks out quite aways away from the side of the fuselage. Photos of real Heinkel bombers show a raised panel in this area, but not as much as Revell has made them out to be. I sanded these down a bit for a more scale appearance.
The horizontal stabilizers were assembled and the seams cleaned up. These were added to the fuselage along with the assembled rudder. I used these to make sure I had the wings on straight. I added the wings and allowed them to set overnight before playing with my Heinkel bomber
(you mean you don’t make engine noises and imagine your models flying when the wings are added?)
The landing gear struts were cleaned of all their mold separation lines and added to the model. I usually paint my models while they sit on their own landing gear. It just a Val thing. The wheels are a three piece affair consisting of left and right halves and a plastic retaining washer. The washer allows you to press the wheels in place without glue, thus allowing them to rotate
(read that as play with the model on an imaginary runway). They were assembled, their seams smoothed out and added to the model. All the cockpit detail I didn't add before was added now and the canopy added to the model. For some strange reason (but what about me isn't?) I opened one of the canopy panes. There were two that could open on the nose of the Heinkel. The canopy and all the clear areas were masked panel by panel with Tamiya tape. That's the best stuff in the world. All the openings were stuffed with tissue and I'm ready to add paint to my monster.|
PAINT & DECALS |
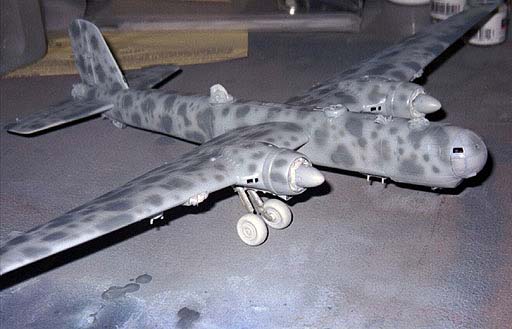
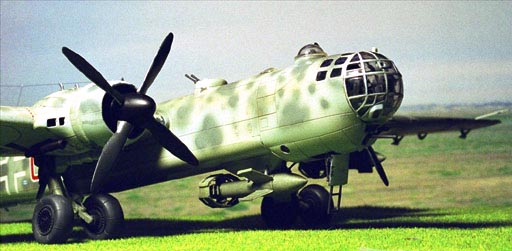
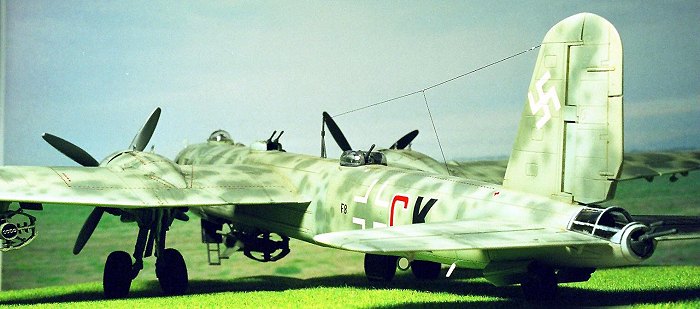
I really didn't feel comfortable with the scheme on the front of the box. I tend to like gray and blue colors on my models. I sprayed the model overall with Model Master Acrylic (MMA) RLM 76. I added a few drops of MMA RLM 65 to the paint in the brush and sprayed some random panels and along panel lines top and bottom. This helps break up the monotony of the scheme.
MMA RLM 74 was mottled all over the model, some in big blotches, other in small dots. It was at this point that I picked up a lot of dust all over the model. It seems the Acrylic paint was drying on the inside of the nozzle and coming off in batches as the paint was sprayed. I read a thread recently on Hyperscale that the nozzle needs to be swabbed out about every five minutes with some thinner. Too bad I read that after I decaled the Heinkel. After the model had dried for a day, I scrubbed down with a worn Scotchbrite pad to get rid of the roughness of the paint. A coat Future was applied to those areas that would receive decals.
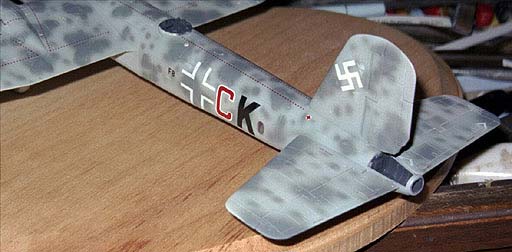
There isn't much in the way of squadron markings on this aircraft. Most of the decal sheet is dedicated to stenciling. I added the national markings and a white halkenkruez from Microscale. These settled down rather nicely without too much prodding for the most part. There was some silvering on the red walkway lines, but after several applications of Solvaset, the silvering was mostly gone. Solvaset is wonderful stuff. The second biggest challenge in the decal department was adding all the walkway stripes. The instructions are not all to clear on what goes where. Multi-colored instructions would have helped here. One color for the model and the markings, another for the numbers and leader lines.
The biggest challenge that I didn't overcome was the spiral on the spinners. They look all right on the sheet, but I couldn't get them to fit onto the spinner. I ended up trashing one and decided not to add the other. I decided to leave the spinners black. I have seen photos of these aircraft with plain spinners. I'll assume that the spinners on the aircraft the model is depicting haven't had their spirals added yet. That's my lie and I am sticking to it. A few days after trashing the one decal, I stumbled across a photo of a Heinkel with its spinner on the ground in front of the engine. I'll be damned if the spiral on the spinner was painted crooked. Maybe I'll add the other decal sometime in the future.
A hand brushed coat of Tamiya flat mixed with Future was added
to all the previously glossed areas. This sealed in the decals and gave the
model an uneven flat look. At first the brush strokes from the flat coat were
highly visible. A light rubbing with the Scotchbrite pad evened out the brush
strokes somewhat, but not completely. Next time, I'm spraying on the flat coat.
I can't be lazy all the time. The photos tend to hide things like the brush
strokes and decal film, if the photographer is selective in his camera angle
that is. Panel lines were accented with a wash of very thin dark umber oil paint.
Exhaust staining was added with black and gray pastels. Oil stains from the
engine were added using thinner mixed with black and red pastels. Chips on the
leading edge of the wings, tails, prop blades and various places in the paint
were added using a silver pencil and MM Metalizer Steel paint. I wanted to
depict a rather beaten aircraft.
|
CONSTRUCTION CONTINUES |
After the worst of the weathering was done, I started adding the small details. Guns, antennae, landing gear doors, access hatches, turret glass, tail gunner canopy, tail gunner gun, turrets, DF loops, radio aerials, and finally the Fritz-X missiles. Oops, I forgot to discuss the missiles! The Fritz-X missiles were assembled with little fuss and painted RLM 02. They were given a wash of black pastel to beat them up a bit. These things are really little jewels and I enjoyed putting them together.
The radio aerial was made from 10-lbs. test fishing line. A quick pass with a lit lighter eliminated any slack in the line. Insulators at both ends were made from drops of white glue painted white.
|
CONCLUSIONS |
I have the old Airfix kit of the Heinkel, but this new kit blows that one out of the sky. Excellent fit, looks accurate and fun to build. Don't delay, get yours today.
If you would like your product reviewed fairly and quickly by a site that has over 1,700 visits a day, please contact me or see other details in the Note to Contributors.