|
KIT: |
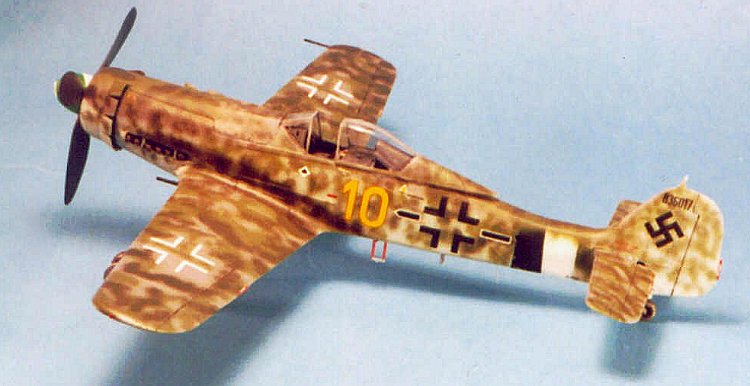
Tamiya 1/48 Fw-109D-13 |
|
KIT # |
61041 |
|
PRICE: |
$27.00 |
|
DECALS: |
One aircraft |
|
REVIEW & |
|
|
NOTES: |
Conversion using
Wurger Mechanic and |

|
HISTORY |
The Focke-Wulf Fw-190D-13 was "the ultimate Dora," in that it was the final development of the basic Focke-Wulf fighter to see operational service, with at least one example serving with JG26 during the final month of the war. Powered by the same Jumo 213E engine that was used by the Ta-152H and Fw-190D-11, the Fw-190D-13 was armed with one 20mm motorkannon and two MG151 20mm cannon in the wingroots.
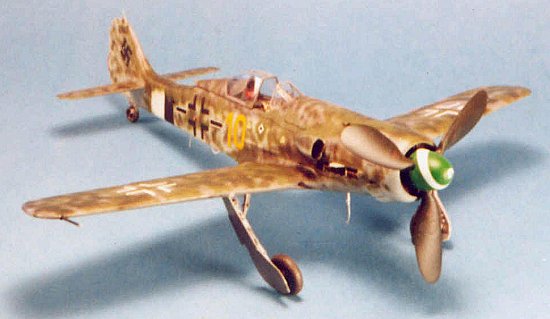
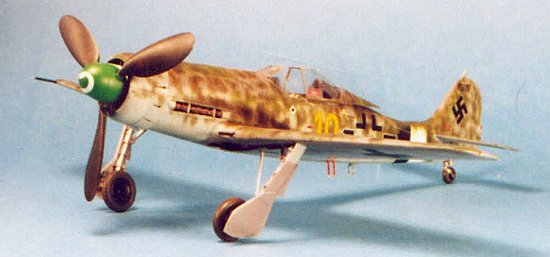
Major Franz Goetz, last Geschwader Kommodore of JG26, flew the Fw-190D-13 during April, 1945, marked as "Yellow 10," his "lucky number" during his career as a 67-victory experte with JG53. He scored no victories with the airplane, as the unit only made five combat sorties during that month.
 Goetz's Dora would end up having one of the most interesting existences of
any airplane to survive the war. It was among several Fw-190D aircraft gathered
after the war and shipped to the United States for evaluation. It could well be
the "slightly different long-nose Focke-Wulf" famed test pilot Chuck
Yeager recalls having flown at Wright-Patterson immediately after the war when
he was a member of the Army Air Force evaluation team testing captured enemy
aircraft.
By 1946, further testing was moot, and the Fw-190D-13 was flown to Freeman Field, Indiana, where many other captured aircraft were awaiting disposition. It was apparently disassembled here. Later that year, a request was made by promoters of an air show in Atlanta, Georgia, for the Air Force to provide some captured aircraft for display, at the same time the Air Force had decided to save a long-nose Focke-Wulf for eventual display at the Air Force Museum. The Fw-190D-13 and an Fw-190D-9 were reassembled for these events. At the time, no one paid attention to the fact that the wing of the Fw-190D-13 was attached to the fuselage of the Fw-190D-9, and vice-versa. After the show in Atlanta, the Fw-190D-13 was left where it was. It was later purchased by a collector, who disassembled it and stored it in a vacant lot outside Atlanta while he came up with a way to restore it. In the 1960s, the airplane was recognized for the rare item it was - though not for how rare a Dora it was - and was eventually purchased by Doug Champlin. The airplane was restored in Germany in the 1970s, allegedly to "flight status," though it was announced it would not be flown due to its rarity. According to Ed Maloney and Steve Hinton from the Chino Air Museum, the airplane is in no way flyable, due to the poor quality of the work done in the restoration. If one looks at pictures of this airplane in the Squadron in the "Fw-190D-9 Walkaround" book, it is immediately apparent that many of the parts - such as the supercharger intake - bear little resemblance to an operational piece of gear.
The good news is that - later this year - the Air Force Museum and Doug Champlin are going to swap wings on their respective Doras, so that the aircraft can be accurately restored as an Fw-190D-9 and an Fw-190D-13. Fortunately, it has already been determined that the airplane will not under any circumstances be flown, regardless of what is done during the restoration.
|
THE KIT |
 The Tamiya Fw-190D-9 kit is inaccurate because it was made from the Air Force
Museum airplane, which means that it has the Fw-190D-13 wing (distinguishable
from the D-9 by the single shell ejector port for the fuselage armament). The
kit has numerous other inaccuracies such as a prop and spinner that look like
nothing ever attached to any Focke-Wulf, landing gear that is 1/8" too
short, and enclosed wheel wells. Fortunately Bob Stephenson with his "Wurger
Mechanic" correction and conversion sets has come up with the way to make
the kit into either an accurate Fw-190D-9 (this set is released by Eagle
Editions), or - with full-fuselage resin conversion parts - into an Fw-190D-11
or this Fw-190D-13. Bruce Radebaugh's "Parts 'r' Parts" has a correct
resin engin plug and wheel well center section, as well as newly-made resin
landing gear consisting of gear legs and doors that correct the Tamiya parts.
All of these parts are so well-made they can easily be confused with
injection-molded plastic parts.
As to decals, well-known aviation artist and historian Jerry Crandall has done a lifetime's research on this particular airplane, with the result being a set of completely-accurate decals to do it as "Yellow 10," with information on the unusual camouflage pattern the airplane carried. His book, "Yellow 10" tells the airplane's story in detail, with every period photograph ever taken of the airplane, and should be a "must have" if you are doing this model.
|
CONSTRUCTION |
Other than using cyanoacrylate glue to attach the resin parts, the model was assembled "out of the box" and was about as difficult as it would have been sticking with the original kit parts. It is really a pleasure to use aftermarket parts that are of this quality.
|
PAINT & DECALS |
Painting "Yellow 10" is the major part of the project. I had Jerry Crandall's book "Yellow 10," and carefully examined the four profiles that show the sequence of what what was painted when to get the final result. I admit to being a bit daunted at getting the pattern "exactly right," until I realized there were only two photographs of the airplane in its original scheme, and that what Jerry has created is an "approximation of reality." I knew I could at least get close to that.
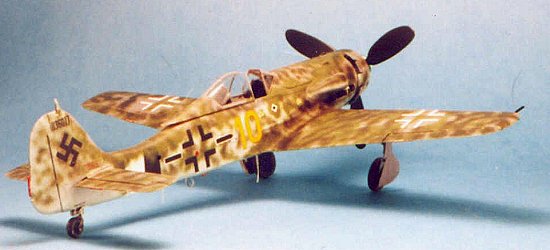 Originally, the airplane came out of the factory with the fuselage simply
painted RLM76 lowers and RLM75 uppers, with the wing painted overall RLM75 on
the upper surfaces and the forward half of the lower surfaces. All the rest of
the dappled camouflage - in RLM82 bright green and RLM83 dark green - was
applied after the airplane came to JG26, as an attempt to camouflage it to be
parked under trees in the forest. It was roughly and haphazardly applied by the
ground crew with spray guns.
I began by pre-shading the model, airbrushing semi-gloss black over all panel lines. This was then followed by painting the wheel well and lower wing surfaces with SnJ Aluminum. I then painted the black/white Reichverteitigung identification stripes on the rear fuselage and masked them off. The lower surfaces were painted RLM76, and the upper fuselage, and upper flying surfaces were painted RLM75.
At this point, I Futured the model and proceeded to place all the stenciling and wing-walk decals. When they were dry, I shot another coat of Future and proceed to apply the two different Greens, after unmasking the upper part of the fuselage stripes for over-painting. The one area I really worked to get right is the area around the upper wing national insignia, which is quite obvious. I think the rest of my camouflaging is about 90% congruent with Jerry's profiles, which is close enough.
After another coat of Future, I applied the rest of the markings. Eagle Editions decals are printed by Micro-Scale, so they are thin and easy to use. I have yet to run across a decal sheet from them that is less than excellent.
When all was dry, I airbrushed another coat of Future, and then two coats of "Flat Future" - Future mixed with Tamiya Flat Base - to get the final finish. I applied the exhaust stains with Tamiya "Smoke." Since the airplane did not see that much use in its operational life, I limited further weathering to some aluminum scuff marks on the wing where the pilot would enter the cockpit.
|
CONCLUSIONS |
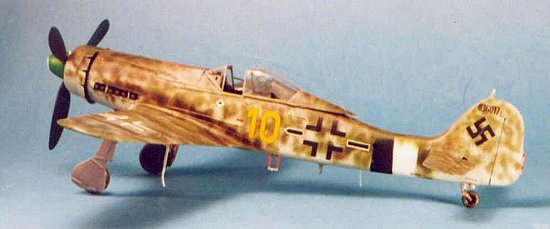 This is definitely the wildest-looking Focke-Wulf in my now-extensive
collection of Wurgers. Assembly of the kit is absolutely easy. Any modeler who
feels confident about their airbrushing skills should be able to recreate this
example of "the ultimate Dora" with no real difficulty.
Contact Bob Stephenson at: rstephen@hom.net
Contact Bruce Radebaugh at: bradebau@netzero.net ( http://partsrparts.homestead.com/partslist.html )
If you would like your product reviewed fairly and quickly by a site that averages over 3,000 visits a day, please contact me or see other details in the Note to Contributors.