Hasegawa 1/48 Ki-61-I tei
| KIT #: | 7240 |
| PRICE: | $34.00 |
| DECALS: | 2 options |
| REVIEWER: | Francisco Santoro |
| NOTES: |
| HISTORY |
 Taken from the kit instructions: "The Japanese Army Ki 61 Hien, code
named "Tony" by the Allies, was the only mass produced Japanese fighter to use a
liquid engine during the conflict. Great efforts were made in its design to keep
it light, and this produced a well balanced interceptor, with good high altitude
performance and maneuverability.
Taken from the kit instructions: "The Japanese Army Ki 61 Hien, code
named "Tony" by the Allies, was the only mass produced Japanese fighter to use a
liquid engine during the conflict. Great efforts were made in its design to keep
it light, and this produced a well balanced interceptor, with good high altitude
performance and maneuverability.
Its only drawback was the engine, for which Japan had little knowledge of liquid engine design, production, or operation. This was countered somewhat in mainland Japan where skilled maintenance personnel and an adequate supply of spare parts were available when needed.
The "Tony" served in the Philippines and New Guinea campaigns and in the air defense of mainland Japan. Following the loss of the Philippines, and the initial raids on Japan by China-based B-29s, large numbers of Ki 61-I were assigned to the defense of mainland Japan.
The most famous squadron using the Hien was the 244th Sentai, commanded by Japan´s yougest squadron leader, Major T. Kobayashi. This squadron accounted for 160 B-29s downed during the war and flew the Ki 61-I until the end of the conflict."
| THE KIT |
 This is a special boxing of Hasegawa´s regular Ki 61-I labelled
"Prisoner of War." As such, it offers two decal options, one for a Ki 61 from
the 23 Independent Flying Corps, and the other is of the same aircraft but
painted in red, white and blue with with stars on the fuselage and wings.
This is a special boxing of Hasegawa´s regular Ki 61-I labelled
"Prisoner of War." As such, it offers two decal options, one for a Ki 61 from
the 23 Independent Flying Corps, and the other is of the same aircraft but
painted in red, white and blue with with stars on the fuselage and wings.
The kit itself is moulded in five light grey sprues of hard plastic and one clear sprue. There was some flash present on some parts, which should be easily cleaned with a sharp hobby knife. Propeller blades are moulded separately and the entire propeller assembly can be added after painting and decalling. The canopy is really transparent, and was a perfect drop fit when dry fitted to the cockpit opening.
There´re two decal options for the same aircraft: The first one is of the camouflaged Ki 61 painted in Kawasaki dark green and natural metal undersurfaces, with some chipping on the fuselage. The other is for the same aircraft painted in the colours of the American flag and with American markings. There´re two painting options for the interior depending on the decal scheme you choose.
| CONSTRUCTION |
Since I chose to paint the aircraft in its Japanese markings, I painted all the cockpit parts in RLM 79 (Revell 17 Africa Brown), highlighting some details in black and silver. I glued the cockpit sides to both fuselage halves, and then added the cockpit floor to one of them.
 Next step was to glue the radiator grill, the radiator to the right
fuselage half and piece A1 (don´t know its name). The first two were painted in
silver, while the third one was painted in RLM 79. I also painted the instrument
panel in black and glued it to the right fuselage half.
Next step was to glue the radiator grill, the radiator to the right
fuselage half and piece A1 (don´t know its name). The first two were painted in
silver, while the third one was painted in RLM 79. I also painted the instrument
panel in black and glued it to the right fuselage half.
With all those bits added, I glued both fuselage halves, realising the front of the fuselage couldn´t be closed because the instrument panel was too wide. I cut a part of it, and re-added it to its opening. I glued from the outside a cockpit bulkhead I had forgotten to add before, and then glue the cover for the machineguns with the guns in place. The cooling intake for the engine was also added at this stage.
Wings came next. These were a simple afair of a single lower and two upper wings. Don´t forget to open the holes for the underwing fuel tanks. I then glued the wings and horizontal stabilizers to the fuselage. The stabilizers come as pieces C6 and C9, numbers which can be confused between each other. The key here is to have the elevator actuators facing down (something I realised after checking the painting instructions and having both stabilizers firmly in place).
Before painting, I glued the radiator exhaust door in place and the pilot´s headrest.
| COLORS & MARKINGS |
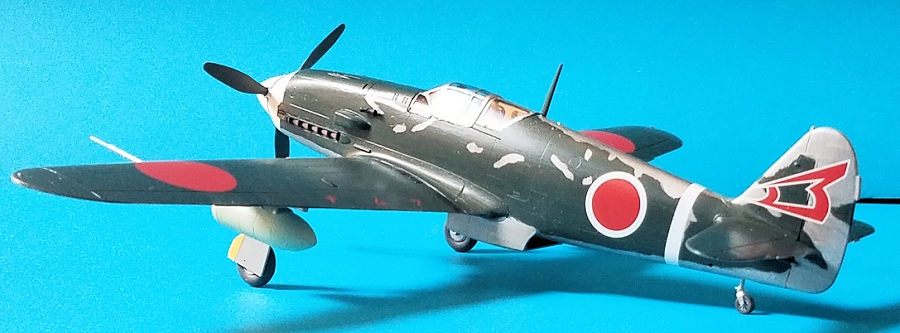
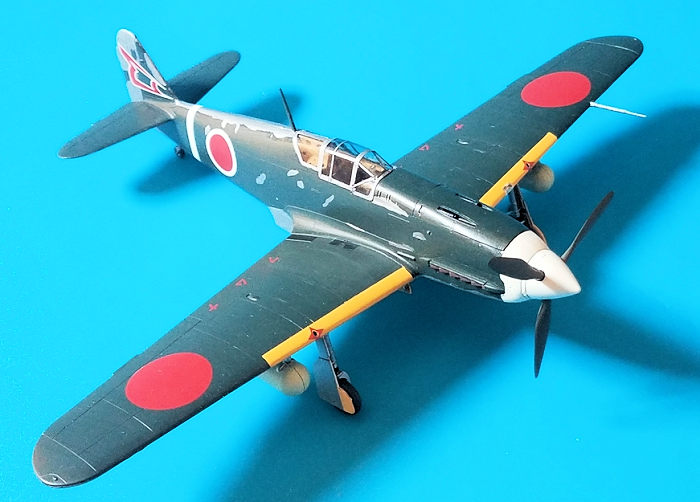
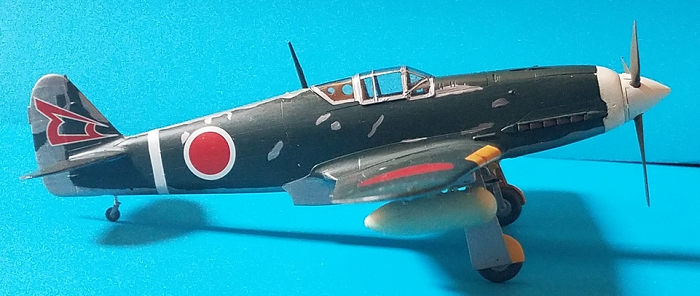
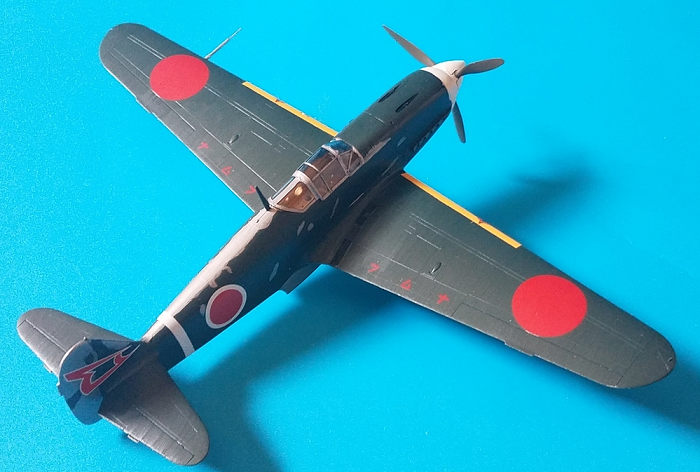
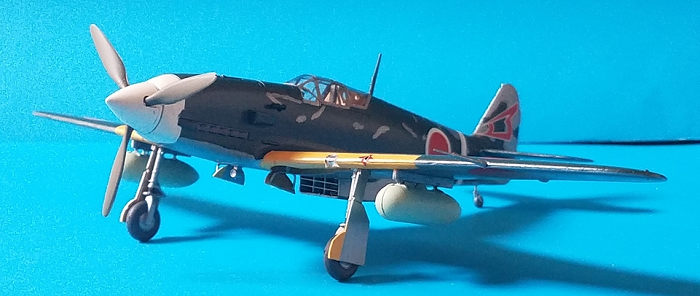 The aircraft I had chosen was painted in Kawanishi dark green and
natural metal undersurfaces, with heavy chipping on the fuselage spine. I
painted the upper surfaces in RLM 70 (Revell 40 Black Green), since I had a
colour photo of a Ki 61 in a similar shade. When that was done, I gave the lower
surfaces two coats of flat so the metallic colour could have a nice grip. The
lower surfaces were painted in Revell 91 Steel, together with the chipping in
the fuselage spine. To avoid the metalling paint from getting damage, I gloss
coated the undersurfaces with Revell 01 Gloss varnish. I then masked and painted
the yellow leading edge bands, and the models was fully gloss coated.
The aircraft I had chosen was painted in Kawanishi dark green and
natural metal undersurfaces, with heavy chipping on the fuselage spine. I
painted the upper surfaces in RLM 70 (Revell 40 Black Green), since I had a
colour photo of a Ki 61 in a similar shade. When that was done, I gave the lower
surfaces two coats of flat so the metallic colour could have a nice grip. The
lower surfaces were painted in Revell 91 Steel, together with the chipping in
the fuselage spine. To avoid the metalling paint from getting damage, I gloss
coated the undersurfaces with Revell 01 Gloss varnish. I then masked and painted
the yellow leading edge bands, and the models was fully gloss coated.
I decalled from rear to front. I began by adding the vertical stabilizer´s artwork, which provided colour to an otherwise boring plane. The I added the white fuselage band and the fuselage Hinomarus. Then came the upper wing Hinomarus, which proved to be rather sticky (but strong), and had to be quite a lot to position them correctly. The lower wing Hinomarus proved to be more easier to handle, and were easily added to their correct position. After the main decals were on, I added the wing walk stripes, the stencils in Japanese writing and the stars that cover the wing cannons.
The model was then matt coated with Revell 02 Matt varnish.
| FINAL BITS |
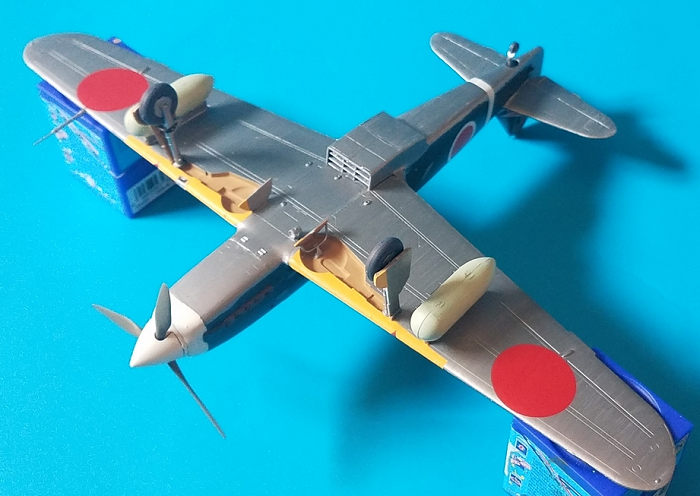
 I painted the landing gear doors in white, then Revell 91 Steel. The
inside of the doors were painted with Revell 17 (RLM 79). After both colours
were dry, I painted the yellow areas on the landing gear doors. The wheels were
painted first in flat black, and the tyres were painted with Revell 78 Tank
Grey. I did the same for the tailwheel. The landing gears were painted with
Revell 91 and flat black.
I painted the landing gear doors in white, then Revell 91 Steel. The
inside of the doors were painted with Revell 17 (RLM 79). After both colours
were dry, I painted the yellow areas on the landing gear doors. The wheels were
painted first in flat black, and the tyres were painted with Revell 78 Tank
Grey. I did the same for the tailwheel. The landing gears were painted with
Revell 91 and flat black.
The landing gear was glued to the holes on the lower wing, don´t knowing they had to hand straight down (mine are canted a bit outward). The wheels were then glued in place, followed by the landing gear doors and the tailwheel. The exhaust were painted in the fuselage colour and glued to their openings. The exhaust stacks were picked up in Revell 83 Rust. The propeller spinner and its base were painted in white, and the propeller blades were painted with Revell 46 NATO brown. They were joined when dry, and the whole assembly was fixed in place with Revell Contacta.
The canopy was masked and painted first with flat black, and then with Revell 91. I glued the gun sight and two other small pieces to the fuselage, and all that was topped by gluing the canopy to its opening.
| CONCLUSIONS |
Not a bad looking kit, it´s cool to have this streamlined fighter next to the chubbier J2M3 Raiden. I´m of the idea that Japanese aircraft are rather boring due to their monotonous camouflage, something salvaged by the rather colourful unit markings. I´m sure most modellers (especially Americans) will buy this kit for the POW markings, which should be nice for an eye catching model.
5 April 2021
Copyright ModelingMadness.com. All rights reserved.
If you would like your product reviewed fairly and fairly quickly, please contact the editor or see other details in the Note to Contributors.