Eduard 1/48 A6M2a Model 11
| KIT #: | 82211 |
| PRICE: | $52.98 SRP |
| DECALS: | Six options |
| REVIEWER: | Dan Lee |
| NOTES: | Profipack |
| HISTORY |
The Mitsibushi A6M Zero-sen was the main Imperial Japanese Naval Fighter of WW2. Often lumped together with the similar Oscar of the Imperial Japanese Army, the Zero became the catchall name for a highly maneuverable, lightly armed/un-armored Japanese monoplane fighter.
 It gained
its prominence in the air war over China when 15 early model Zeroes (designated
Model 11 and only for land based use) were sent to China to deal with the
Chinese flown Soviet made I-153 Biplanes and I-16 Rata Monoplanes that were
giving the A5M Claude fighters a hard time. In one combat, the Zeroes wiped out
27 I-153s and I-16s with zero losses to themselves. Allied intelligence services
were in a state of shock and disbelief that the Japanese could design a fighter
plane superior to anything the Allies had (much of it due to racism as the
belief at the time was that Asians couldn't design their own aircraft and simply
copied Western designs.)
It gained
its prominence in the air war over China when 15 early model Zeroes (designated
Model 11 and only for land based use) were sent to China to deal with the
Chinese flown Soviet made I-153 Biplanes and I-16 Rata Monoplanes that were
giving the A5M Claude fighters a hard time. In one combat, the Zeroes wiped out
27 I-153s and I-16s with zero losses to themselves. Allied intelligence services
were in a state of shock and disbelief that the Japanese could design a fighter
plane superior to anything the Allies had (much of it due to racism as the
belief at the time was that Asians couldn't design their own aircraft and simply
copied Western designs.)
On the week of December 7th 1941, the Japanese would stun the Allies with the superiority of the Zero and it wouldn't be till after much painful one sided combat (for the Allies) and the capture of the Akutan Zero after the Dutch Harbor Raid that the weaknesses and flaws of the Zero would become evident such as lack of armor, under powered engine, lack of self sealing tanks and an obsolete air-to-air doctrine that stressed maneuverability instead of energy/speed based diving/hit and run attacks.
The Model 11 were non carrier based A6Ms without a tailhook and folding wingtips but otherwise the same as the carrier based A6M2a Model 21.
| THE KIT |
It's pretty much identical to the Eduard A6M2a Model 21 kit. See DaBoss' or Tom Cleavers previews on what is in the kit.
| CONSTRUCTION |
 It all
began with the cockpit. I sprayed on one layer of Tamiya XF-71 cockpit green and
a lighter layer of Gunze H-58 cockpit green for the interior green on the parts.
The various details were painted as per instructions and unused PE faces. I
didn't use most of the cockpit PE because I found it unnecessary. I only used
the IP, the PE harnesses and some of the smaller details. The guns and various
attachment pieces were painted gunmetal.
It all
began with the cockpit. I sprayed on one layer of Tamiya XF-71 cockpit green and
a lighter layer of Gunze H-58 cockpit green for the interior green on the parts.
The various details were painted as per instructions and unused PE faces. I
didn't use most of the cockpit PE because I found it unnecessary. I only used
the IP, the PE harnesses and some of the smaller details. The guns and various
attachment pieces were painted gunmetal.
The rest of the interior was painted Gunze Blue Green Metallic aka Aotake while the remaining small bits were painted as per Eduard's instructions.
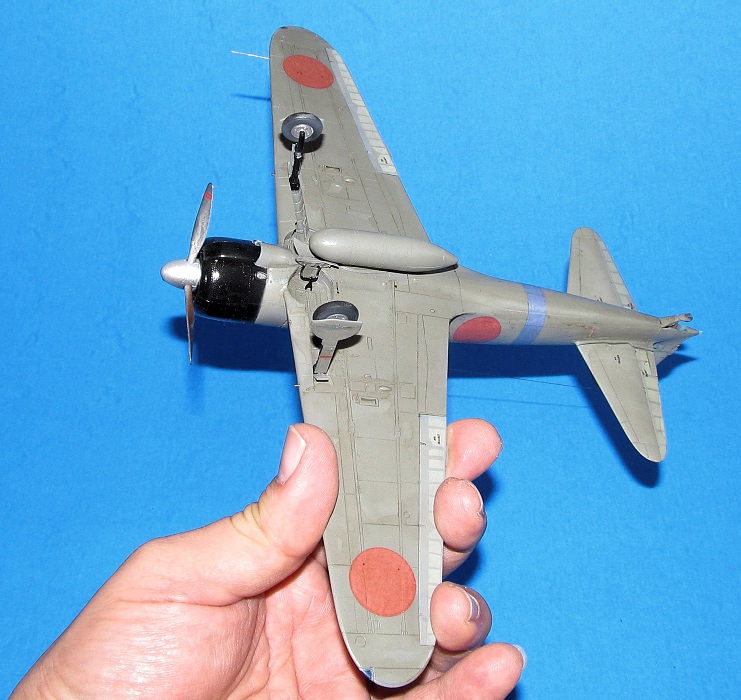
I then glued together, cleaned up the various parts of and painted the landing gear and tail wheel, external fuel tank, propeller, the engine, ailerons, cowling and wings before assembling the fuselage. I used CA glue for the external seams and Tamiya extra thin glue for the interior connections on all the various parts. They were lightly sanded and polished to get rid of any visible seams... all except the tailhook compartment which had to be filled in with several layers of CA glue before it was sanded smooth.
| COLORS & MARKINGS |
First the canopy was masked then first painted the interior green color. I painted the assembled engine flat black and then brush painted the details with aluminum paint. The exhausts were painted with a combo of burnt metal and rust.
 I next
primed all the parts using a light coat of Stynylrez Grey after it was dried, I
polished the surface of all nits and dust. Next I made the Tom Cleaver mix of
the Eduard version of the “Concrete Grey” early war Zeroes used because I had
the colors handy which is a 50/50 mix of Tamiya XF-51 Khaki Drab and XF-76 IJN
Grey Green. It was sprayed on the required primed model parts and gives a dark
caramel color that is what the current Japanese WW2 color experts consider the
“real” color of early war Zeroes. FYI, I have three early war Zeroes that are
all different shades based on what was considered “real” at the time. I used all
Tamiya colors for all three of them (XF-14, XF-76 and now the 50/50 XF-51 and
XF-76 mix.)
I next
primed all the parts using a light coat of Stynylrez Grey after it was dried, I
polished the surface of all nits and dust. Next I made the Tom Cleaver mix of
the Eduard version of the “Concrete Grey” early war Zeroes used because I had
the colors handy which is a 50/50 mix of Tamiya XF-51 Khaki Drab and XF-76 IJN
Grey Green. It was sprayed on the required primed model parts and gives a dark
caramel color that is what the current Japanese WW2 color experts consider the
“real” color of early war Zeroes. FYI, I have three early war Zeroes that are
all different shades based on what was considered “real” at the time. I used all
Tamiya colors for all three of them (XF-14, XF-76 and now the 50/50 XF-51 and
XF-76 mix.)
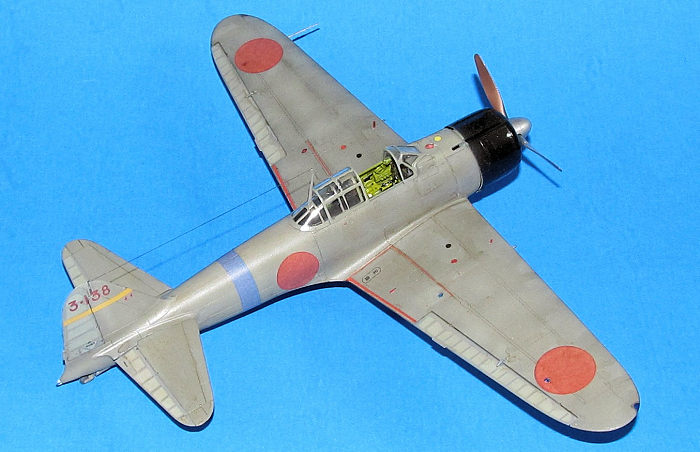
The rudder and aileron
flaps were supposed to be cloth and a noticeably different shade so I masked off
the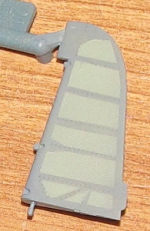 areas that would be the frame of each part using very thinly cut strips of low
tack tape.
areas that would be the frame of each part using very thinly cut strips of low
tack tape.
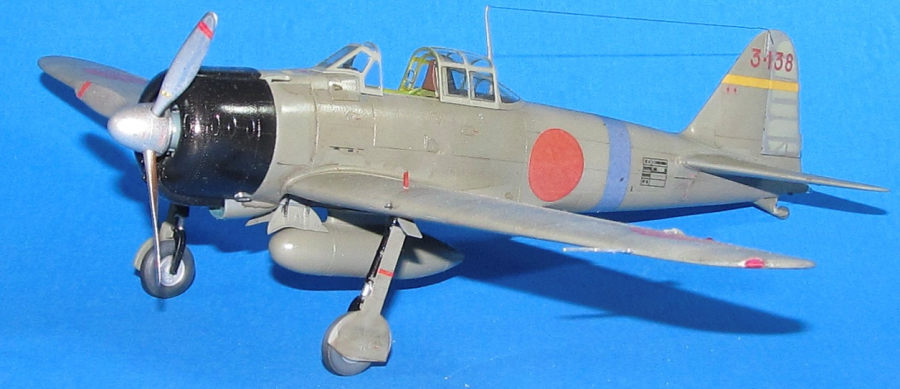
The various other parts were painted whatever colors as per instructions. I used Vallejo RLM01 Aluminum for the propeller, Tamiya XF-9 Hull red for the anti-glare rear of the propeller. The landing gear was sprayed with gloss black and brush painted the various details with silver paint while the tire portion of the landing wheels were masked off and painted RLM66 black/grey and the hubs brush painted silver.
To emulate the sun fading, I used the Tamiya version of the Eduard mix and added about 20% flat white. It was misted over the various fuselage areas as per the painting diagram till it started to almost appear and then stopped. Next I added about 20% more XF-76 to the color and misted it on the masked off rudder and aileron parts to show off the difference in tones between the metal frame areas and doped cloth. This was the first time I ever did this and it took a fair amount of work, but did make a difference I feel in the look of the model.
The last part was the cowling which I sprayed on a mix of NATO black and gloss black. Finally, I sprayed on two light coats of Vallejo Gloss Acrylic in preparation for the decals.
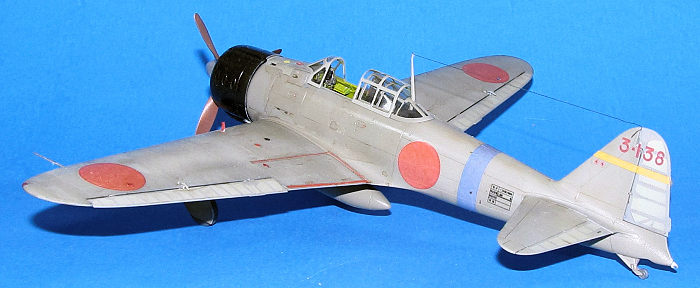
I selected Option D which was PO3c Kunimori Nakakaryia from the 12th Kokutai. I added the various decals and stencils as per the instructions. I had some issues with the blue stripe as it folded over on itself but I managed to get it into position and orientated correctly without ripping the decal.
 After the
decals were dried I used Tamiya black panel line accent to highlight the panel
lines and weather lightly the model. The excess was removed with mineral spirts.
After the
decals were dried I used Tamiya black panel line accent to highlight the panel
lines and weather lightly the model. The excess was removed with mineral spirts.
Lastly I sprayed on a light final coat of Vallejo Flat for the end finish.
All the various small bits and parts were added to the model from the wingtip lights to the gun nozzles and pitot tube. Next up the engine, cowling and prop. The painted antenna, gunsight, PE step and canopy were glued in place.
Next the landing gear was glued in. I used CA glue to hold the main landing gear at the correct angle and position. Finally, I added the radio wire using black elastic repair thread and I was done.
| CONCLUSIONS |
I really enjoyed building the A6M2a Model 11 Zero. I think this is one of Eduard's best kits as it has got better detail than the older Hasegawa Zeros (which I have built) but is almost as easy to build. Apparently they are similar in style and build to their newest FW-190s which I have a couple of kits but not yet started to build. Definitely for most levels of modeller from the beginner who is familiar with PE parts to the advanced modeller.
6 September 2024
Copyright ModelingMadness.com. All rights reserved. No reproduction in part or in whole without express permission.
If you would like your product reviewed fairly and fairly quickly, please contact the editor or see other details in the Note to Contributors.