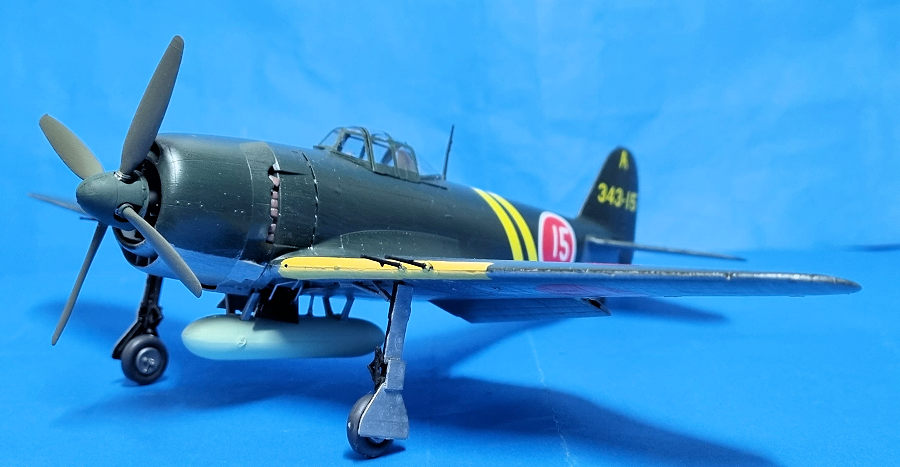
Hasegawa N1K2-J Shiden kai
| KIT #: | 09073 |
| PRICE: | 35$ |
| DECALS: | Two options |
| REVIEWER: | Fancisco Santoro |
| NOTES: | \ |

| HISTORY |
 (From
the instructions):
"The Imperial Japanese Navy Air Force Shiden Kai (literally "upgraded Shiden")
was developed from the Navy's Kyofu seaplane fighter. Replacing the floats
of the Kyofu with landing gear and fitting the airframe with the compact but
powerful Nakajima "Homare" engine, the IJN fighter went into production in
1943, and provisionally assgined to active units in October of 1944. The
IJN, however, found the new fighter a lot left to be desired, and sent back
the fighter to Kawanishi´s drawing board, where modifications to the
fuselage, main gear positioning and automatic combat flaps were worked out.
The finished product was the "interceptor" Shiden Kai (N1K2-J). The
prototype made its maiden flight in January of 1945. The surface area of the
Shiden Kai´s vertical stabilizer was smaller than that of the early
production Shiden airframe. Perhaps the most famous unit to fly the Shiden
Kai was the 343rd Naval Flying Group, which on March 19 1945 engaged a large
force of American F6Fs, F4Us and SB2Cs aircraft over Matsuyama in Shikoku,
shooting down 52 American planes, proving beyond doubt the superlative
qualities of the plane."
| THE KIT |
 A single
medium sized bag contained all the light grey sprues, and a smaller one had the
clear parts. The grey sprues were molded in Hasegawa's standard quality of shiny
and hard plastic with fine recessed panel lines and (almost) no flash. The clear
parts were also excellently done.
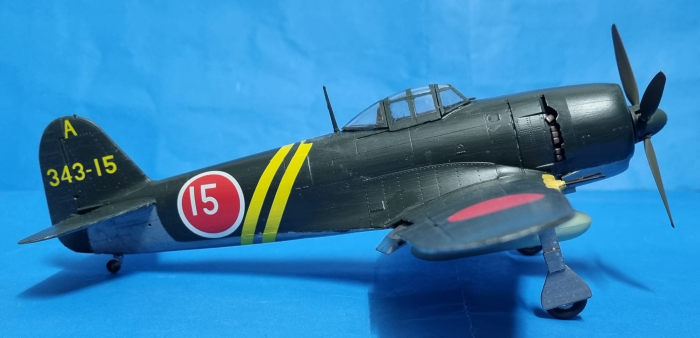
Decals were of the usual Hasegawa style, beautifully printed without hints of being off-register. They were a bit thick, so hot water and Mr. Mark Softer will help you make the decals sing into the panel lines. There're two decal options, both from the 343rd Naval Flying Group, Naoshi Kanno´s White 15 (the most known Shiden Kai pilot) and Kouji Ohara´s White 03. Painting indications are given in Mr. Color shades.
Instructions are typical of Hasegawa, foldable style with clearly shown construction steps. Instructions start you off by building the cockpit, the gluing the cockpit into the fuselage, then the wings and wheel wells. After that you glue the wings and horizontal stabilizers to the fuselage, and to finish off the main assembly, you glue the engine, cowling and combat flaps (which can be either glued in the extended position as it comes from the box, or in the closed position, prior some surgery). The last steps indicate to glue the landing gear, propeller and clear parts. Simple, isn't it? As simple as Japanese engineering gets.
| CONSTRUCTION |
Prior to always opening a brand new kit, I
take a quick look to the corners of the bag to see if any part(s) had fallen off
the sprues. No parts were off them, so I opened the bag. Inspecting them, most
of the parts were fine, except both main landing gear struts, which had broken,
both of them at oleos of the struts. I pondered what to do, so after a short
time, I decided to use as little liquid glue (knowing full well that applying
too much of it would melt the gear) as possible. Two small blobs of glue on each
strut, some minutes of my hand holding them, and the broken parts were in plac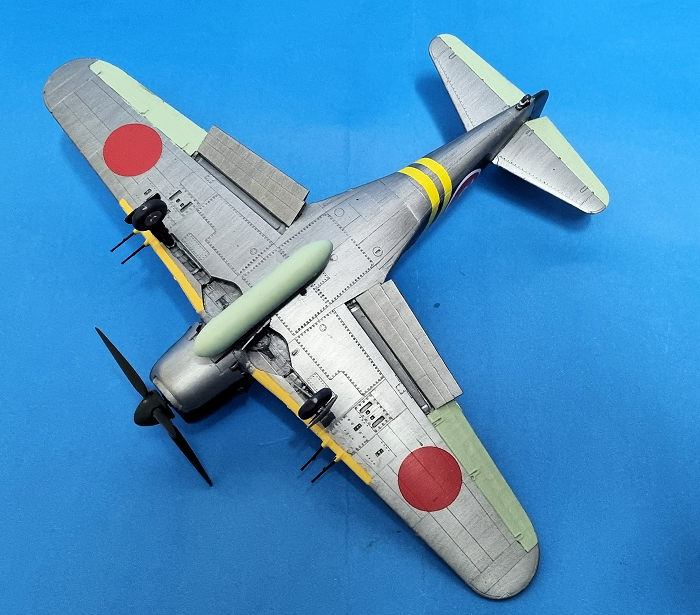 e.
To reinforce the parts some more, I glued the oleo scissors, landing gear doors,
and glued with CA four (two on each) small metallic rods on the outside. All
these was done before applying paint to the parts). The next day, with the legs
dry, I painted them black with steel (Revell 91) gear doors).
Now that the hardest part of the assembly was over, it was time to start painting. I looked at the instructions to see all the parts that could be painted in interior green. These were the cockpit floor, control stick, seat and fuselage walls, which were painted Interior Green (Revell 48 Sea Green). Smaller details were painted matt black (Revell 08 Matt Black). The instrument panel was painted black and the IP decal applied, with Mr Mark Softer being brushed to make the decal conform into the irregularities. Once the paint had cured, I glued all of them into place and left them to set.
The fuselage was next. A quick test fit showed no issues, so I glued the cockpit to the fuselage, and then glued both halves together.
While the fuselage was curing, I went for my next victim assembly, the wings. I first glued the wheel wells to the lower wing, and then glued the top wings to the lower one. As part of the wings, I tackled the automatic combat flaps. These can be glued in the opened or closed position, the first one not needing any surgery, while the closed option needs some plastic to be removed from the flaps. I went for the extended option because it looks nice. After the fuselage had cured, I glued the wings to the fuselage and taped them together to achieve the correct dihedral. The horizontal stabilizers were glued at this stage too. After 30 minutes, I glued the combat flaps in the extended position.
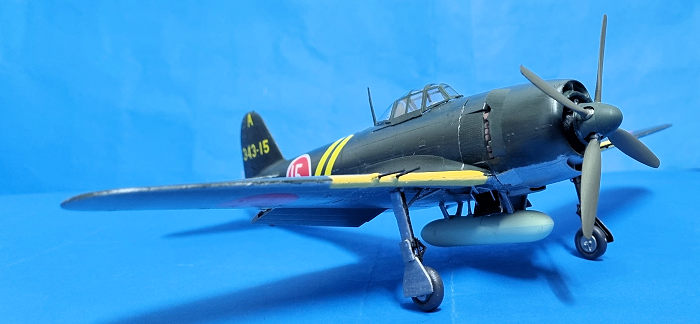 The engine was then built up by gluing the
front face and the exhauts. Hasegawa provides a very clear picture on how to
attach them correctly. The engine was then glued to the front of the fuselage,
and the cowling followed immediately after. I also glued the radiator (?)
intake.
While the airframe was curing, I built up the propeller and external fuel tank. The prop was painted Revell 46 NATO Brown and the nose cone was painted Revell 40 Black Green (readers of my articles will see I use these colours for both Japanese and German aircraft).
Once the fuselage had cured, I began the most tedious task any aircraft modeller has to endure: seam filling. I used CA on the upper and lower join areas of the model. It took a couple of sessions to eliminate the seam line (I wasn´t careful enough, and ended with a flat spot at the front). I'll see if I can get Deluxe Materials's Perfect Plastic Putty, which can be removed with a water moistened cotton bud.
With the airframe complete and sanded, it was time to paint it.
| COLORS & MARKINGS |
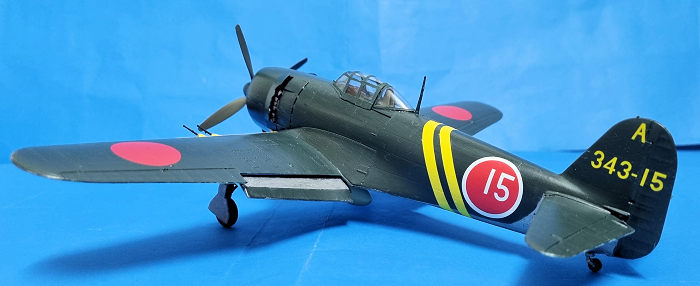 Unlike German, British and American aircraft,
Japanese ones are very easy to paint (unless you want to get the look of the
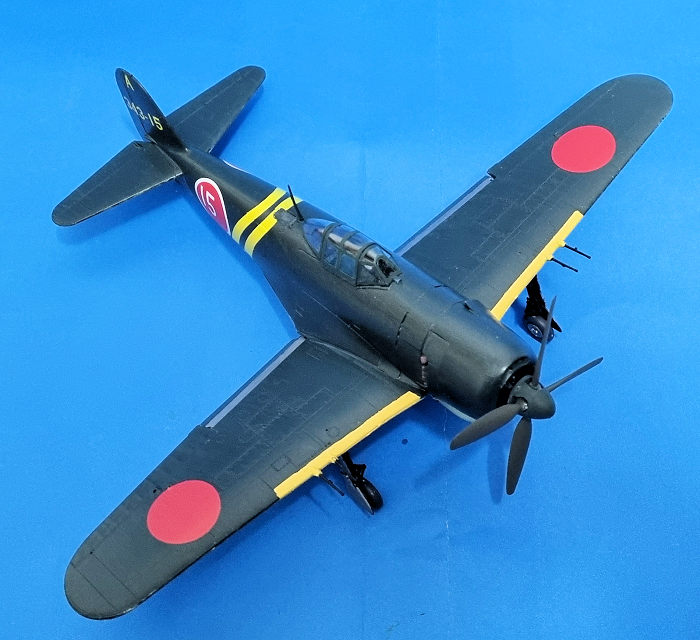
heavily cheeped planes). I painted the upper surfaces in Revell 40 Black Green
(RLM 70), and the under surfaces were painted in Revell 91 Steel). The ailerons
were then repainted with Revell 59 Duck Egg Green (RAF Sky). Before glossing the
model, I also masked and painted the front sections of the flaps, which were
painted with Revell 91. The model was then glossed with Revell 01 Gloss Varnish.
I then applied the decals, starting with the empennage 343-15 decals. The double
yellow bands were then added, and after that the Hinomarus. I applied two coats
of Mr. Mark Softer, and left the decals dry overnight. The model was then matt
coated (Revell 02 Matt Varnish).
I glued the landing gear in place and added the propeller. The clear parts were then masked and painted. These were glued with white glue to the cockpit edge. After letting the gear's glue harden, I turned the model over its back, and let it stand on itself. Proud to say the gear hasn´t collapsed under the aircraft's weight.
| CONCLUSIONS |
Hasegawa has given the modeller an excellent fitting kit with adequate detail for its scale. I can't wait to see if I can get my hands on the 1:32 version.
20 February 2023 Copyright ModelingMadness.com.
All rights reserved. No reproduction in part or in whole without express
permission. If you would like your product reviewed fairly and
fairly quickly, please
contact
the editor or see other details in the
Note to
Contributors.