Hasegawa
1/32nd Ki61-1 Koh/Otsu Hien
| KIT #: | 08179 |
| PRICE: | $59.95 SRP |
| DECALS: | Two options |
| REVIEWER: | Scott Weir |
| NOTES: |

| HISTORY |
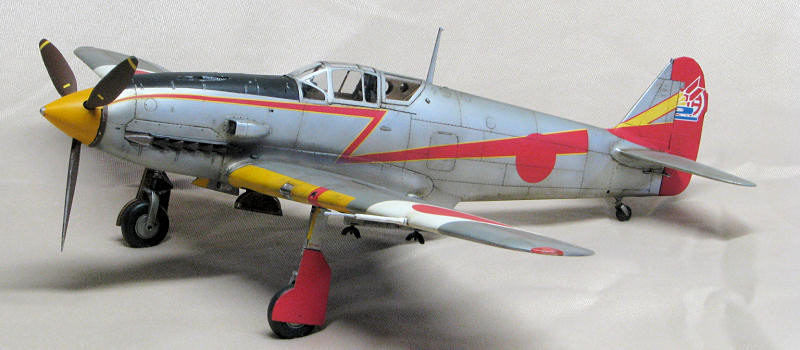
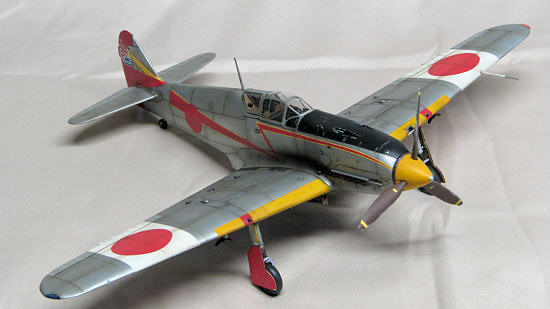
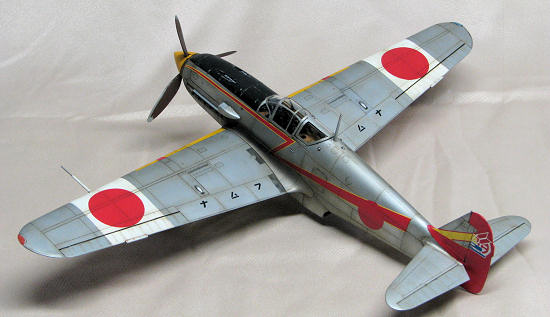
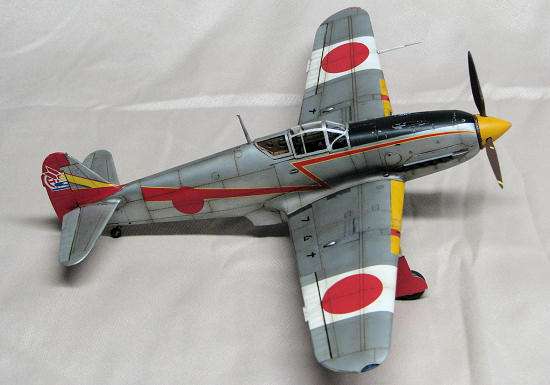
In my opinion the Tony is one of the best looking fighter aircraft of the Second World War if not the best looking Japanese aircraft to see combat in the Pacific. Other than that about all I can add is that this particular bird was assigned to the 149th “Shinbu” Special Attack Squadron, Ashiya A.B. during the summer of 45. The tail section appears to have been pieced together from scavenged aircraft. The only photo I’ve seen of this plane indicates heavy weathering at the time the picture was taken. For any further history on the Ki61 I will digress to the fine reviews that have been posted here previously at MM.
| THE KIT |
 This is one of Hasegawa’s Special Version kits. It seems to be the stock
offering with a different decal sheet and the usual superb box art that adorns
most of their products. I built the 35+ year old Revell Ki61 many, many moons
ago. It still builds into a
respectable representation of a Tony if you can find one. That being said this
kit is the state of the art for mainstream injection molding if you’re looking
for a 1/32nd Hien. The engineering is brilliant and the fit is what
we’ve come to expect from this company. Hasegawa’s straight forward approach of
simplicity is right on target. Cockpit detail is really good and the absence of
the engine expedites construction and helps reduce the cost of the product. One
aspect of clever tooling is the incorporation of the radiator assembly and the
wing spar. As with many of their newer releases it comes with a pilot figure
that looks just about as good as anyone can find in the aftermarket.
| CONSTRUCTION |
In the case of this particular build I found no real vices to complain
about. The usual filling and sanding down the fuselage seams and wing leading
edges along with some adjusting to the single piece canopy were about the only
“abnormalities” I encountered. For the most part she falls together pretty well.
The wing spar makes it virtually impossible for even me to foul up the dihedral.
Follow the instructions and it should lead you home to a satisfying conclusion.
| COLORS & MARKINGS |
 All airbrushing is done with a Paasche VL using enamel paints.
For the cockpit and wheel wells I came up with my own mix of
sand color. The panel lines were pre-shaded in black. Decanted Plasticote
aluminum from a 12oz rattle can was airbrushed over the entire kit. A word of
caution is that when shooting some of these fast drying spray paints is they can
be pretty hot and attack the plastic in an adverse way. Also after decanting
allow a day or so to let the propellant evaporate. Hold the airbrush back a bit
and don’t lay the paint down too wet. Mask off and paint the wheel wells, yellow
leading wing edges, anti-glare panel and white home defense bands. Next is the
first coat of clear lacquer.
The
access panels and the tail section were given a wash of black oil paint over the
gloss coact to give the look of a slightly darker, different grade of aluminum.
Some more clear coat to seal the black wash. The decals laid down very well with
Solvaset. After this dries shoot another coat of clear. A wash of raw
umber oil paint over the entire plane gives it a good used in the field dirty
look followed up with yet another coat of clear. The last weathering touch is
raw umber post shading in the panel lines. Finally, it gets its last coat of
clear to seal the whole package up and then dull coat to tone it down a bit.
| FINAL CONSTRUCTION |
 Pretty much adding the last parts that would get in the way of the paint
and weathering process. One item that was included that the instructions didn’t
call for was the addition of the cowling guns. Being from a Special Attack
Squadron there probably wasn’t much call for them. But I like ‘em and who’s to
say this aircraft wasn’t armed with them at some point.
| CONCLUSIONS |
It’s a Hasegawa! Great subject! Accurate outline! Excellent detail!
Fantastic Fit! Simple and streamlined! Brilliantly engineered!
February 2011
If you would like your product reviewed fairly and quickly, please contact me or see other details in the Note to Contributors.