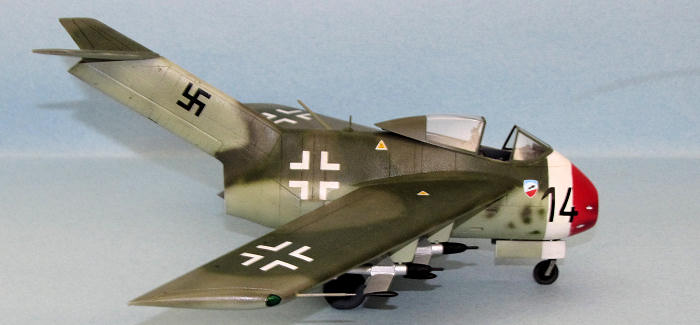
AMtech 1/48 Ta-183
| KIT #: | 484601 |
| PRICE: | $39.95 MSRP when new and available |
| DECALS: | Six Options |
| REVIEWER: | Dan Lee |
| NOTES: |
Aires Cockpit and Landing Gear Wheel Well
as well as the Quick Boost Intake and Exhaust and Squadron Vaccuform
Canopy |

| HISTORY |
The Ta-183 was born out of the desperate final days of Nazi
 carry two
or four 30mm cannon in the nose and up to four wire guided X-4 AAMs on the wings
as well a fuel tank or bomb that was semi-recessed into the fuselage.
Like most of Nazi
It was
rumored that the Ta-183 design inspired the Mig-15, but according to noted
Soviet Air Historian Yefim Gordon there is no real connection between the Ta-183
and Mig-15 despite a passing resemblance as the Mig bureau based the Mig-15 on
their own internal designs based on the swept wing.
When Kurt Tank moved to
| THE KIT |
See the
preview of the Ta-183 kit
http://modelingmadness.com/scotts/axis/luft/fw/ta183preview.htm.
| CONSTRUCTION |
It was during one of those internet sales that I got interested in purchasing bits for my Ta-183 kit which I bought a few years earlier. I ended up purchasing the Quickboost intake and exhaust. A couple of months later I bought the Aires cockpit and the Aires rear landing gear well for cheap in another sale. This time when I put the parts into the kit box I got the itch to build the Ta-183 and it went on the To Build Pile not the “Collect Dust” pile.
 Looking at
the parts, I realized that I was going to use only the tail, the fuselage parts,
the landing gear, the wheels, the wings and (at the time) the canopy or less
than 1/2 the parts of the original kit.
I guess this would qualify as an
I wish I could tell you that I had no issues with the aftermarket parts, but I would be a liar. The one item that did fit was the Aires rear wheel well. It was painted with RLM02, aluminum and steel (for the Jumo engine) and glued in place on one fuselage half. The aftermarket cockpit went in without too much sanding, swearing, yelling and filling.
Where I ran into trouble was with the intake and the exhaust as both were a touch too small compared to the parts they replaced. This meant several attempts at sanding and filling them into place. This was the most tedious part of the build and it was at this point when I questioned why I spent money to replace mostly adequate plastic parts--the reason I went with the resin intake was because it was deeper and had a better detailed forward landing gear well and the resin exhaust was used because it was a one piece affair with better detail.
Anyway, the rest of the plane went together out much hassle as it is a straight forward kit to build.
| COLORS & MARKINGS |
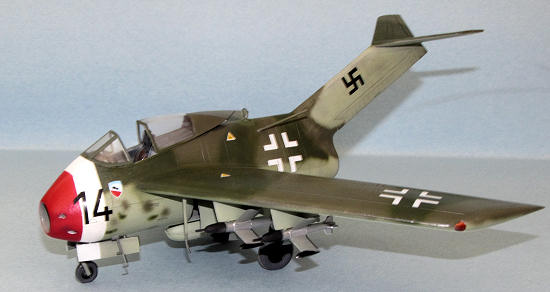
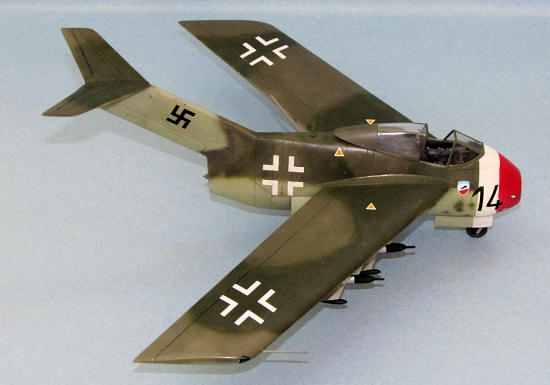
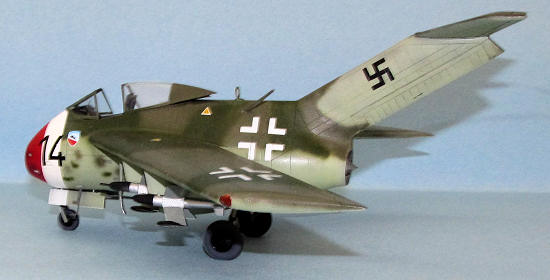
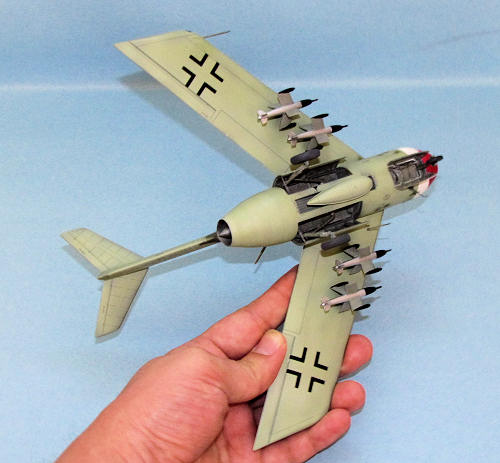
The color option I selected was a variation of the fictional plane from JG52. It was an RLM81/RLM82 with RLM76 on the bottom with a red and white nose. I changed the RLM76 to RLM84 because I had all the colors available in Gunze or Tamiya while I only have RLM76 in Polly Scale (Polly Scale and other Testors Acrylics don’t work well with Gunze unless either is fully cured.)
 The first
thing I did was pre shade all the panel lines with dark gray.
Next I painted the nose white while masking the interior
of the intake which was painted in aluminum.
I then masked off the white areas and sprayed on the
RLM84 “Sky” undersides (including the leading gear doors.)
After I sprayed on Gunze RLM81 and Tamiya XF-58 for the
RLM82.
I turned the compressor to 10
Once everything was dry, I masked off the nose and pretty much the rest of the plane as I sprayed on XF-7 gloss red. Once everything was dry, I sprayed on two thin coats of Tamiya Gloss as the gloss coat for the decals.
The kit decals are excellent and went on without too much trouble and a bit of MicroSet.
I used a light water color wash for the details. After removing the excess and decal solution, I sprayed on a final clear coat of Xtracrylix Flat.
| FINAL BITS |
The kit comes with a one piece canopy which I tried to saw apart. I ended up ruining the windscreen and had to buy a vaccuformed replacement. I nearly ruined that one when I removed it from the plastic, but I got really lucky and it held together. I’m getting better with vaccuformed canopies as I managed to sand away the edges without scratching it or sanding away too much.
 I scratch
built a canopy frame for the interior using plastic strip and painted it RLM66.
It was glued to the canopy using Tamiya Thin Glue.
The landing gear was cleaned up, sanded and painted RLM02 while the wheels were done with dark grey tires and gloss black wheel hubs. The plastic pieces were attached to their mounts using CA glue while the wheels were glued on using Tamiya extra thin glue. The pre painted and weathered landing gear doors were glued on using CA glue as well.
Next I tackled the missiles. These went together okay except they had a seam in the middle in between the fins that would be problematic to fill/sand. I thought about a few things I could do like not attach them etc. I decided to cover up the seam using cut strips of plastic card and sand fill the other areas. Next these missiles were polished with various grades of sanding cloths as these were painted aluminum and the noses flat black. The fins were hand painted RLM02. The missiles were then attached to the pylons using CA glue.
One of the things that the
I was finally done my Ta-183.
| CONCLUSIONS |
August 2011
If you would like your product reviewed fairly and fairly quickly , please contact me or see other details in the Note to Contributors.