| HISTORY |
MPM 1/48 Bu-131 Jungmann
| KIT #: | ? |
| PRICE: | 7Euro (1990) |
| DECALS: | One option |
| REVIEWER: | Carmel J. Attard |
| NOTES: |

| HISTORY |
Bucker Bu-131 Jungmann (Youth)
The
Bu-131 was a two-seat light trainer designed by Anders Anderson, the company’s
Swedish engineer. The Jungmann was a conventional single-bay biplane with a
staggered, swept wing of fabric covered wooden construction, a welded steel tube
fuselage, with the exception of light alloy around the engine and the cockpit
was also fabric covered and a wire braced tail unit of similar construction to
the fuselage. The fixed tail-wheel type landing gear had a rather stalky-divided
main unit.
 production
version was designated Bu-131A and proceeded very successful.. The type was not
only manufactures for civil flying schools in
Right from the outset the Second World War
affected the Balkans.
Other Bu-131s
were built by Aero in
| THE KIT |
 The MPM
scale model of the Bu-131 is injected type moulded in dark brown rather brittle
plastic and all the parts are attached to two frets of sprues. There are the
main fuselage parts, wings, front engine cowling, wheels, seats and a two bladed
propeller attached to one sprue, and the wing and fuselage struts, instrument
panels,, tail wheel, legs on a smaller sprue. The A4 size 4-page instructions
contain history, plan view of components, accurate three view scale plan and
another detailed plan and side view showing decal placement for one Czech AF
trainer aircraft. There is no exploded diagram to indicate the stages of
assembly procedure, neither written assembly sequence. As for detail parts the
fuselage and wing parts have nice ribbing and the forward cowling is also
convincing. A decal sheet for a Czech AF C-4 contains national markings,
fuselage registration and fuselage stamped detail inscriptions.
| CONSTRUCTION |
This was a straight from
the box kit build. Assembly start with detailing the cockpits for the instructor
and trainee. Accurate decals are provided to fit over a brown instrument panel.
Crew seats are added and seats straps made from slices of tape colour tan are
also added. Interior was painted light grey. A blanking firewall is made from
plastic card and added just aft of the front air
 intake
which is painted black and serves to stop the see through effect between the
intake and cockpits. Fuselage is closed, wings separated carefully from runner
and sanded and lower wings inserted in fuselage slots. The same goes for the
tail planes. After reference to scale plans the position of fuselage and wing
struts is marked and struts are carefully glued at the spots marked and allowed
to dry overnight. At this stage the two windshields are cut from clear acetate
provided with the kit, these were somewhat thick and not so clear. Looking
hindsight I should have replaced with a fresh set made from thinner clear
acetate. These are then attached to the fuselage with white glue.
intake
which is painted black and serves to stop the see through effect between the
intake and cockpits. Fuselage is closed, wings separated carefully from runner
and sanded and lower wings inserted in fuselage slots. The same goes for the
tail planes. After reference to scale plans the position of fuselage and wing
struts is marked and struts are carefully glued at the spots marked and allowed
to dry overnight. At this stage the two windshields are cut from clear acetate
provided with the kit, these were somewhat thick and not so clear. Looking
hindsight I should have replaced with a fresh set made from thinner clear
acetate. These are then attached to the fuselage with white glue.
It was time
to drill holes for rigging at forward central fuselage and lower and upper wing
parts. There is little access to the forward rigging and tiny holes using 0.04mm
pin drill are best drilled before the upper wing is lowered on the struts.
Invisible thread is used for rigging. The wings are lowered and fixed on struts
and allowed time for the assembly to set. Wheel struts are fixed in place and
wheels with integral mudguards are inserted. In the end the tail wheel is added
and rigging carefully passed through pre-drilled holes, secured with super glue
and tiny amount of filler blanks the holes. These areas were sanded using wet
and dry.
| COLORS & MARKINGS |
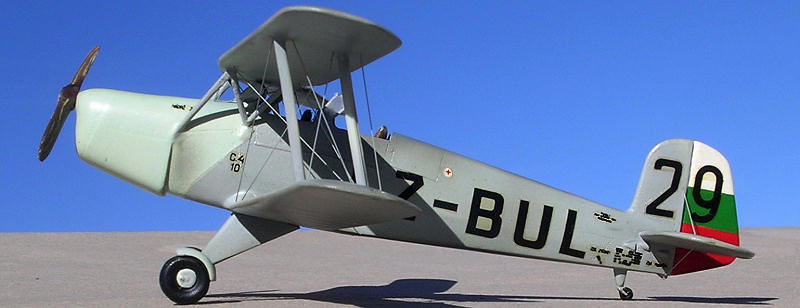
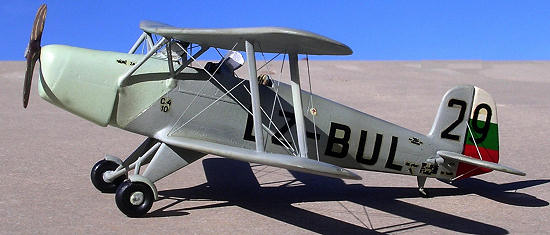
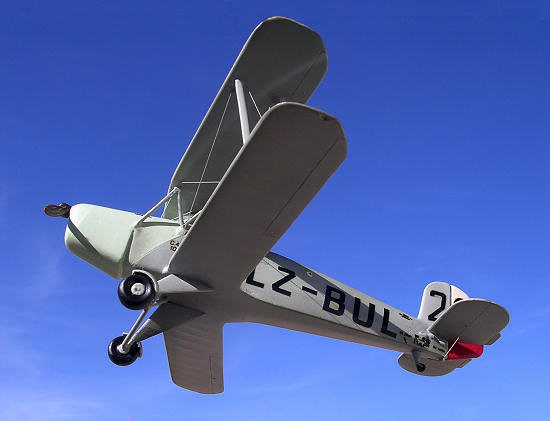
 With
windshields covered using Maskol, and the cockpit openings blanked with masking
tape the model had the nose cowling painted very pale blue. The rest of the kit
airbrushed in Humbrol RLM2. Rudder was painted in Bulgarian national colours.
Kit was given a coat of Klear and lettering decals configured registration from
spares box applied. First aid box decal and fuselage instructions at the rear
came from kit decals.
| CONCLUSIONS |
January 2011
If you would like your product reviewed fairly and quickly, please contact me or see other details in the Note to Contributors.