German Beaching Trolley
|
KIT #: |
- |
|
PRICE: |
Negligible |
|
DECALS: |
- |
|
REVIEWER: |
Carmel J. Attard |
|
NOTES: |
Materials required:
thin plastic card, metal wire, and wheels, sprue. |

 On
occasions I come across modelers who are keen on building float planes and when
they come to display the model, quite often, they either display it standing on
the twin floats or display standing on a makeshift bracketed stand which is
custom made but not quite the design appropriate for the type.
Some
model kits such as the Japanese Sairan and Pete come with an accurate beaching
trolley and so does the single float type Ro-43 by Pavla Models and in such a
cases no problem of this sort exist. Other models like the Fairey Swordfish and
Sea Fox, Bellanca Skyrocket, Arctic Auster, Supermarine S6B, these would only
require drilling a hole right through at the correct place at the side of each
float, where a shaft is inserted and a set of wheels are added on which the
aircraft can be safely manoeuvred at some parking spot on the beach.
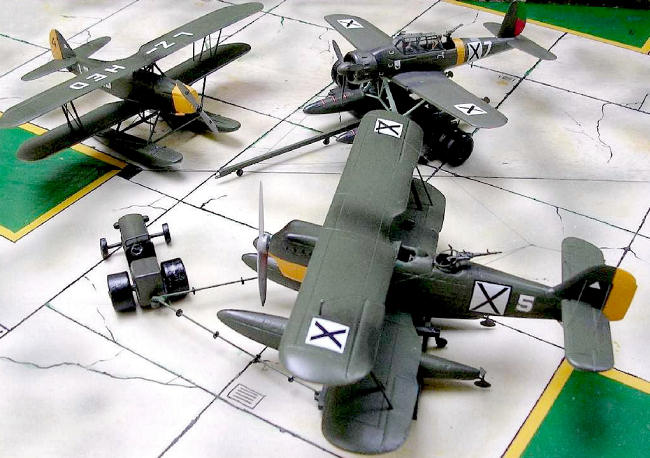
 Not
so can be said in the case of building models of German type of twin floatplanes
such as the Heinkel He-42, He-60, Arado 96, He-114 and Arado Ar-196 etc. etc.
Over the years I managed to find a solution to this situation involving these
types. I have managed to acquire a drawing of the type of beaching gear
involving the trolley used with additional proposal for a more sturdy type that
was used for the heavier floatplanes. The method of building these trolleys is
not beyond the reach of the many keen modelers in spite that they have to be
built from scratch. This is a relatively simple method that would certainly
yield satisfactory results. One of the trolleys which has a single bogie wheel
at the side was used for types as the He-42, He-51 and He-60 while another type
which was of a more robust construction had twin bogie to each side and was used
on Arado Ar-96 and Ar-196 types.
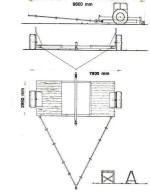
 Arrangement
drawing of the simple type of beaching trolley is shown. The dimensions are in
‘mm’. The simple way to adopt them to 1/72 scale is obviously by dividing the
dimensions by 72. The result will be the standard measured length of the
dimension on a printed drawing layout. This will be used for constructing the
part items required. The material required is a pair of A5 size white plastic
card sheets, a pair of 20mm diameter bogie wheels, a pair of metal paper pins, a
length of 1.5mm metal wire and a short thick sprue piece. Once a full set is
produced then the trolley can be constructed using liquid cement and /or super
glue where metal is used.
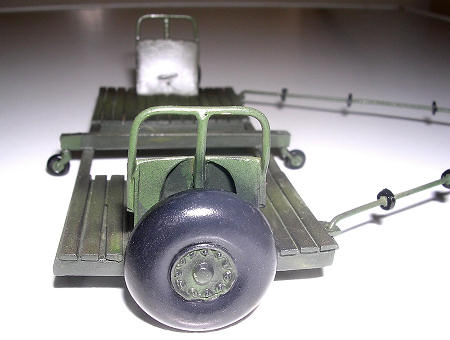
 The
main component is a rectangular piece of plastic card, which had a square, cut
space at the centre. Strips of plastic card are cut to suite a dimension that
now forms the planking on the sides of the blank areas on the rectangular base.
Two smaller pieces form the mudguards. These had two sides made on the shape of
a right angle triangle. Another shaped items are cut to form the outside face of
the mudguards adjacent to the wheels. A hole is drilled at the base of the
mudguard and a shaft is inserted to take the 20mm diameter wheels. Other
construction d
 etails
take the form of straight strips, which form the metal perimeter around the
trolley base. These were made in double, as the plastic thickness I used was
rather thin. The side metal frames fitted to the mudguards were made from metal
paper clips that seemed to offer the right thickness. These were bent to shape
and super glued in place. The long ‘Vee’ shaped metal pull strop was made from a
piece of wire with distance circular shaped pieces being constructed from cut
lengths of round sprue that were inserted at a distance apart. This apparently
held the tube away from the muddy floor. The end of the metal wire had a length
of 2mm bent down at 90 degrees. These will fit inside eyeholes located at two
front corners of the trolley. Segmented plastic strips formed a central beam and
at each end a smaller wheel added. These were tail wheels acquired from the
spares box.
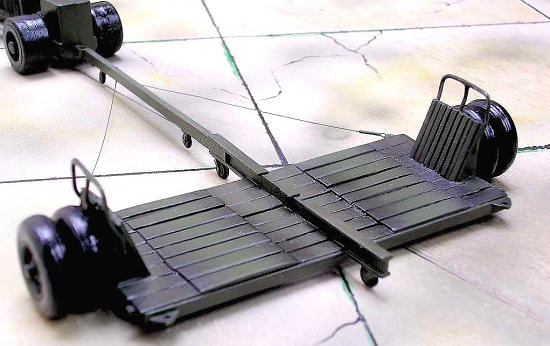
 A
more sturdy type of beaching trolley can also be constructed using same
dimensions with the difference that the robust construction had additional
planking at the base and also had a pair of wheels added at each side and the
trolley was pulled from a central beam of
‘I’ section as shown in the
drawing. A thin wire inserted in eyeholes at two corners of the trolley served
to keep the beam from swaying to one side when trolley is driven at tight
corners. The central beam also had 4 smaller wheels added which will serve to
hold the trolley level. A tractor model that I located in a Hasegawa Emily
flying boat appeared to fit the shape of tractor used with these types of
trolleys.
Having assembled all the pieces together
the beaching gear is painted in shades of olive green simulating discolouring at
the area where the floats rest, possibly adding some wear and tear at this area.
For those who build
to a larger scale of 1/48, the same method is used with the difference being in
using thicker plastic card and other material sections, size of wheels etc.
Having
scratch built these pair of floats with satisfactory results one may now study
other large flying boats when beached and observe the type of trolley being
used. Careful examination may open scope for more research to be carried out so
that other trolleys designs can be built for specific types of float and
seaplanes.
Luftwaffe Seaplanes 1939-1945 by Chris Goss and
Bernd Rauchbach
Carmel J. Attard
November 2011
If you would like your product reviewed fairly and fairly quickly, please contact the editor or see other details in the
Note to
Contributors.
Back to the Main Page
Back to the Review Index Page


 Arrangement
drawing of the simple type of beaching trolley is shown. The dimensions are in
‘mm’. The simple way to adopt them to 1/72 scale is obviously by dividing the
dimensions by 72. The result will be the standard measured length of the
dimension on a printed drawing layout. This will be used for constructing the
part items required. The material required is a pair of A5 size white plastic
card sheets, a pair of 20mm diameter bogie wheels, a pair of metal paper pins, a
length of 1.5mm metal wire and a short thick sprue piece. Once a full set is
produced then the trolley can be constructed using liquid cement and /or super
glue where metal is used.
 etails
take the form of straight strips, which form the metal perimeter around the
trolley base. These were made in double, as the plastic thickness I used was
rather thin. The side metal frames fitted to the mudguards were made from metal
paper clips that seemed to offer the right thickness. These were bent to shape
and super glued in place. The long ‘Vee’ shaped metal pull strop was made from a
piece of wire with distance circular shaped pieces being constructed from cut
lengths of round sprue that were inserted at a distance apart. This apparently
held the tube away from the muddy floor. The end of the metal wire had a length
of 2mm bent down at 90 degrees. These will fit inside eyeholes located at two
front corners of the trolley. Segmented plastic strips formed a central beam and
at each end a smaller wheel added. These were tail wheels acquired from the
spares box.