Eduard 1/48 Bf-108B
|
KIT # |
8052 |
|
PRICE: |
$24.95 |
|
DECALS: |
Two Aircraft |
|
REVIEWER: |
|
|
NOTES: |

|
BACKGROUND |
For a nice history of the plane and a look in the box, please visit the preview.
|
CONSTRUCTION |
 Like the P-39 before it,
Eduard's Bf-108 is well-engineered. I only found one area of difficulty in
construction; if you follow these steps, you'll bring your model together with a
minimum of fuss and bother.
1. Thin the interior sidewalls of the fuselage by about half.
2. Assemble the entire interior - including the engine to the firewall, the entire cockpit, and the upper rear bulkhead - before you attempt to put this in the fuselage.
3. Attach the completed interior assembly to the lower center section of the wing subassembly.
4. Attach the fuselage to this assembly one side at a time, carefully checking the fit. Glue the fuselage to the upper wing, and glue the fuselage halves together, but DO NOT glue the sidewall of the cockpit to the fuselage until the fuselage has been fitted over the interior and glued together.
5. Once all the above has been accomplished, glue the upper edge of the cockpit sidewall to the fuselage, and glue the rear bulkhead to the fuselage.
If you test-fitted everything while you were doing this, the model will go together with a minimum of "fiddling."
Once this was accomplished, I attached the horizontal stabilizers and their struts.
If you Futured the very clear canopy, you can assemble it in the closed position it is molded in without losing any ability to see the beautifully-detailed cockpit inside.
|
PAINT & DECALS |
 Painting:
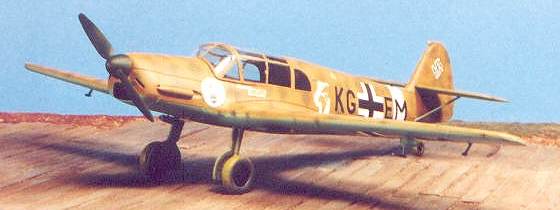
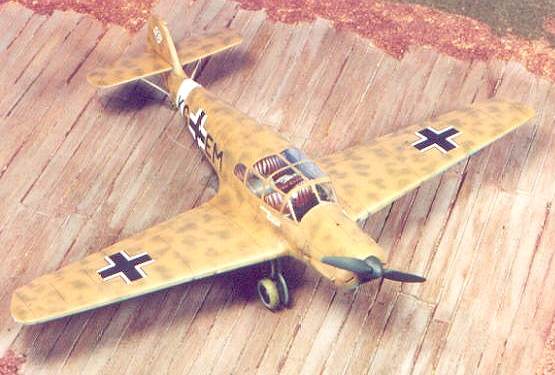
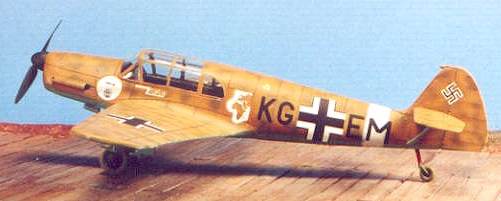
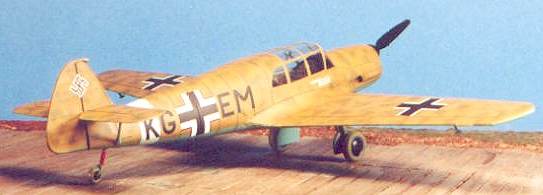
After pre-shading the model, I applied Gunze-Sanyo RLM65 Hellblau to the lower surfaces; the upper surfaces were painted with Gunze-Sanyo RLM79 "Sandy Brown," with splotches of Gunze-Sanyo RLM70 Schwarzgrun. When all was dry, I applied a coat of Future.
Decals:
I used the Eduard kit decals for the desert-painted airplane, which went down easily under a coat of Micro-Sol.
|
FINAL FINISH |
 This particular
airplane is well-documented in the Monogram "Luftwaffe Camouflage and Markings,
Volume 2." At the time it was photographed, it appears to have been relatively
newly-painted and not worn from service in North Africa yet. After I attached
the pitot tube and the aileron mass balances, I used Testor's Metalizer Aluminim
(non-buffing) and dry-brushed areas of scuffing on the wing and the leading
edges of the flying surfaces. I created exhaust staining on the lower fuselage
with Tamiya "Smoke." When all this was done, I applied two coats of thinned
Testors Dullcote, and the model was finished.
This is one of the nicest kits I have seen in a long time, and fully establishes Eduard as one of the "big three" quality-wise in kit production. Any modeler of average ability can create an outstanding model with this kit.
|
CONCLUSIONS |
This is one of those kits I would buy even if I didn't like the airplane modeled as much as I do, just because of the quality of the kit. At US$29.95, this represents excellent value for money.
Copyright ModelingMadness.com
Thanks to Eduard for providing this review copy.

If you would like your product reviewed fairly and fairly quickly, please contact the editor or see other details in the Note to Contributors.
Back to Reviews Page 2020