Italeri 1/48 Hs-123
|
KIT #: |
2632 |
|
PRICE: |
€20.00 |
|
DECALS: |
Five options |
|
REVIEWER: |
Spiros Pendedekas |
|
NOTES: |
ESCI tooling |

The Henschel Hs
123 was a single-seat biplane dive bomber and close-support attack
aircraft flown by the German Luftwaffe during the Spanish Civil War and
the early to midpoint of World War II. It proved to be robust, durable
and effective especially in severe conditions. It continued to see
front-line service until 1944, only to be withdrawn due to a lack of
serviceable airframes and spare parts (production ended in 1940).
 This
is the well-known 1977 Esci mold of this important plane. Apart from the
2003 AMtech release, which was beefed up with some nice resin casts, the kit
has been reissued another 10 times ever since (recently by Italeri, but also
by Tamiya and Revell in the past) with different decals but no change in the
molds whatsoever.
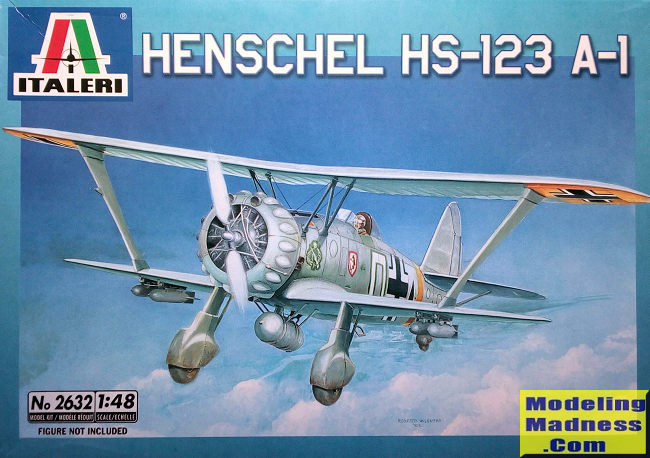
My kit was the Italeri 2004 edition, coming in a top opening not that strong
box (something that has changed, as Italeri kits come in very good quality
boxes nowadays), with a nice box art depicting a machine in “winter white”
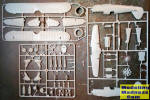
camo. Upon opening the box, I was greeted with three light gray sprues
bagged together. Molding seems pretty good with little flash, seemingly the
molds holding up well through the years. Detail is mostly raised and
acceptably done, as is the fabric representation, with correct looking
“ribbing” and nice fabric texture: if you (unlike me) are careful during
assembly and preserve these areas, they will look good under a (light) coat
of paint.
Cockpit is average, including a floor with molded-on pedals, seat, stick,
sidewalls with molded-on details and a flat instrument panel onto which a
decal is to be affixed. You will most probably wish to beef up that open
cockpit, especially if you decide to pose open one or both of the side entry
hatches.
The engine is adequately represented with pushrods and molded-on spark plug
wires, with the two-bladed prop looking good. The cowling is provided in two
halves (front and rear) being split between the distinctive bulges, meaning
that some filling and sanding job might arise there upon joining. The
characteristic nose twin guns are molded together with the top cover,
looking passable. The landing gear spats look acceptable, but the tire
thread pattern looks tad overdone, some sanding-down might not harm there!
An external tank is provided, with the bracings looking off scale and too
rectangular, the same being true for the foot pegs. Four bombs are also
suplied, with equal average looking pylons, to be attached under the wings.
The tiny windscreen is on the thick side and with some scratches witnessed,
since it was floating around unprotected with the rest of the sprues.
Instructions are very nicely done in pamphlet style, including a short
history at the front, a sprue parts list, with the not complicated
construction spread in six clear steps with color callouts everywhere that
are needed.
F ive
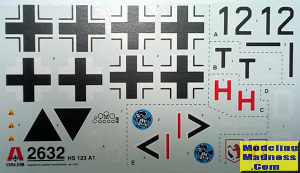
schemes are provided, all Luftwaffe ones. The first is an early style
splinter of brown/gray/green (RLM 61/62/63) over light blue (RLM65), based
in France in 1940. The next three are machines based in the Russian front
during 1941-42: two of them are in RLM70 over RLM65, with one wearing yellow
fuselage and underside wingtip bands, the third one featuring “winter” camo,
wearing a splinter RLM70/71 over 65 with yellow bands which was over painted
with white soluble distemper. Fifth option is a machine assigned to the
“Balkans” theater in 1941, wearing the standard splinter RLM70/71 over 65
camo with yellow cowling and rudder. Decals are superbly printed by
Zanchetti- Bucchinasco.
Instructions want you to first assemble the cockpit and trap it between the
fuselage halves. The rear wheel is to be attached as well at this stage, but
it looks like it can be attached at later stages, should you prefer. Then
the top fuselage cover, exhausts and tail planes have to be attached,
followed by engine assembly which is then trapped in the cowling and affixed
in position.
Assembly of upper and lower wings is next, followed by attachment of the
lower wing, the windscreen, the headrest fairing and side entry doors, with
the latter able to be posed open or closed. The top wing with its supporting
struts and the prop are next attached. There is some rigging between the top
wing and the fuselage that is not mentioned in the instructions, which must
be accounted for beforehand (i.e. drilling the appropriate holes), should
you wish to depict.
Construction concludes with assembly and attachment of main landing gear,
drop tank and bombs, as well as attachment of the foot pegs, tail planes
supporting struts and engine lower air intake (seemingly leading to the oil
cooler).
GasPatch introduced their Hs123
quarter scale kits in 2017. They seem to be excellent, “modern” kits, moderately
priced, promising to deliver an accurate representation of this iconic plane. If
you want the best 1/48 Hs123, this is definitely the way to go.
This Italeri (ex-Esci), though old, is still an acceptable kit of this iconic
biplane, with seemingly correct general shape. Parts count is relatively low and
the molds seem to hold quite well, with construction seeming relatively simple
and straightforward. However, initial impressions might be deceptive, since both
our Editor and Drew Nix have built it in the past (with our Editor also having
built the nicely beefed-up AMtech version) and, by reading their reviews in
Modelingmadness archives, it became clear that, though buildable, this kit it is
definitely not among the easiest to build.
The kit is regularly reboxed by Italeri with excellent decals and offered at
roughly one third of the GasPatch kit price, which kind of makes it the cheaper,
simpler (but, possibly, more difficult to build) “alternate” option.
Happy modeling!
Spiros Pendedekas
January 2022
http://en.wikipedia.org
If you would like your product reviewed fairly and fairly quickly, please contact the editor or see other details in the
Note to
Contributors.
Back to the Main Page
Back to the Review
Index Page
Back to the Previews Index Page


 This
is the well-known 1977 Esci mold of this important plane. Apart from the
2003 AMtech release, which was beefed up with some nice resin casts, the kit
has been reissued another 10 times ever since (recently by Italeri, but also
by Tamiya and Revell in the past) with different decals but no change in the
molds whatsoever.
 ive
schemes are provided, all Luftwaffe ones. The first is an early style
splinter of brown/gray/green (RLM 61/62/63) over light blue (RLM65), based
in France in 1940. The next three are machines based in the Russian front
during 1941-42: two of them are in RLM70 over RLM65, with one wearing yellow
fuselage and underside wingtip bands, the third one featuring “winter” camo,
wearing a splinter RLM70/71 over 65 with yellow bands which was over painted
with white soluble distemper. Fifth option is a machine assigned to the
“Balkans” theater in 1941, wearing the standard splinter RLM70/71 over 65
camo with yellow cowling and rudder. Decals are superbly printed by
Zanchetti- Bucchinasco.