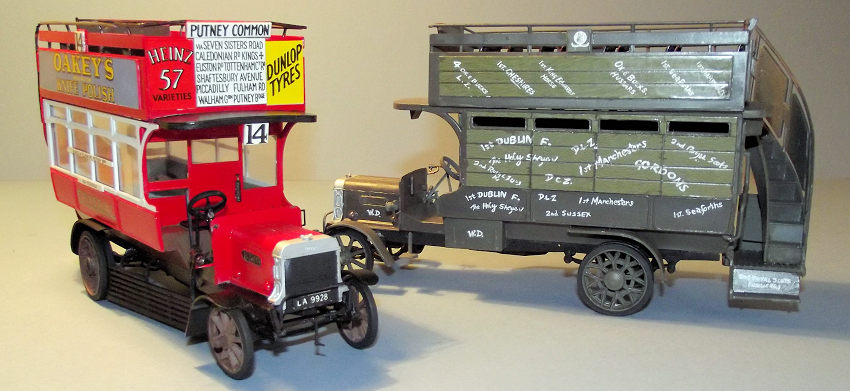
Airfix 1/32 WWI B type Bus
| KIT #: | A50163 |
| PRICE: | £25-00 |
| DECALS: | One option |
| REVIEWER: | Frank Reynolds |
| NOTES: |

| HISTORY |
 The
B type Bus was introduced in 1910 by the London General Omnibus Company
as a means of mass transport in the city. It was intended to be a
standardised mechanically propelled vehicle although it retained many of
the characteristics of the horse drawn buses that preceded it, such as a
coach built body of primarily wooden construction. They were built in
their hundreds in both single deck and double deck layout. A water
cooled 25hp engine powered a three speed gearbox linked the drive to the
rear axle.
With the B type providing efficient mass transport it was a natural choice to be called up by the military for use in the first industrial – scale war in history. During the Great War of 1914-18 the British established a sophisticated and complex logistics line to deliver tens of thousands of troops from their camps and training areas of Southern England via railways to ports on the South Coast, onto ferries for the short voyage to France and Belgium then to the railway systems of Western Europe. This final bus ride to the front was a common means of delivering the troops to the trenches.
| THE KIT |
When Airfix released a kit of a 1910 London Bus in 1962, few could have imagined that it would still be on sale in minimally modified form 55 years later. The kit was militarised in 1968 as a bus from the battlefields of the First World War, essentially by adding some military figures and cladding to protect the windows of the passenger saloon – just as the full size had gone into service.
A
tray and sleeve box contains parts trees that are typical of the1960s, not
the framed type of mouldings that are common today and although the plastic
was sealed into a vinyl bag, many parts had broken off the frames. It
consists of some 140 parts in pale blue-grey plastic with many areas of
flash, some very prominent ejector pin marks throughout and with part
numbers engraved on the m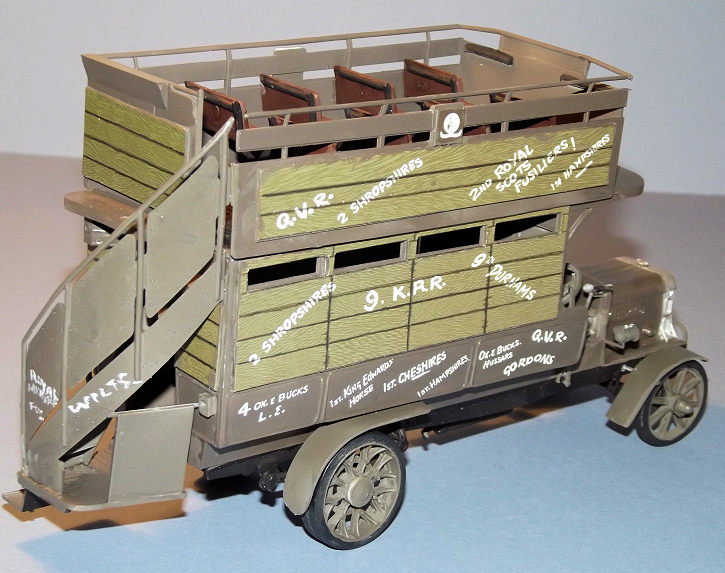 ajor
components. There is a small decal sheet to create some of the graffiti on
the body work and military serial numbers. The protective boarding around
the main bodywork is replicated by card panels from a pre-coloured die cut
sheet. Instructions are in grey scale with ten stages of exploded views and
a coloured painting guide linked to Humbrol paints.
The kit provides six military figures with an assortment of tools and weapons. Included, but not required for the build are the original’s civilian passengers, bus driver and conductor figures. Omitted from this boxing of the kit are the glazing and lower saloon roof lights which are not required for a military version. Sold as a gift set, the package includes ten small pots of Humbrol Acrylic paint, two nylon paint brushes and a small tube of glue.
On checking the contents I found that one of the parts trees had been duplicated and one was missing. I got great service from Airfix UK in the supply of replacement parts which came through my door just four days after I sent them the email.
| CONSTRUCTION |
This started a straight from the box build, with no aftermarket products. I chose it as a fun build and a break from aircraft modelling. Trawling the web produces much advice as to what is “wrong” with this kit and how to update it, for those who feel the need. Shortly after its purchase I was given a mint and boxed edition of the basic bus kit, a re-release dating from 1979, so I embarked on a dual build.
T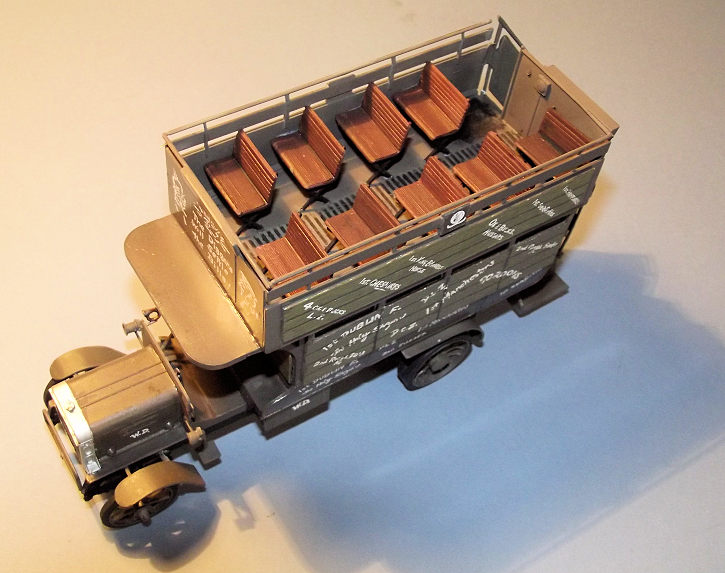 his
is old tooling, so virtually every part had to be trimmed to remove flash or
surface ridges caused by slippage in the moulds. There was a mass of ejector
pin marks; so many that I gave up any thought of dealing with them all and
contented myself with filling or rubbing down the largest ones on the
exterior of the bus. I could see that a number of the parts were warped and
twisted, so I looked to build up sub-assemblies that could be taped or
clamped straight while the glue dried.
The lower saloon of the main body is formed as a bathtub floor platform with four panels to form the front, rear and sides. I left the seats to one side to be added later in the build and sloshed EMA Plastic Weld along the corner and lower joints of the cabin, then taped the joints until they set. The roof, which also acts as the floor of the upper deck, was dry fitted to act as a jig until everything had set. I added the plank - like driver’s seat shelf at this stage. I had also recognised that the parts were going to get a lot of handling at the initial build stage, with all of the trimming and taping up, so there would be no painting until the main sub-assemblies had been completed.
The next sub assembly was the engine and the driver’s compartment. The engine hood and sides were assembled around the one piece radiator housing and this box structure glued onto the bulkhead, with the driver’s floor added to its rear face.
Once the engine assembly and lower saloon had set overnight, the saloon roof/upper deck floor was retrieved and the four sides of the upper deck glued in place. I now had two empty boxes for the passenger accommodation.
 The
upper deck seats were assembled as handed pairs with their outside edge
support frames and set aside for later in the build.
The chassis could not be built as a sub assembly since the cross members were moulded into the underside of the lower saloon floor bath tub. The long chassis side members could be aligned straight and true by gluing under the bath tub but the forward extensions projecting under the driver’s floor and engine were twisted slightly and could only be straightened after an overnight wait when the engine box assembly and driver’s floor could be glued to the upper edges of the chassis and to the front of the saloon body to provide a strong self-aligned assembly. The fittings to the driver’s position would be added later.
After another overnight wait the suspension leaf springs were glued in place, followed by the minimal underside detailing, consisting of three under pans and the transmission parts followed by a simple drive shaft, fly wheel and rear axle/ gear box. There is no detail provided for the engine compartment.
The upper and lower bodywork boxes were sprayed in grey auto primer from a rattle can, then finished overall in an airbrushed coat of Tamiya XF51 Khaki Green. The sideways facing seats for the lower deck were painted in XF26 Dark Green. With some careful masking the chassis was sprayed in XF-1 Black.
The previously assembled upper deck seats were painted in XF-10 Red Brown and their support legs Black, then they were added to the upper deck.
The driver’s cockpit details were glued into place , comprising the steering wheel and pedals, bulb horn and two fire extinguishers. It is helpful to fit these before the overhang of the upper deck gets in the way.
Fitting the card “board” cladding was achieved by pressing out the pre-cut
panels and fixing them to backing sheets of 5thou plastic card with double
sided tape. Those to the lower deck were sprayed Khaki Green on the rear
faces that would show inside the saloon. The military version of the kit has
no glazing for the saloon area and no ceiling lights – I guess that such
features would have been deleted by the military so as to make the vehicle
Soldier Proof. The definition of the joints between the cladd ing
boards was improved by scoring along them with an HB pencil held against a
straight edge, then the panels glued in place using Revell Contacta cement.
The small sheet of decals provided some graffiti to the lower body sides and
entrance step. I added two hand painted bits of graffiti in small tribute to
two of my ancestors who served respectively in the Munster and Wiltshire
Regiments. There is a marked contrast in colour finish between the acrylic
painted plastic parts and the printed card, so I tried to persuade myself
that the coach built bodywork of the would have a different colour tone from
the rough hewn boards over the window openings.
After some test fitting and fettling, the upper deck assembly was glued to the lower saloon and the whole body assembly left aside for a week to thoroughly set. Attaching the stairs proved to be the most difficult part of the build since the parts were twisted. The staircase and rear access platform were built up as a separate unit, painted and then glued in place. I found it best to align the upper edge of the stairs against the main body and then adjust the fit where the lower platform tucks under the lower passenger saloon. It was still necessary to insert some small plastic card packing pieces around the upper and lower sections of the stairs to close up any gaps.
Paintwork was touched in where necessary and the exterior sprayed in Xtracrylix Satin varnish to seal the decals and the card cladding. The radiator housing was painted in XF-16 Flat Aluminium and the grille in Black.The remaining parts were added, consisting of the side step to the driver’s cab, running lights and framework around the radiator. Wheels were finished in Khaki with the tyres in XF-85 Rubber Black.
| COLORS & MARKINGS |
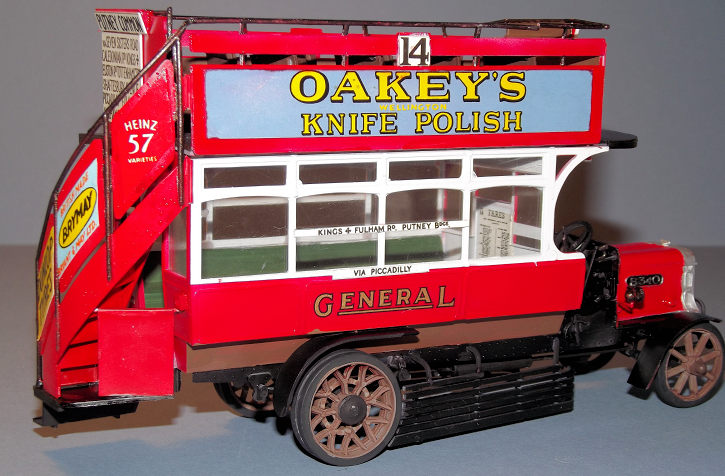
This 1979 moulding of the kit is supplied in an eye watering bright red, rather brittle, plastic and requires the use of the plastic windows and safety guards to the lower chassis sides. The standard of moulding was a little crisper than that of the 21st century pressing with a little less flash, but some warped parts were evident and some flash needed to be trimmed away. It was surprising to find that the older moldings had many more ejector pin marks than the later version
 The old
instruction sheet was of newsprint style and unfolded to a whopping 17” x
17” sheet and its period pictogram style an interesting comparison with its
modern equivalent. I followed the same method of building major box
structures as sub-assemblies.
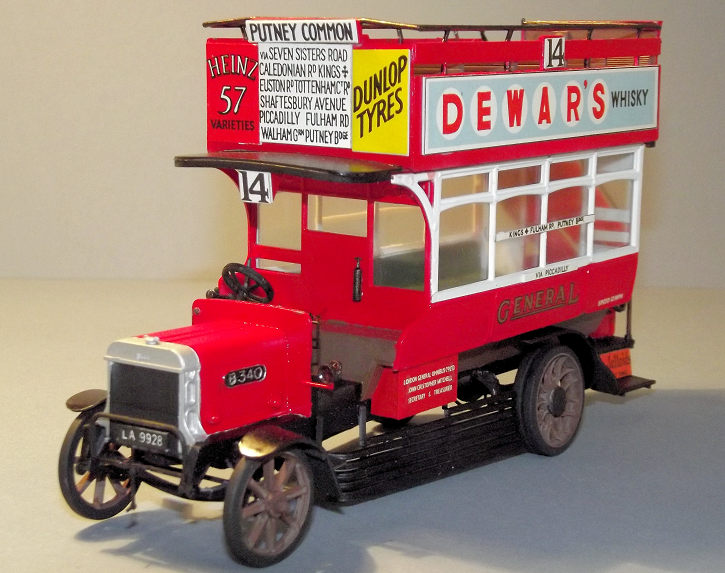
The painting was considerably more complicated than the military version since the body work was mainly Red (Tamiya XF-7) with the areas around the lower saloon glazing in White (XF-2). The lower areas of the main body tub and the interior of the upper deck were Red Brown (XF-10) and the chassis and running gear Black (XF-1).
I followed the same method of construction as the military version by building the lower body box with attached chassis and the separate upper floor box. The paint scheme was complicated by the shocking red of the plastic, so all of the parts were first primed in Grey auto primer for a rattle can, then all sprayed White using Tamiya Fine Surface primer. The areas that were to remain white were masked off with Tamiya tape and the Red areas finished in Tamiya XF-1 Flat Red. The Red Brown areas of the upper floors and lower body sides were hand painted using the good old fashioned brush technique.
A sheet of coloured
paper stickers is provided for the main advertisements to the bodywork. I
was unsure as to which glue would fix paper direct to painted plastic so I
attempted to bypass the problem. Each subject was cut out and fixed to a
sheet of 5thou plastic card using double sided tape, then carefully cut out
again using a steel straight edge and a fresh scalpel blade. The plastic
backed advertisements were glued in place using Revell Contacta cement which
allows some scope for juggling the fit be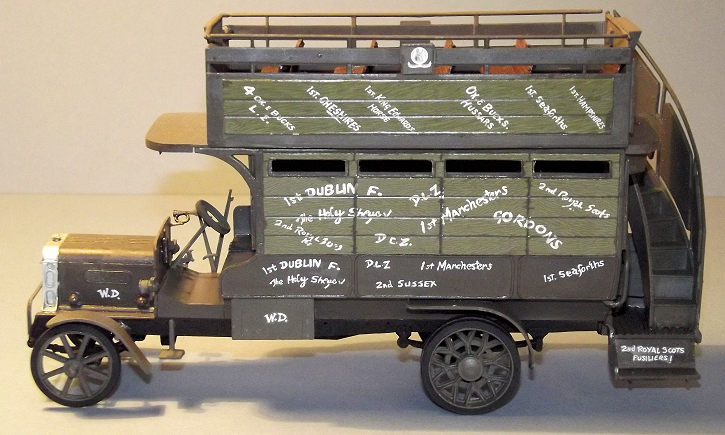 fore
the glue sets.
A small decal sheet is provided for the gold lettering to the body sides and small information stencils. I was pessimistic about the old decals being usable and asked Airfix if they had any replacements. They were unable to help, so I gave the 38 year old decal sheet a couple of hand brushed coats of Future/Klear varnish and was pleased to find that they went on just fine. The clear plastic internal ceiling lights and lower saloon glazing were fixed in place with Humbrol ClearFix.
As with the military version, the driver’s cockpit details were glued into place, comprising the steering wheel and pedals, bulb horn and two fire extinguishers, all painted Black with a light dry brush of grey to try and lift the details slightly.
The staircase and rear platform were assembled and painted separately and adorned with paper advertisements fixed down with double sided tape and sealed with a couple of hand brushed coats of Future/Klear.
Finishing followed the pattern set by the military version, but adding the distinctive side fenders that served to deflect the unwary form being flung under the rear wheels. They required careful alignment on their rather flimsy mounting brackets
| CONCLUSIONS |
The price of this kit varies between vendors, according to my limited research. Airfix was offering it direct from its website for £31-99, which is their standard price in the UK for a Series 5 kit. I paid £25-00 at my LHS for a kit that had been in stock for a while and preceded the recent price rise. £31-99 seems like a lot of money for an unmodernised vintage kit but I was reminded of context when I analyzed the example of the 1979 release of the slightly simpler civilian version. It was boxed as Series 6 in those days, so it might be argued that is now actually cheaper today! The inclusion of card and paper finishes in a kit that is on sale in the 21st century does not impress, when the inclusion of more decals and some minor retooling of the plastic would have given better results. It is a little annoying to find that some of the decorative touches are provided by decal and other by paper derivatives so there is an inevitable inconsistency in finish. The military bus version was packaged as a gift set, supplied with paint, brush and glue and presumably is intended as a simple introduction to the hobby. I have my doubts as to whether this clunky old collection of plastic is the best way of achieving this.
It is best not to expect too much of this kit. It belongs to a time when standards of accuracy were considerably more slack that they are today and the fit of parts leaves much to be desired.
There are not too many Military Bus kits on the market so this one might prove to be a pleasant diversion. I enjoyed making it but it would require work to stand comparison with state of the art modelling.
6 June 2017
Copyright ModelingMadness.com
If you would like your product reviewed fairly and fairly quickly, please contact the editor or see other details in the Note to Contributors.
Back to the Main Page Back to the Review Index Page Back to the Previews Index Page