
| KIT #: | 25005 |
| PRICE: | $75.00 SRP |
| DECALS: | One option |
| REVIEWER: | Mark Hiott |
| NOTES: | Resin & metal |

| HISTORY |
Frank Lockhart’s setting the 91 cubic inch class land speed record of 171.02 mph with his modified Miller 91 rear drive ultimately whetted his appetite for further speed records. Working with the brothers John and Zenas Weisel,as well as Myron Stevens, Floyd “Pop” Dreyer, and with financial backing of Fred Moscovics, President of The Stutz Motorcar Company. Lockhart began the design and construction of the Black Hawk int he Stutz factory building in Indianapolis with the intention of setting the world’s land speed.
When the Black Hawk emerged it was completely antithetical to the
LSR cars of the day. It was about half the usual size, and rather than a
large number of massive engines, it relied on a small engine that
 was built from
the blocks of two Miller 91s on a common crankcase. Upon completion, the car was
transported to Ormond Beach, Florida(near Daytona) and speed trials commenced.
After a few abortive attempts and a wreck in February of 1928 the car went back
to Indianapolis, was repaired and returned to Ormond Beach on April 20th, 1928
to try again. With few days of runs to sort the car out, Lockhart was ready
for a serious attempt on Wednesday April 25th. The first runs North and
South warmed up the car and at 7:32AM he made a third run south averaging
203.5mph. On the required return trip, 700 feet short of the timing wires, his
right rear tire blew. The car skidded, bounced, and flipped before coming to
rest 1000 feet down the course after ejecting Lockhart’s lifeless body.
AAA estimated he was traveling about 220 mph when the right wheel tire
blew. At the end of the first warm-up run, Lockhart locked the right
rear tire and skidded the car to a stop. It is thought that the skid caused
the tire to be cut, weakening the casing. Because the run wasn’t completed
Frank never actually set the LSR overall, but he did set the American
National Class D record (122-181cubic inches) and it stood for 45 years.
| THE KIT |
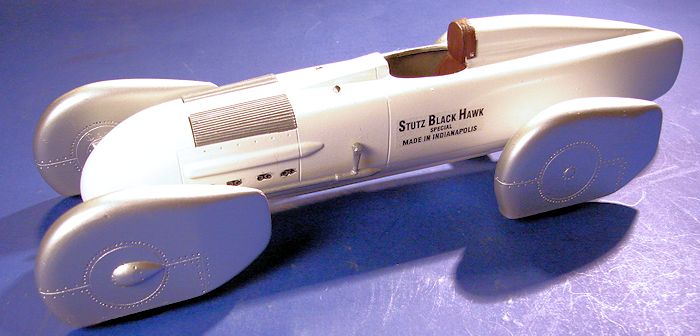
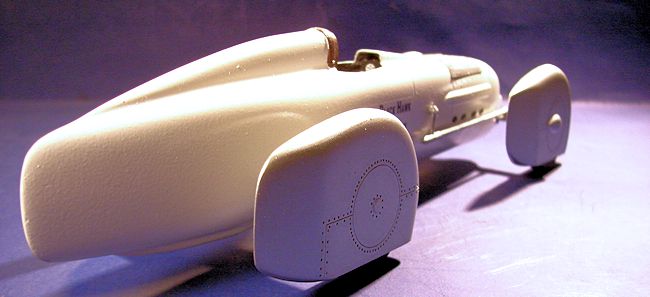 The kit consists of a 2 part resin body,
axles and wheel fairings with most of the smaller parts made out of white metal.
There are wires cast into the resin crossbars for the suspension which should
make for a sturdy model. The instructions are 8 pages with 12 construction
steps. They are well illustrated with in-progress photos of the kit. The parts
layout photos are a nice touch. "Stutz Blackhawk" decals are also included.
| CONSTRUCTION |
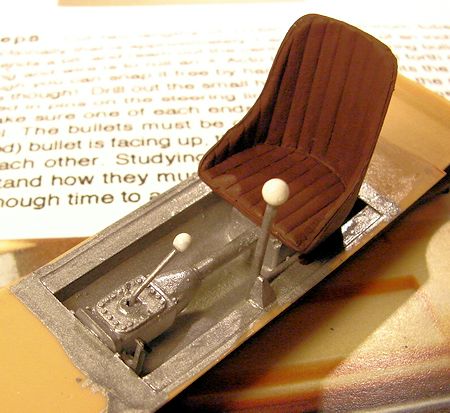 As with most auto kits, you start
with the interior. Not much here really, but it includes everything that was on
the real thing. I attached the pedals, transmission, shifter lever and brake
level and painted the cockpit as a whole. After painting, the seal was attached.
Test fit the lower pan and make sure you don't attach the seal too far back. It
should just touch the rear bulkhead.
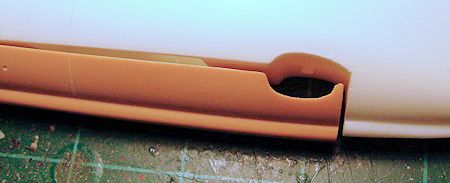
With the cockpit finished, I attached the belly pan. It was here that I ran into the only fit problems with the kit. The lower pan was too short. I could either line up the rear axle opening or the nose. I decided to cut the lower pan in an area that had no surface detail, attach the pan and then fill the resulting gap. The results were better then I expected. A bit of filler was required to make everything smooth.
 When attaching the axles, I found that careful
test fitting should be done before joining the upper body and the lower pan.
They mount to pins in the body and you want a good fit with these parts. I used
slow setting super glue to attach the axles and then set it up on the wheel
fairings to make sure everything was level. The openings around the axles are
normal, do not try to fill them in!
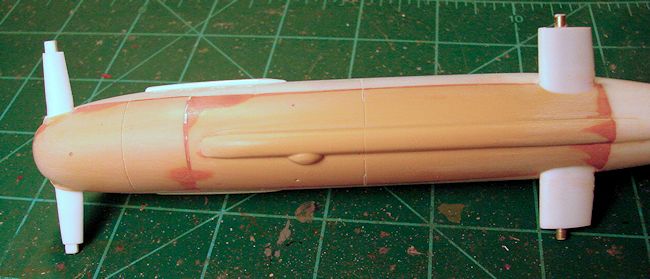 Once the axles were solid, I attached the front
steering linkage. Pay close attention when installing the linkage bullet ends.
They are different, front to rear, and the instructions point this out. I also
attached the intercoolers at this point. I attached the tires to the fairings
and then to the body after painting.
| COLORS & MARKINGS |
 Painting this one is pretty
easy; white and silver. The cockpit was painted MM Enamel Aluminum with white
details. The seat was painted Folk Art Acrylic Leather.
The body and axles were first assembled then painted with Krylon Gray primer and the shot with Krylon Gloss White. The body was then masked and the axles painted with MM Aluminum. This paint was also used on the fairings and steering linkage.
| CONCLUSIONS |
A simple multimedia kit that most anyone could handle. A small parts count with reasonable fit, this would make an excellent first multimedia kit for anyone.
| REFERENCES |
Wikipedia for the history
Photos from the internet
http://americanracingminiatures.com/
Mark Hiott
November 2015
Copyright ModelingMadness.com
If you would like your product reviewed fairly and fairly quickly, please contact the editor or see other details in the Note to Contributors.