AMT 1/25 1968 Road Runner
| KIT #: | 31549 |
| PRICE: | $15 or so |
| DECALS: | One Option |
| REVIEWER: | John Van Deusen |
| NOTES: | Reissue |

| HISTORY |
The Roadrunner was
 They
planned on making 2,500 but ended up with orders for 45,000!
A special engine was designed, a 383 V8 with 440
performance heads, special cam, manifold, air cleaner, and dual exhausts.
There was one option, which was the 426 Hemi.
To keep the
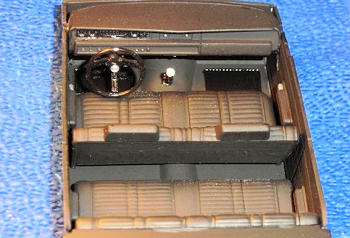
car affordable there wasnít much for options. You got a bench seat, three
colors of two-tone blue, silver and black and parchment and tan with a
custom dťcor package the colors went to eight choices.
What you really got was performance, four speed transmission or a torqueflite for the Hemi, 15 inch wheels for the Hemi and 14 inch for the 383, heavy duty suspension, large drum brakes or an option of front discs.
| THE KIT |
Yes,
it comes in a real box with a lid that lifts off! No end opening fiasco!
What you find when you open the box is plenty of sprues inside a plastic
sealed bag, molded in light gray with very little flash. The parts count is
just over 100 parts, maybe 115 tops. Also
 there is
a sprue with chrome parts, a smaller sprue with 4 clear window parts, You
get a small decal sheet with the necessary Roadrunner emblem for the front
doors, optional stripes, license plate and bumper stickers. The tires are
black rubber with raised lettering.
The
instructions contain a brief history of the car, basic tips and tools and
information for advanced builders. The sheet is an easy to follow large fold
out with exploded diagrams showing what part goes where. The parts are not
only numbered but also named and where necessary you are given color
suggestions. A nice touch!
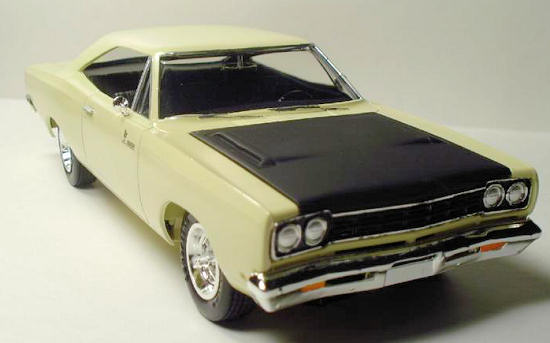
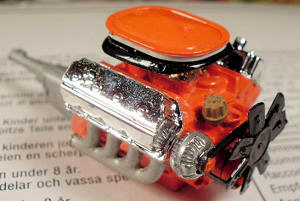
The body is molded one piece with a separated hood and multi piece chassis with separate suspension and exhaust parts. Also there is a nicely detailed interior assembly and not a one-piece tub. The only down side is the body is molded with the Hemi trunk lid so its not correct for the 383 engine. I have also been told the air cleaner is incorrect, my fix for that is keep the hood closed. The engine is suppose to be a 426 Hemi, looks it to me. The chrome wheels are OK but I wished they had included the dog dish hubcaps, which came stock with the car.
| CONSTRUCTION |
Step one
seemed to be a logical place to start. The engine was first. I assembled all
the basic parts that were the same color with the exception of the
transmission. The block was assembled, then the water pump, i ntake
manifold, cylinder heads then oil pan and transmission. When the glue dried
I then painted the entire assembly gloss orange with a wide brush. Next I
did the transmission aluminum, again brush painting and when done put a
tooth pick in the hole in the transmission then inserting the other end into
a block of modeling clay to hold it to dry. While that was drying I detail
painted the rest of the engine parts.
 When the
parts were dry I finished the engine and moved on. Next was the interior. I
assembled all the parts to be the same color similar to the engine assembly.
The seats, door interiors and floor were all assembled and sprayed flat
black. I then painted the dashboard and picked out the details, did the same
to the steering wheel. When all this was dry I added the dashboard to the
interior, added the shift lever and did my final detail painting of knobs
and handles that would be seen. Then it was time to paint the chassis prior
to assembling it, and since I planned to use the body color for the chassis
and engine compartment I did them all at the same time. While those parts
were drying, I did all the small parts for the chassis and engine
compartment.
After all the
body and chassis parts were dry I assembled the front end and engine
compartment, then dropped then engine in and added the battery, washer
bottle, radiator, horn and hoses. Now it was time to flip it over and
assemble the parts I had pre-painted, the front suspension and axles, then
the rear end, drive shaft, springs, shocks and exhaust. Here is where I
strayed from the instructions. Instead of assembling the body parts,
bumpers, lights, windows, I assembled the tires to the wheels and inserted
 them on
the axels and then glued the interior to the chassis. This I let sit for a
day, as I glue my wheels on. Itís a static model and whenever I moved the
cases I keep them in, they used roll and crash around. Insurance isnít
cheap!
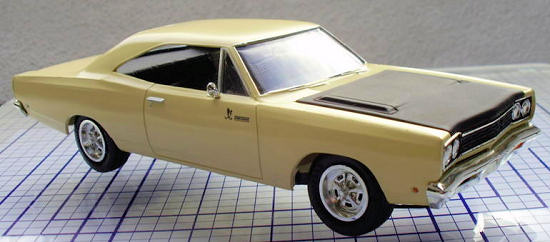
The home stretch, time to put the front grill and bumper on to the body, then glue the front and rear windshield and rear view mirror in, I leave the side windows out, rolled down, so you can see inside easier. That and I am just a tad lazy. Next you pry the body apart at the bottom and gently fit it over the chassis. With this done the rear bumper is added then the fiddly little bits, mirrors, tailpipe extenders. Lastly I paint the trim, marker lights, parking lights, taillights, door handles and door locks. Add the Roadrunner decals and you are done!
| COLORS & MARKINGS |
 Most
of my painting is pretty simple, as I have no airbrush.
For the body
and chassis I used Model Master custom lacquer (Phoenician Yellow) in the
rattle can. I let it set in a bowl of hot water for five minutes. It goes on
smooth, dries fast and gives you a semi-gloss sheen. If you want a high
gloss you can use Testors gloss coat over your color for a super wet look.
All other painting is pretty much acrylic. Most of my acrylics are Model Master but I have been experimenting with Tamiya, which doesnít seem to want to brush paint as well as Model Master. A neat trick I found for taillights is to paint them silver then when dry paint over them with clear red. Thatís all I do now for position lights on my wing things.
| CONCLUSIONS |
This was a fun and fairly accurate kit. It has
very few flaws, which are not really noticeable and can be fixed easily. I
definitely will build this again and add a few aftermarket pieces to make it
truly a stock build. Very highly reco mmended,
where else are you going to get a Roadrunner for under $50,000?
| REFERENCES |
December 2009
If you would like your product reviewed fairly and quickly, please contact me or see other details in the Note to Contributors.