Khee-Kha 1/72 Fairchild F.71
|
KIT #: |
? |
|
PRICE: |
$31.00 including the resin floats |
|
DECALS: |
None with the base kit |
|
REVIEWER: |
Carmel J. Attard |
|
NOTES: |
Vacuform and resin kit. Decals extra. |
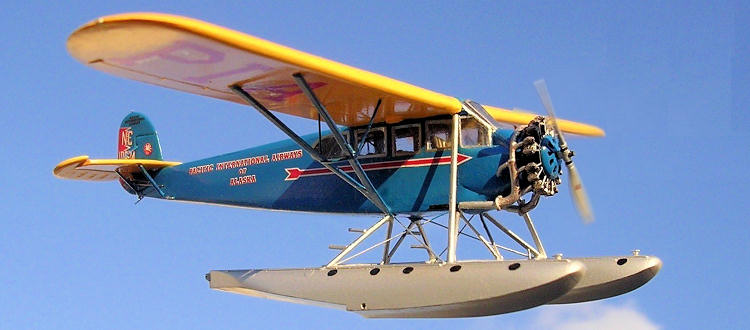
The
Fairchild model 71 was a direct development of the FC-1/FC-2W2 series produced
from 1928 through 1930. Intended as a 7-seat passenger and utility transport
bush plane, the model 71 also serves in the US Army Air Corps as the YF-1 photo-
reconnaissance and aerial survey platform as was adopted like its predecessor
FC-1.
Throughout
the 1930s the model 71 earned a reputation as a rugged and reliable bush plane
on wheels, skis and floats, particularly in Alaska and Canada where a few
continued to serve into the 50s. Typical example of the F-71 on wheels was
NC-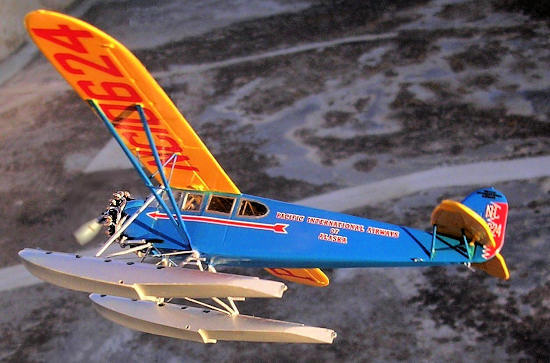 153H ‘Yucon’ flown by Joe Crossom for Alaska Airways, which participated in
the famous joint Russian-US Canada search for Colonel Carl Ben Eielson in winter
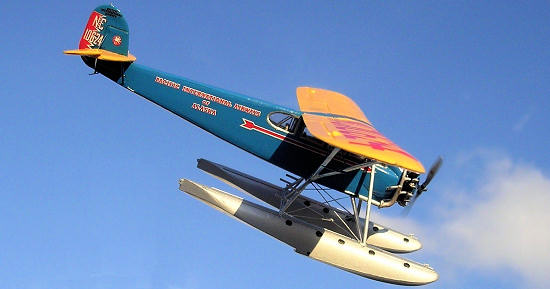
1929. Another Fairchild 71, this time on floats NC10624 that was built in 1929
and operated by Pacific International Airways in 1931 and 1932 then with Pacific
Alaska Airways.
An
FC-2W2 on skis was G-Carm of 1935 which had a dark blue fuselage, center
section, vertical tail; red / red orange wings and horizontal tail surfaces;
white and yellow lettering. Another F71 was NC142H also registered in June 1929.
This aircraft was confiscated from a fur smuggler and sold to Nick Bez of Alaska
Southern Airways while still fairly new. Named ‘Pribilof’, it replaced the
Leoning Commuter operated out of
Cordova,
Alaska
by pilot Alex Holden. In late 1934 Nick Bez sold Alaska Southern Airways to Pan
Am’s Pacific Alaska Airways. Soon after
PAA
sold off their F71 fleet and NC142H went to Percy Hubbard of Service Airways in
Fairbanks.
While with Service Airways, 142H participated in the Aerial Volcano Exhibition
lead by Percy’s brother Bernard, the ‘Glacier Priest’.
On 3rd
September 1935 Percy and 2 observers were searching for a missing Service
Airways Stinson with pilot and 3 passengers in the Chena River Canyon when ‘Pribilof’s’
engine quit. All three in the Fairchild survived the crash landing in the wood
but the F71 caught fire and was a total loss. Those in the missing Stinson were
not so lucky. The F71 probably had red wings and tail surfaces, black engine,
nose and numbers, possibly cream or silver fuselage, red or black lightning
bolt.
Floats same as NC10624.
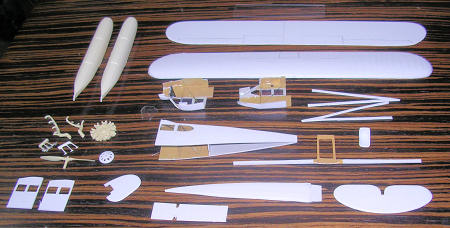 The Fairchild F71 is
a vac-form type kit molded in white acetate with cream colored resin detail
parts and other accessories, resin
Edo
floats bought extra. The kit has options for a wheel type, ski or floats. A
simple and accurate windscreen is provided in clear acetate. The instructions
come in A4 size fourteen pages was among the most comprehensive and detailed
type I ever came across which makes a fairly difficult building task into a
somewhat a simple one full of useful ideas and recommendations. Full merits go
to Mr. Lars Opland and Co of Wasilla for the preparations of so much information
and drawings. The instructions contain side views of various F71 liveries;
detailed drawings of F71 with float installation, strut angles for Edo J-53000
and Ya-6470 floats. Suggestions are also given to adopt your own set of floats
by modifying a set of retrieved floats from the Frog/Novo Blackburn Shark kit.
There is ample of cabin strut interior detail and seating arrangement,
instrument panel, engine assembly detail, wing assembly detail and accurate 1/72
scale plans complete with fuselage sections at 8 separate stations.
 Fuselage and wing
halves, tail plane parts and fin and rudder parts are all marked and carefully
scored just like any vac-form type of kit construction. Being a small aircraft,
process looks simple but certainly requires continual attention not to over
score or does excessive filing when shaping the aperture of the fuselage side
windows. Nevertheless, one of the beauties of styrene is that anything that has
ben cut too short can be made larger again with some scrap and little liquid
cement. A helpful hint is NEVER use tube glue with this soft styrene. The
instructions has several helpful building hints, such as use of clear tape to
mask around areas needing filler to protect windows and surface detail, engraved
panel lines, upper fuselage fabric etc.
 Mating
surfaces of forward and upper rear fuselage, wing halves etc and crank area
cover are sanded until thickness of backing sheet is removed. A medium grit sand
paper was used. An inside-out loop of masking tape is used to hold small parts
during sanding since they are difficult to push around. Extra attention was
needed to achieving sharp trailing edges on wing and tail surfaces. There were
areas at the lower of front of cockpit that required sharpening at the corners
by using stretch sprue. Wing spars were cut at the upper fuselage using the
existing spar/bulkhead unit as pattern. Double-checking of dihedral and depth
from plans and wing parts. Assembling the square section fuselage also required
frequent checking with the drawing provided. The cabin roof was detachable as
the correct height was to be4 achieved and turtle deck sanded to match. Using a
straight edge and exacto blade, the fuselage side panels are scored from top to
bottom at front edge of rear door. Forward section was then broken off and set
aside. In case one opts to build an FC-2W2 this will require filling in the rear
window outline, lowering the wing slightly and replacing the upper rear fuselage
decking with a peace of 0.04 plastic sheet.
Windows
had transparent panels. For these I used clear windowpanes cut and shaped from
clear acetate stiffeners retrieved from neck of newly bought shirts and styrene
from toothbrush boxes. Window apertures were first roughed out slightly
undersize, then carefully trim to final shape with a sharp exacto blade. No
liquid cement was used to fix the clear panels but simply applied Klear (Future)
sparingly and I was surprised at how clear and strong the complete windows were
after allowed to set.
 Interior
parts for seats were cut and assembled on a false floor. Interior was painted
cream with seats in brown leather. Fuselage interior stiffeners were added from
measured lengths of steel wire. These were visible from the clear windows and
therefore fixing at correct placing and angle was essential. Pilot seat and
instruments were added. Nose halves were joined and allowed to dry set. Once dry
roof panels are removed for correct wing height. Fuselage sides were then joined
to forward fuselage with tape, and test fit top and bottom panels and interior
components. Ensuring correct fit including window alignment, these were trimmed
as necessary before applying liquid cement. If one is building a cargo FC-2 as
used in bush service most or all passenger seats were often removed for cargo
hauling. At this stage the clear acetate front windscreen was cut and checked
for fit. Tail assembly was trimmed as per drawing allowing a rectangular see
through gap located under the tail plane root area. Resin engine was then added
to front of fuselage and exhaust mounting strut added to both sides. Reference
was made to photos of the F71 that I was building to alter slightly the exhaust
manifold issued with the kit. Exhaust systems varied from one aircraft to
another though they may have same type of engine.
Wing
parts were first separated into three sections by carefully scoring along panel
lines between fuel tanks. Scrap area from behind center fuel tank was removed.
This was clearly marked on the kit part itself. Windscreen transparency was then
test fitted
 in conjunction with the wing center section. This was then aligned
and glued in place using a small amount of white glue. Holes for tail fin
surface rigging were drilled, then checked and fitted vertical fin and rudder
unit to the fuselage.
Assembly
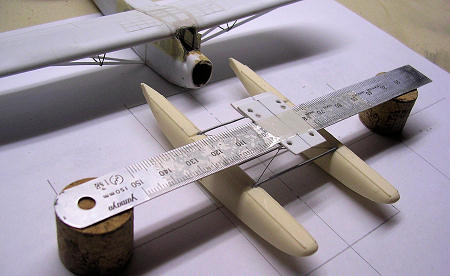
struts for the
Edo
floats was scratch built from Contrail struts, which were measured and cut to
size indicated on kit instructions. The resin floats themselves had a hole
drilled through on the sides. A removal pin forming the shaft for a set of
wheels was fitted in each float. These were detachable so that the kit is
displayed with or without the beaching gear. Tail and intermediate wing struts
were all installed in place as well as tail bracing wires. Model was then set on
a jig made of hardboard ready to receive the complete float assembly. The height
of both wing tips was checked. Being a floatplane this had to be perfectly equal
heights, i.e. there is no room of adjusting the height of one tip by adjusting
the amount of “air pressure” if it was the case involving tires with an emery
board. Other small details like doorsteps, control horns, cables, and wing tip
lights, door handles were added at this stage. Adjustment to the exhaust system
was made beyond the manifold part provided in resin.
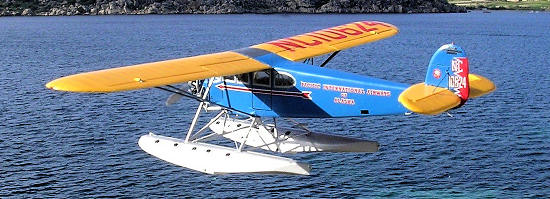
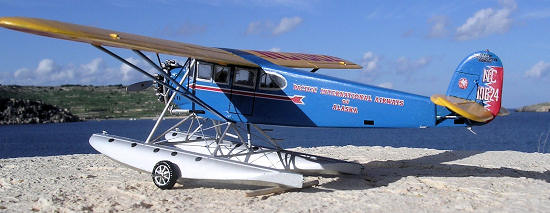 Fuselage was
airbrushed dark blue, wings and horizontal stabilizers yellow. The propeller,
floats and wing, floats and struts were painted with a mix of aluminum and 10%
clear lacquer. Engine was black with touches of red brown. Hole covers and bow
bumpers of floats were black. Gloss Humbrol paint was used throughout. Model was
sealed in an overall coat of Klear and decals applied. Pacific International
Airways of Alaska livery decals came from Arctic Decals also issued by Khee-Kha
Art Products. These adhered very well with no handling difficulties during
application. Kit was finally sealed in an overall uniform coat of semi gloss
Model Master lacquer.
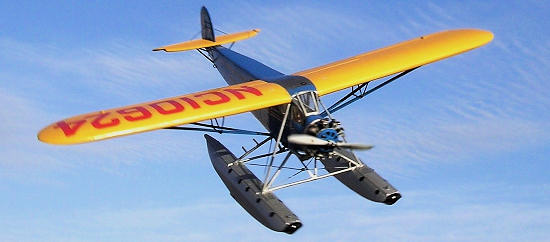 This was a classic
model and the third in a series that I made from the Khee-Kha range. Once you
build one you want to do the whole set. Primarily recommended for those who have
a taste for vac-form type of models, and as one may notice these are of a unique
category of once popular classic range of aircraft types. I recommend making a
start on one for a change from routine injection molded kits. In all these
respects they are all the more authentic and the result is very rewarding. The
Fairchild F.71 remains one of the types that adorned the US/Canada skies during
the 20s and 30s and certainly brings happy memories to many early aircraft
spotters across the American continent.
Khee-Kha
F.71kit instructions.
Carmel J. Attard
September 2011
If you would like your product reviewed fairly and fairly quickly, please contact the editor or see other details in the
Note to
Contributors.
Back to the Main Page
Back to the Review
Index Page


 153H ‘Yucon’ flown by Joe Crossom for Alaska Airways, which participated in
the famous joint Russian-US Canada search for Colonel Carl Ben Eielson in winter
1929. Another Fairchild 71, this time on floats NC10624 that was built in 1929
and operated by Pacific International Airways in 1931 and 1932 then with Pacific
Alaska Airways.
  The Fairchild F71 is
a vac-form type kit molded in white acetate with cream colored resin detail
parts and other accessories, resin
  Fuselage and wing
halves, tail plane parts and fin and rudder parts are all marked and carefully
scored just like any vac-form type of kit construction. Being a small aircraft,
process looks simple but certainly requires continual attention not to over
score or does excessive filing when shaping the aperture of the fuselage side
windows. Nevertheless, one of the beauties of styrene is that anything that has
ben cut too short can be made larger again with some scrap and little liquid
cement. A helpful hint is NEVER use tube glue with this soft styrene. The
instructions has several helpful building hints, such as use of clear tape to
mask around areas needing filler to protect windows and surface detail, engraved
panel lines, upper fuselage fabric etc.

 in conjunction with the wing center section. This was then aligned
and glued in place using a small amount of white glue. Holes for tail fin
surface rigging were drilled, then checked and fitted vertical fin and rudder
unit to the fuselage.
 Fuselage was
airbrushed dark blue, wings and horizontal stabilizers yellow. The propeller,
floats and wing, floats and struts were painted with a mix of aluminum and 10%
clear lacquer. Engine was black with touches of red brown. Hole covers and bow
bumpers of floats were black. Gloss Humbrol paint was used throughout. Model was
sealed in an overall coat of Klear and decals applied. Pacific International
Airways of Alaska livery decals came from Arctic Decals also issued by Khee-Kha
Art Products. These adhered very well with no handling difficulties during
application. Kit was finally sealed in an overall uniform coat of semi gloss
Model Master lacquer.
 This was a classic
model and the third in a series that I made from the Khee-Kha range. Once you
build one you want to do the whole set. Primarily recommended for those who have
a taste for vac-form type of models, and as one may notice these are of a unique
category of once popular classic range of aircraft types. I recommend making a
start on one for a change from routine injection molded kits. In all these
respects they are all the more authentic and the result is very rewarding. The
Fairchild F.71 remains one of the types that adorned the US/Canada skies during
the 20s and 30s and certainly brings happy memories to many early aircraft
spotters across the American continent.