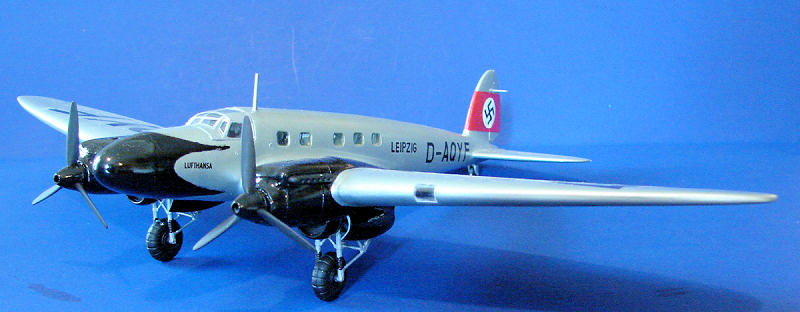
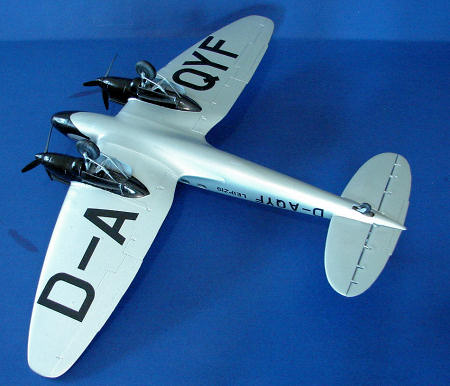
Roden 1/72 He-111C “Lufthansa”
| KIT #: | 009 |
| PRICE: | About $30.00 when new |
| DECALS: | One option |
| REVIEWER: | Mark Hiott |
| NOTES: | Poor fit, interesting subject |

| HISTORY |
In
the mid-1930's the political situation in
 The
summer of 1936 saw the beginning of the assembly of six pre-production planes,
which received the designation He 111C-0. By the end of 1936 all six C-0's had
been built, each aircraft received its own name:
After being used for a short time on local routes, DLH declared that the He-111C
was too expensive, and not economical. The He-111C program was cancelled and all
six pre-production C-planes were passed on to the "Prestigious Routes"
Berlin-Hanover-Amsterdam, Berlin-Nuremberg-Munich, and Cologne-Dortmund-Berlin.
Later on He 111C-01 and He 111C-05 were used as special courier planes in the
Just
after the invasion of
| THE KIT |
Molded in a light gray plastic, there is some flash on a few parts, but nothing
major. The smaller parts are delicately molded and have good detail. Most of the
ejector pin marks are located in areas that should
 be easy
to take of. Decals look good, but more on that later. The cockpit glass has part
of the fuselage molded with it so blending it in should not be too bad. A full
set of clear parts is included so I suppose it might be possible to build a
bomber version if you were up to it.
The instructions are very well done and include a parts list and a 3-view. The last page includes a color listing for Humbrol, Model Masters, Aeromaster, Tamiya, Gunze Sangyo and Revell. It gives you the number of the paint, but not the name. The assembly steps are well drawn and consist of 25 steps.
| CONSTRUCTION |
Oh
my… where to start. There is not one part of this kit that didn’t need cutting,
trimming, grinding, bending, hammering or modifying in some way. The first thing
you’ll notice is that the passenger compartment flooring is too wide. I ended up
tossing it out. During the test fitting I also discovered the cockpit glass is
too wide without the flooring installed. BUT, it fits the fuselage if
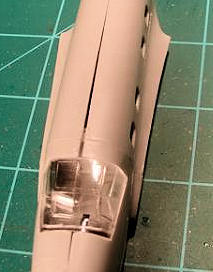 you do
install the flooring! What I ended up doing was installing the cockpit and parts
D10, D11 and B32. I left out all the passenger parts and part D12. The kit
includes a separate nose for the civil version. I attached these to the fuselage
before gluing it together. This will help minimize the seam between the fuselage
parts. I then glued the rear of the fuselage together and allowed it to dry
thoroughly. Next, I pinched the front of the fuselage down to fit the nose cone,
glued the front of the fuselage and attached the nosecone.
 The resulting gap in the fuselage was about 1/8in wide. Several applications of
filler were required to close the gap. If you’re careful, you can save most of
the fuselage detail. The fuselage has a separate lower center section; care
fitting this part will save you some time filling later.
Moving on to the wings, I found they fit worse then the fuselage! I deviated
from the instructions and assembled the wheel wells and installed them without
the landing gear. I did use the wells as jigs to assemble the gear, but did not
attach them yet. Be aware that the wells are left and right. The wheel wells
will need to be trimmed to fit, otherwise they keep the wing halves from fitting
together properly. I ended up test fitting the wheel wells, then removing them
and gluing the wing halves together. I then slid the wells in through the engine
openings. Roden molded the control surfaces of the wings with the
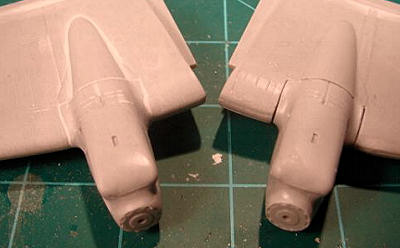 bottom
part. After gluing the wing halves together, you are left with a very large gap
between the 2 parts. Again, several applications of filler are required to get a
decent seam. Losing detail here can’t be avoided.
On
to the engines, but bring that filler along kiddies! Take care here as the
engines are left and right handed. The engines themselves fit together rather well, but that’s about it. Test fitting
to the wings reveals more gaps. There is also a fairing that is installed behind
the engines that will need blending in. I left the oil coolers and exhausts off
the engines until later in assembly to make filling and sanding easier. I also
installed the engines to the wings before installing the wings to the fuselage
for the same reason.
On to putting it all together, yep, grab that filler! There are locating tabs for the wings, but I had to modify them to get the wings to fit properly. I also ended up adding shims of plastic card to make sure the wings have the correct dihedral. I messed up on that part, but didn’t notice until it was too late. My starboard wing sits a bit higher then the port one. Of course, after fitting the wings, there are gaps you will need to fill. At this point I applied a coat of gray primer and checked for flaws. There were a few to say the least.
| COLORS & MARKINGS |
Even
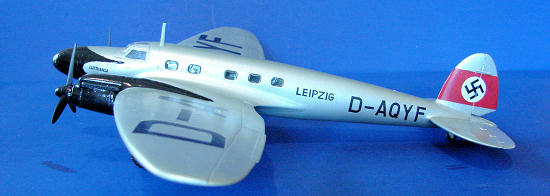
this didn’t go well. The model was painted with Model Master German Aluminum and
Gloss Black. I lightly sanded the gray
 primer
and sprayed the silver first. When I sprayed the first coat of silver, it went
on shiny but dried grainy. I sanded that down and reshot the silver. It was
better, but still not quite right. I then masked off the silver and sprayed the
gloss black. I sprayed the nose, but hand painted the black nose flashes. I also
managed to put a nice freaking scratch on one wing cutting the masking! After
painting I installed the landing gear. It was a bit of a tight fit, but I
managed to get them in without breaking anything.
I
started decaling with the small “
After decaling was done, I installed the propellers, exhausts and the various
other bits. I used Krystal Klear for the passenger windows.
| CONCLUSIONS |
 What can
I say; this kit’s a pig. There is no way around that. I’ve heard people call
this kit “The Rodent” and it fits. The fit is terrible, the parts breakdown is
odd and the decals are crap. You’ll need a case of filler and a box of
sandpaper. I have seen very few of these kit built, now I know why.
Having said that, the level of detail is good and I like the final result. It
takes a
| REFERENCES |
 Just some
photos
Instructions for the history
September 2009
Copyright ModelingMadness.com. All rights reserved.
If you would like your product reviewed fairly and fairly quickly, please contact the editor or see other details in the Note to Contributors. 2021