
| KIT #: | H-142 |
| PRICE: | $30.00 from auction site. Kit long OOP |
| DECALS: | One option, United Airlines |
| REVIEWER: | Mark Hiott |
| NOTES: |
Runway 30 ONA
Bicentennial, Draw Decals wing "Coroguard" and fuselage window decals
used |

| HISTORY |
 In the post-World
War II era,
In 1952,
Douglas remained the most successful of the commercial aircraft manufacturers.
They had almost 300 orders on hand for the piston-engined DC-6 and its
successor, the DC-7, which had yet to fly and was still two years away from
commercial service. The De Havilland Comet disasters, and the consequent airline
lack of interest in jets, seemed to demonstrate the wisdom of their staying with
propeller-driven aircraft.
The DC-8 was
officially announced in July 1955. Four versions were offered to begin with, all
based on the same 150-foot-6-inch (45.87 m) long airframe with a 141-foot-1-inch
(43.00 m) wingspan, but varying in engines and fuel capacity, and with maximum
weights of about 120–130 tons (109–118 tonnes). The maiden flight was planned
for December 1957, with entry into revenue service in 1959. Well aware that they
were lagging behind Boeing, Douglas began a major push to market the product.
The DC-8
entered service with Delta Air Lines on September 18, 1959 with United entering
service later the same day. By March 1960 Douglas had reached their planned
production rate of eight DC-8s a month. Despite the large number of DC-8 early
models available, all used the same basic airframe, differing only in engines,
weights and details. In contrast, Boeing's rival 707 range offered several
fuselage lengths and two wingspans: the original 144-foot (44 m) 707-120, a
135-foot (41 m) version that sacrificed space to gain longer range, and the
stretched 707-320, which at 153 feet (47 m) overall had 10 feet (3.0 m) more
cabin space than the DC-8. Douglas' refusal to offer different fuselage sizes
made it less adaptable and forced Delta and United to look elsewhere for
short/medium range types. Delta ordered Convair 880s but United went for the
newly developed lightweight 707-020 but prevailed on Boeing to rename the new
variant the "720" in case people thought they were dissatisfied with the DC-8.
Significantly, Pan Am never reordered the DC-8 and Douglas gradually lost market
share to Boeing. After an excellent start, 1962 DC-8 sales dropped to just 26,
followed by 21 in 1963 and 14 in '64, and most of these were for the Jet Trader
rather than the more prestigious passenger versions. In 1967, Douglas merged
with McDonnell Aircraft Corporation to become McDonnell Douglas.
 On August
21, 1961 a Douglas DC-8 broke the sound barrier at Mach 1.012
(660 mph/1,062 km/h) while in a controlled dive through 41,000 feet (12,497 m)
and maintained that speed, for 16 seconds. The flight was to collect data on a
new leading-edge design for the wing, and while doing so, this DC-8 became the
first civilian jet to make a supersonic flight. The aircraft was a DC-8-43 later
delivered to Canadian Pacific Air Lines as CF-CPG. The aircraft took off from
Edwards Air Force Base in California, and was accompanied to altitude by an
F-104 flown by Chuck Yeager
In April 1965,
Douglas announced belated fuselage stretches for the DC-8 with three new models
known as the Super Sixties. The DC-8 program had been in danger of
closing with fewer than 300 aircraft sold, but the Super Sixties brought fresh
life to it. By the time production ceased in 1972, 262 of the stretched DC-8s
had been made.
By 2002, of
the 556 DC-8s made, around 200 were still in commercial service in 2002,
including about 25 50-Series, 82 of the stretched 60-Series, and 96 out of the
110 re-engined 70-Series. Most of the surviving DC-8s are now used as
freighters. As of May 2009, 97 DC-8s were in service following
| THE KIT |
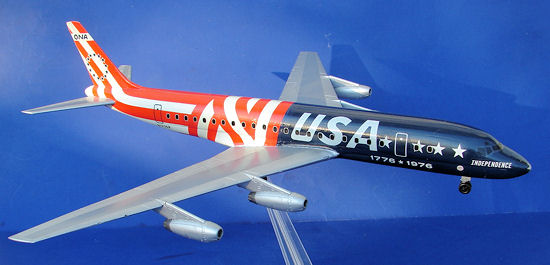 I'm not
sure when my particular kit was made, but I guess it was in the 60's. Long OOP,
I bought mine off Ebay and it came with 2 sets of extra "United" decals. Molded
in gray plastic, the parts are crisp and the model has decent detail. However,
the engines are a bit simplified.
The
decals look ok, but I didn't use them, so I have no idea how well they work. I
had previously bought 2 sets of the Runway 30 ONA decals and those are what I
used.
The
instructions are typical 60's Revell... a simple 2 page fold out with numbered
assembly steps. Color callouts are spaced throughout the instructions but are
generic colors.
The kit also includes one of those cool Revell stands which is a nice touch.
| CONSTRUCTION |
Construction
was fairly straight forward. The first thing I did was to glue the fuselage
halves together, install the fuselage doors and fill them, along with the
windows, with 3M Glazing and Spot putty. I intended to use the provided stand,
so I didn't add any weight to the nose. However, if the stand in not used, the
instructions tell you how much weight to add. The cockpit glass was installed
and it was also sanded over and filled in with the spot putty.
While the fuselage was drying, I assembled the wings and attached the engines.
| COLORS & MARKINGS |
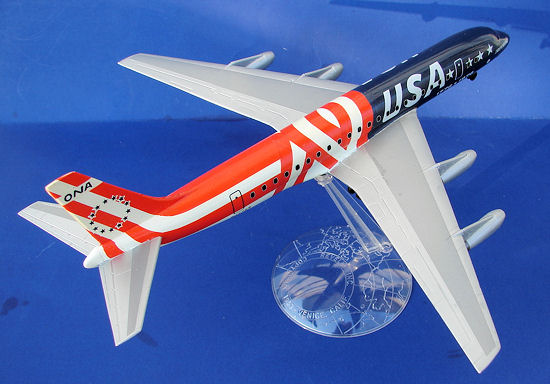
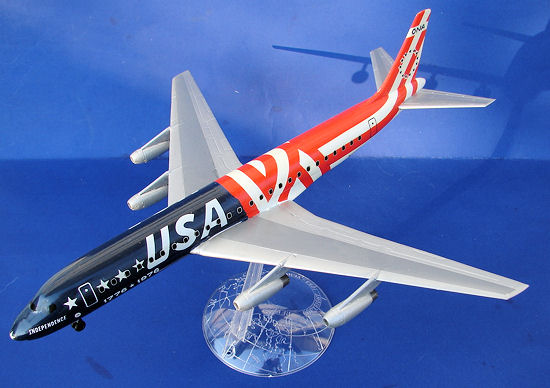
The
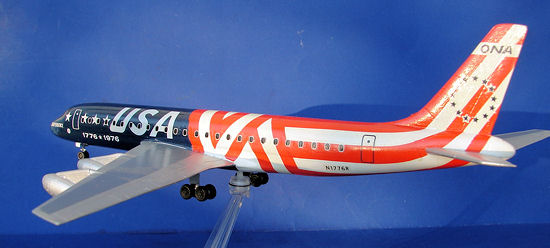
decals are the real reason I built this plane. When I first saw the ONA flag
scheme, I had to have one. Unfortunately, the decals turned out to be a letdown
and I'm REALLY glad I had acquired 2 sets of them.
The
first thing I did was paint the fuselage Krylon Bright White. I then copied a
decal sheet, cut it out, and used that as a template for the blue. I masked off
the back half of the fuselage and painted the nose Krylon Dark Blue. The wings a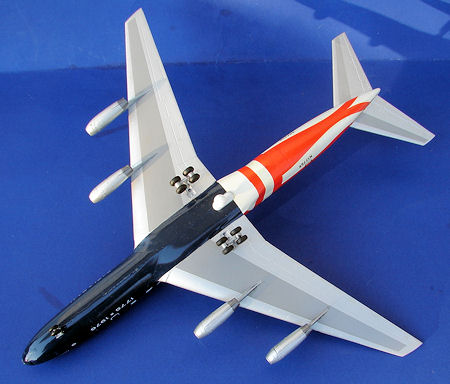 nd
engines were painted MM Aluminum. The engines exhausts were painted MM Gun
Metal.
Now
for the decals. Either I got the placement of my template wrong, or the decal
sheet itself is wrong, because when I went to test fit my copied decals, they
wouldn't fit! There should be a white line between the blue and the first red
stripe, but I had to move the first stripe forward to make the rest fit
properly. The first red stripe should pass over the 13th window on the
starboard side, but I had to put mine at the 12th window.
After the first stripe was in place, I again used my copies to mark out the
spacing for the remaining red stripes. It's a bit of a pain to get them all just
right, but with slow careful placement, I got them all where I thought they
should be. The stars on the tail fin are especially difficult, as they have to
match the clear star cutouts on the red stripes. The red stripes are translucent
and I had to double up on some of the stripes. (which you can see in a couple
places) Testors Bright Red in the small bottle was a good match for the stripes
though.
Once
the stripes were in place I added the window decals and the nose markings. The
silver windscreen outline decals were missing from my decal sheet, so I had to
use the black one.
I applied the wing Coroguard to the tops and bottoms of the wings before I attached the engines. However, when I did attached the engines, a bit of touchup was required around the pylons. The Draw Decals went down with no trouble, however the Runway 30 decals required setting solution to fit all the curves.
After decaling, the wings were press fitted to the fuse and the landing gear was
installed. Attaching the tailsurfaces completed the build.
| CONCLUSIONS |
While the overall impression is good, I was disappointed with the Runway 30
decals. They didn't fit properly and are too translucent. If I had to do it over
again, I would use the copies I made to lay out masking and just paint the red
stripes.
| REFERENCES |
 Wikipedia
for the history
The
'Net for photos
Builds done by others
Mark Hiott
December 2012
If you would like your product reviewed fairly and fairly quickly, please contact the editor or see other details in the Note to Contributors.