| KIT #: | ? |
| PRICE: |
£11.95 |
| DECALS: | Two Options |
| REVIEWER: | Carmel J. Attard |
| NOTES: | Cast in white metal |

| HISTORY |
Way back in 1929 the Comper
Aircraft Company was formed by Flight Lieutenant Nicholas Comper, formerly of
the Royal Air Force, to build an aircraft of his own design. The prototype
designated Comper CLA7, named Swift. The prototype made its first flight at
Brooklands on  hp
A.B.C. Scorpion piston engine. Following successful testing seven more swifts
were completed during 1930 each powered by a 50hp Salmson AD9 radial engine and
could attain a speed of 145 mph and a rate of climb of 1,400ft/minute. A trial
installation of a Pabjoy P prototype radial engine fitted on the 7th
of the production aircraft in preparation for an air race resulted in this unit
being chosen as the standard engine and most of the early construction Swifts
were re-engined subsequently with the Pabjoy R.
The price in 1932 was £550 and
standard items included altimeter, revolutions counter, oil and petrol gauges,
clock, map case and tools. A suitcase was engineered to fit in a space between
the firewall and the undercarriage. The locker incorporated into decking was
sufficient long enough to house a set of golf clubs.
No fewer than 8 Swifts took part
in the 1932 Kinds Cup Air Race, and those that survived the war carried on the
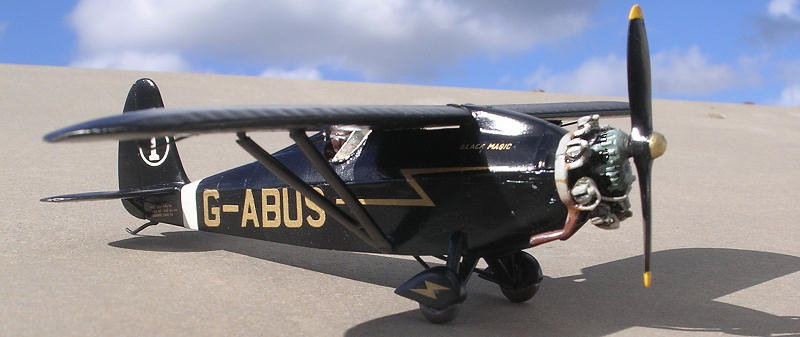
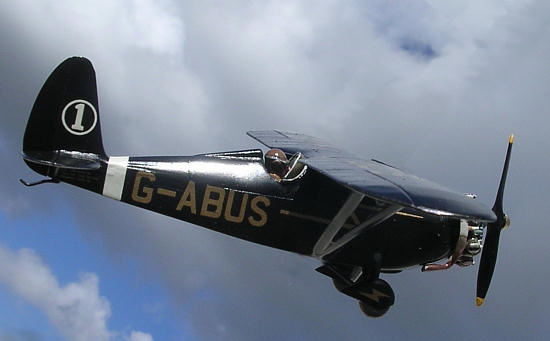
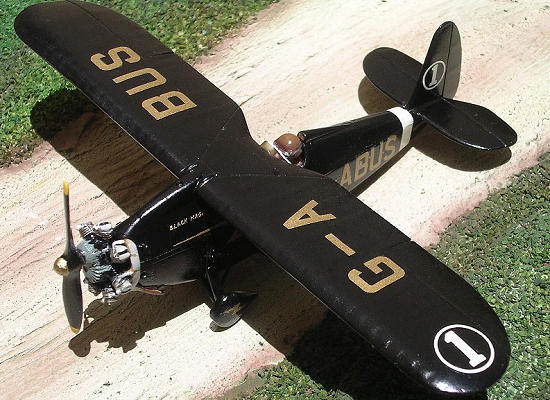
racing tradition, G-ABUS, the subject of this model attaining third place in the
1949 Kings Cup. Five swifts are still in existence including ‘BUS, and G-ABUU.
It is interesting to note that the longest lived Swift (G-ACTF) construction
number S32/9 and built in 1932, remained in the British civil aircraft register
in 1999 and form part of the Shuttleworth Trust collection at Bigelswade, Cambs,
UK. The Swift has folding wings which reduced its width to a mere eight feet and
led to the manufacturer’s claim that it could be housed in an ordinary car
lock-up.
| THE KIT |
 The
Comper Swift was among the early white metal kits released from LDM, which date
back to 1984. All the components are finely cast with minimal flash, having a
detailed instructions and a brace of exceptional decal sheet. The model is easy
to assemble and although there was no detail scale drawing from which to check,
it appears to be accurate with direct comparison to photographs and
measurements. The kit basically consists of 16 components all in white metal
with the exception of a clear acetate vac-formed windshield. Assembly
instructions are well detailed and small-scale plans indicate the position of
the decal items, mostly come in gold colour that retained its true shiny gold
with time.
| CONSTRUCTION |
Being a white metal scale model I
found that Cranoacrylate adhesive was the ideal glue to fix parts together. A
most perfect fit of parts after a general cleanup made he process of assembly an
easy one. The first stage was to paint the detailed cockpit, which contains a
small well-shape seat and/or the addition of a crew figure, which gives an
indication of the dainty design of the aircraft. There is little room for the
extra detailing and all that was required was a seat harness. I also added the
rudder bar but this was totally hidden when the figure was in place.
LDM exploded views shown in the
instructions are explicit and no problem was encountered during assembly.
Assembly commences with first attaching the undercarriage into lower fuselage,
install the crew seat with integrated rudder pedals,
 dashboard,
compass bin for which a decal sheet is provided besides that for instruments to
go on the dashboard. Having completed paintwork to the interior cockpit items,
the upper fuselage was clipped onto the lower one allowing the super glue to
cure. The wings were then lowered over the fuselage and the wing struts added. I
made use of fine gauge wire that was thinner than that which comes with the kit.
These fitted to the left hand strut that had two tiny holes to house the pitot
and static tubes. Also replaced control horns for ailerons. Fin and rudder part
was added making sure it was correctly aligned with the fuselage. The horizontal
fuselage seam required little filler, which was sanded, with little wet and dry
sanding. Tailskid was then cut, bent and attached into locating hole at rear of
fuselage.
Fitting the Pabjoy engine required
first drilling a 1.5mm diameter hole to take the shaft of the propeller. The
exhaust pipes were bent to conform the shape they show on photos, having an
octagon form kinks. Complete model was in the end washed, dried and airbrushed
in grey primer.
| COLORS & MARKINGS |
Kit was airbrushed in Humbrol
gloss black. A brush coat of Johnson’s Klear followed and was ready for water
slide decals as per
 drawing
reference. The seat was hand painted brown with buff seat straps to crew figure.
The vac form clear windshield was trimmed to fit and glued using white glue at
its base. A venturi was fitted in place to left hand side of fuselage. Propeller
was hand painted black with yellow tips. Pabjoy engine was light turquoise, and
manifold was copper colour with touches of silver and brown. The entire model
was finally given a coat of gloss lacquer.
| CONCLUSIONS |
Between wars light planes remain a little remote subject among modellers and one certainly make an authentic collection if encouraged to build simple light planes of this era many of which are of simple design that could be built from scratch. This was the second Swift I made, previous one was to scale of 1/72 (see MM archives) and if one wants to see the real Swift can go to the Shuttleworth Collection and be startled at the small size this racing plane was.
January 2011
If you would like your product reviewed fairly and quickly, please contact me or see other details in the Note to Contributors.