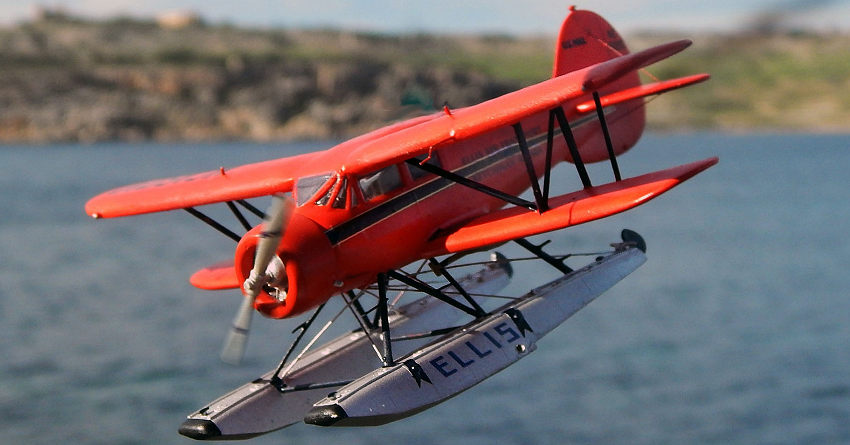
Khee-Kha 1/72 Waco YKS-6
| KIT #: | |
| PRICE: | $40.00 for all of it |
| DECALS: | One option |
| REVIEWER: | Carmel J. Attard |
| NOTES: | Vacuform with resin partsFive figures - Motorcycle not included |

| HISTORY |
Waco (Weaver Aircraft Company) produced many attractive and sporty biplanes in the period 1921 to 1942. For many enthusiasts the most handsome and recognizable of these were the series of 4-seat standard cabin biplane whose production began with the QDC in 1931.
Many of these found their way into bush service in Alaska and Canada. Export versions were sold to government and private owners overseas. The famous Long Range Desert Group employed two Wacos during WWII as supplies and liaison aircraft in North Africa. A single example of this cabin biplane was impressed into RAAF service in August 1942 as A54-1 an ex-Adastra Airways at Mascot NSW, besides other earlier owners. The A54-1 served with No3 Communication Flight at Mascot NSW.
 Due
to their utility, performance and all-around good looks, surviving examples tend
to be prized and well maintained. Earlier airframes differed only in details
like engines used, additional rear window area and extent of wing fairings.
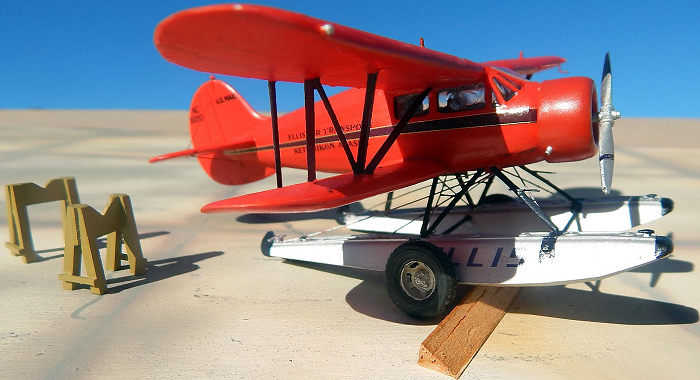
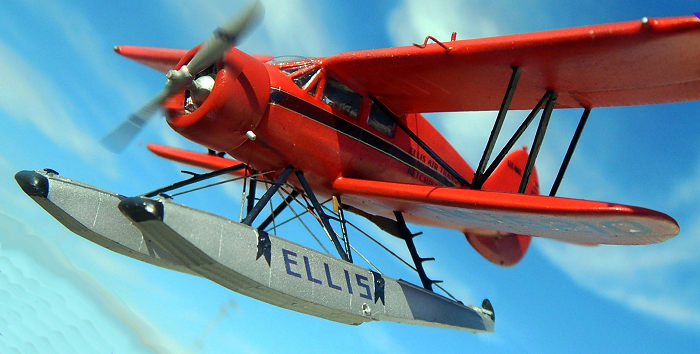
Way back in 1936 pioneer aviator Robert Ellis established the airline Ellis Air Transport, Ketchikan, Alaska, with a ingle Waco YKS-6 c/n 4417 float plane. In South East Alaska floatplanes were a big convenience. They were able to land in lakes close to town centre where supply stores and hospitals were. Ellis was one of few airlines in the world to operate from water exclusively. Ellis Air Transport was incorporated in 1940. During its service Ellis hauled mail, ice cream, consignment of cash, expectant mothers, hunters with gunshot wounds, tourists and all manner of other ‘payloads’. It was the lifeline to many people around the unusual geography of Southern Alaska..
After the attack of Pearl Harbour in 1941, Ellis Air Transport became part of the war effort. Ellis Air sold two Wacos, one Bellanca and one Stinson to the Navy for military use. Bob Ellis flew the Waco on anti submarine patrol out of Ketchikan. A hole was cut in the floor through which a 100lb bomb could be dropped. Also one rifle was carried. Other Wacos were used by the Civil Air Patrol on patrol duties along the coasts.
| THE KIT |
 Kit
comes sealed in a polythene bag. All parts are vac formed, produced in white
styrene to Khee Kha high standard of moulding. Two vac form windscreens are
included (one being spare) along with a clear acetate sheet for side windows.
The resin detail parts consists of two types of propeller blades, control wheel,
instrument with coming and a detailed radial engine, two floats comes as an
additional set complete with twin rudders, four tiny bollards and two rudder
tilt bars. An 8-page comprehensive instructions comes with the kit containing a
brief history, and in great detail how to go about building the model with least
effort, it suggests four side views in detail, and two sets of 1/72 scale plans
one depicting livery of Ellis Air Transport. More detail in color accompanies
the decal sheet of Arctic Brand of Finland. These contain history of the Ellis
Airline, and exact liveries of how these varied over the years so that one is
free to pick any one of the three appearing in full color.
| CONSTRUCTION |
Building the model is not different than any procedure described many times in connection with vac form kits and being so always requires more care when handling the delicate parts particularly when scoring, cutting and trimming the fuselage halves. No rush is needed and the more one progress with the cutting, sanding and detailing the model the more one wants to progress with the construction.
 Construction
start with cutting the parts forming the cabin floor, seating arrangement, the
cabin has a partition/bulkhead at back of passenger seats. The fuselage halves
are then cut and sanded to correct width so that when the resin instrument piece
is added this will accommodate in its place. Windows are cut using a hand drill
and then shaped with a pointed Exacto blade. Any over cutting can be repaired or
corrected using a piece from the backing sheet and use liquid cement. All
interior are painted mainly brown seats and gray surrounding walls and glued in
place to one half of the fuselage. Clear material is cut for the side windows.
These are then glued in place. Small tabs added to the inside edge will help to
guide mating the two fuselage halves together.
The kit has an option for the fin and rudder. If the float version is selected then the fin and rudder has to be replaced with another one of a larger area supplied with the set. Guides to take the top and bottom wings to fuselage are also cut and fitted in place. Instructions show these in detail. Cowling is also prepared so that it will take the pre-painted radial engine.
 The
wings and tail planes are cut and prepared and the respective halves glued
together. One may want to alter the angle of the ailerons or the elevators.
Fit-up of wings can be done at this stage. If one selects a land plane there are
parts for the wheels and their struts also in vac form. Fitting the ‘N’ struts
in their exact location needs to be done carefully with frequent checking and
measuring the scale plans as well as reference to photos on line which I found
to be of great help. Probably this is the most difficult stage but with some
attention the proper angles for these struts are attained.
As I chose to do the floatplane then next stage was to drill the side
holes that will take the struts between the floats to hold together. For struts
I used hypodermic needles of the right length. I have flattened these at centre.
I also cut measured pieces of these metal tubes to form the other struts that
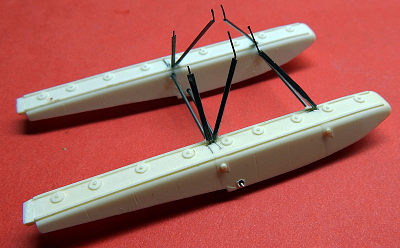 hold
the floats to the fuselage. In fact I passed a thin wire before I flat hammered
each of these struts. The extra-extended bit will be inserted in the exact
location hole pre drilled to the fuselage bottom. The floats pre assembly is now
brought to the completed fuselage and fixed using a tiny drop of super glue.
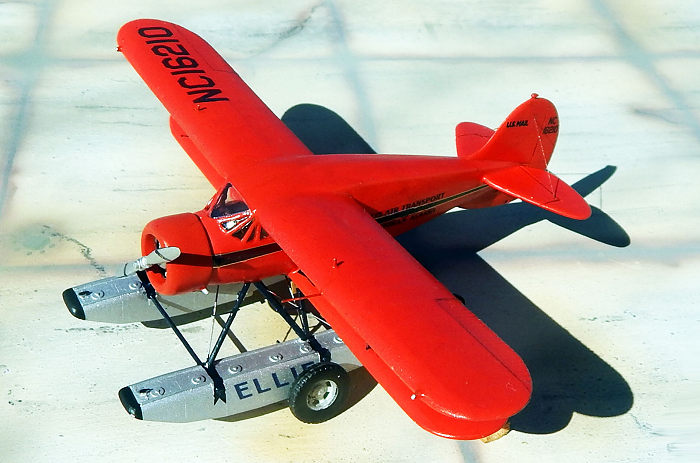
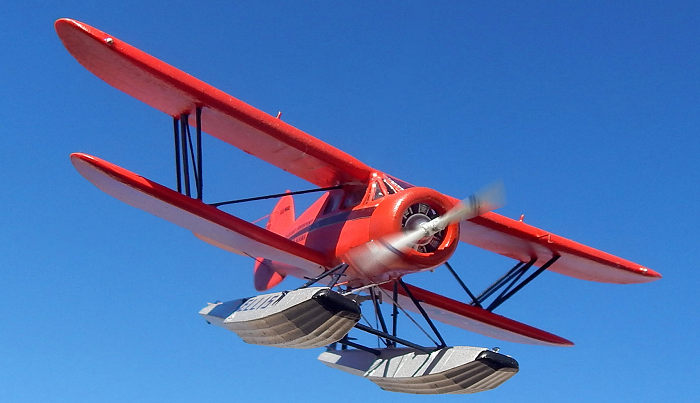
The windshield was trimmed to fit and installed. Then masked as were also the other windows glazing. A 15mm diameter disc was cut from kit scrap and sanded to fit in the rear 1/3 of the engine cowling. Then fitting the cowling in front ensuring correct alignment when checked from front and sides. With all the parts joined together it is then the turn to add connecting links or wires that turn the floats rudders. Tail and float struts are added as indicated in scale views. Whole plane sprayed overall vermilion red with dark blue wing struts and aluminium floats and float struts. Other detail added as per color views instructions. Ellis Air Transport decals ARC-72-026 by Arctic Decals brand were carefully applied on the model. Finally the kit was given a coat of satin lacquer.
| CONCLUSIONS |
This happened to be the smallest of all four float planes I built from Khee Kha range and probably took me more time than in each of the previous cases but am sure the next one will take me half the time to make. Still I enjoyed making this model and somehow these bush float planes made me research more on the tough life that they faced operating in the harsh cold terrain in Alaska. My appreciation to Lars Opland for his idea to produce these Bush Planes for us modelers to enjoy building giving a chance to rebirth of the type and be conscious that once upon a time they filled many skies. Also for his continuous support and further information coming all the way from Wasilla, Alaska (in spite of the minus 20F temperature environment). Thank you Lars.
| REFERENCES |
Ref: Khee Kha Art Products kit instructions.
19 January 2018
Copyright ModelingMadness.com
Thanks to www.dragonmodelsusa.com for the preview kit. You can find this kit at your favorite hobby shop or on-line retailer.
If you would like your product reviewed fairly and fairly quickly, please contact the editor or see other details in the Note to Contributors.
Back to the Main Page Back to the Previews Index Page Back to the Review Index Page