AMT 1/48 Lockheed Vega
| KIT #: | T637601 |
| PRICE: | € |
| DECALS: | Two options |
| REVIEWER: | John Summerford |
| NOTES: | Decals by Bedlam Creations |

| HISTORY |
Notable pilots who flew the Vega were Jimmy Doolittle, Amelia Earhart, and Wiley Post.
Courtesy the Ketchikan museums Tongass Historical Museum and the Totem Heritage Center
Alaska-Washington Airways, 1929-1932
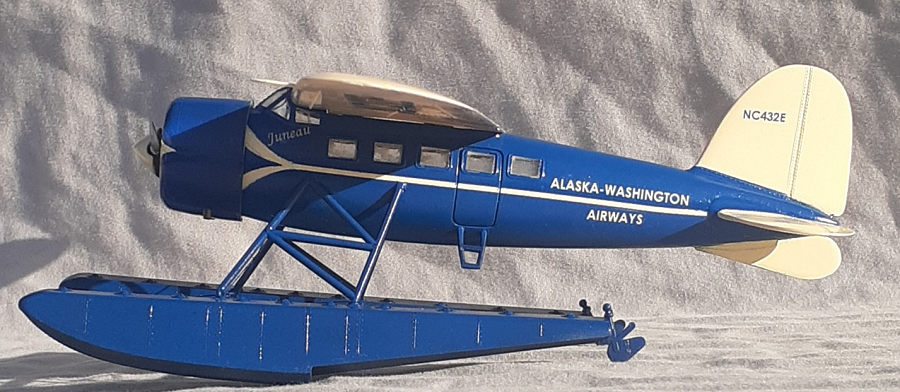
Southeast Alaska's commercial aviation really blossomed during the spring of 1929. On the heels of International Airways' Boeing flying boat charter survey flight to Ketchikan and Juneau that March, came the historic arrival of owner Joe Carman Jr.'s Seattle based Alaska-Washington Airways' modern Lockheed Vega 5C floatplanes, powered by reliable air-cooled radial engines. On April 15, 1929, Alaska-Washington Airways made the first non-stop flight from Seattle to Juneau inaugurating the company's ambitious air charter operations in the Panhandle region. Chief pilot Anscel Eckmann, accompanied by co-pilot/navigator R. E. 'Bob' Ellis and mechanic Jack Halloran, completed the 940 mile flight to Juneau in seven hours and thirty-five minutes, flying the Vega appropriately dubbed the "Juneau" (NC432E). They flew over Ketchikan at 12:53 p.m. and landed in Juneau harbor an hour later. Carrying same day edition copies of Seattle newspapers, it well demonstrated the great potential for airmail service for Alaska.
 For a professional appearance,
Alaska-Washington Airways pilots wore full navy style dress uniforms with a
flight mechanic aboard as crew. The airplanes, mounted on Edo Mod. 4650 pontoon
floats, were uniformly painted in attractive dark blue and cream schemes.
Charter rate was $44/hr. for moving passengers and freight. Twice-weekly
scheduled flights to Seattle were also offered. Fish trap and cannery patrol
duties were very lucrative, along-with mining, hunting, and fishing charters.
Using their two Vegas "Juneau" and "Ketchikan", Alaska-Washington Airways
carried more than 1,500 passengers during the five months of the 1929 season
(4/15/29 - 9/21/29).
Capitalizing on their great early achievements, Alaska-Washington Airways augmented their fleet to six different Vegas in Southeast Alaska for the 1930 season. Each plane was named after Panhandle towns: "Juneau" (NC432E), "Taku" (NC102W), "Skagway" (NC103W), "Wrangell" (previously named "Ketchikan" NC657E), "Sitka" (NC974H) and "Petersburg" (NC336H). The "Wrangell" and "Petersburg" sported bright new flashy deep orange schemes. Full NACA speed engine cowlings were fitted onto some of the Vegas. Alaska-Washington Airways constructed seaplane maintenance floating hangars that summer in Ketchikan and Juneau. One-way ticket fare from Seattle to Ketchikan was $75 and $135 roundtrip (4 hr. 30 min. flight). One-way ticket fare from Seattle to Juneau was $105 and $189 roundtrip. In July, RKO Film Studios chartered the Vega "Skagway" for on location shooting logistics on their Rex Beach saga film production "The Silver Horde" in Ketchikan and Loring. Strong steady business allowed the Vegas to extend seasonal operations into that fall.
Fate impacted Alaska-Washington Airways' fortunes on October 28, 1930 when the Vega "Skagway" went missing with three aboard while flying from Seattle to Ketchikan in bad weather and darkening skies. The Vega "Taku" was previously written off on October 4, 1930 due to fire, following a precautionary water landing outside Hood Canal near Kingston, Washington. Three Alaska-Washington Airways Vegas returned for the 1931 season: "Petersburg", "Sitka", and "Wrangell". In December 1931, fishing cannery baron Nick Bez announced purchase of Alaska-Washington Airways' assets (Vega "Petersburg" and the Juneau hangar), to form Alaska Southern Airways with Anscel Eckmann as Vice President. Alaska-Washington Airways held a receiver’s sale of its remaining assets in Seattle in March 1932.
| THE KIT |
 According to Scale Mates, the kit
was first released in 1970. This example was gifted to me earlier this year with
assurances that it was purchased from the inaugural production. At some time
during its storage, it became water logged. It was still wrapped in cellophane
and mold had grown on, and inside, the box. While unwrapping it, the cellophane
disintegrated into pieces.
Inside, the parts were sealed in a bag. Unfortunately, the instructions and a promotional flyer, plus the decals were packed loose. The decals were stuck to the flyer and beyond salvation. Some kind of mold/foxing had grown on the instructions. I opted to wear gloves while scanning them to print a fresh copy. The box and paper were disposed of.
Six hard, white, styrene sprues hold 33 parts, including a pilot figure, and the clear(ish) sprue has the 10 windows and the canopy. Some flash is present and there are sink marks in difficult to fill locations. The one-piece engine is basic and a resin substitute is a good option. Instructions are printed on both sides of an 8.5 by 11-inch sheet.
| CONSTRUCTION |
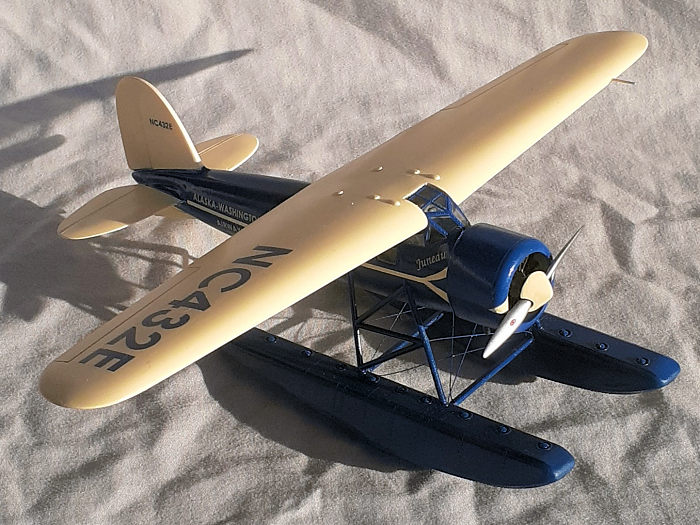
Research on the World Wide Web revealed some inaccuracies in the kit and decal markings. Since this kit’s decals were ruined anyway, a custom set was ordered from Bedlam Creations by sending a PDF file of the numbers and letters. They are ALPS printed on continues film, so they must be trimmed closely.
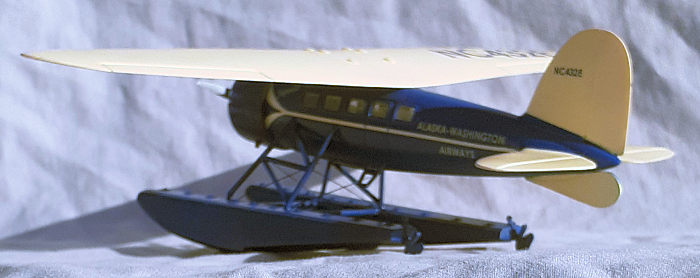
Some detail was added to the seat and bulkhead and the cockpit area brush-painted neutral gray. A cabin floor was added and seat-backs installed next to the windows where they could be viewed. Like the cockpit, the cabin was painted gray. Windows were installed from the outside. After the fuselage was closed-up, the seam was addressed. Previous experience indicated that it is better to attach the canopy at this time. The fit here is not good, so the way to deal with it is to have the wings assembled and use it as a jig to ensure the proper alignment. Unfortunately, that was not done with this build. Fortunately, given the paint, scheme, it is hard to notice the canopy is cocked to the right side. The clear parts were masked.
Using a smooth, flat surface, the
upper wing parts were glued together and the center seam was filled and sanded
over several sessions. The lower wings nestle into raised trailing edges, which
makes mating them to the uppers easier, but results in long seams that need
filling. Test fi tting the assembly to the fuselage revealed more filing was
needed and it was set aside for painting.
A nice piece of engineering is that the tail pieces fit into deep sockets but it is still easy to misalign them and gaps need attention. The fin/rudder was installed first, then the horizontal pieces, then a scratch-built ventral fin that replaced the kit-provided tail skid.
After painting the engine, it was trapped inside the two-piece cowl and sink marks filled. The engine was masked and that subassembly also set aside for painting. A spinner was scratched built by creating a cone from paper and filling it by layers with cyano and filing/sanding to final shape.
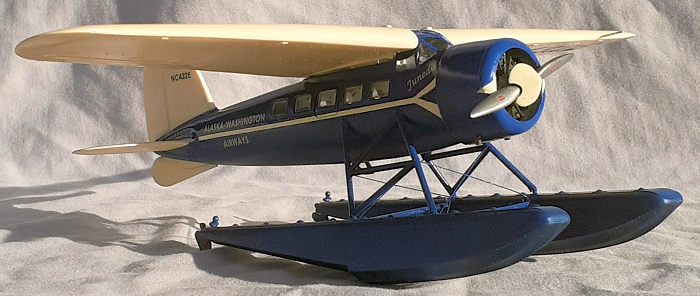
Another nice piece of engineering is the floats being molded as hulls and decks, minimizing the seams so that their clean-up did not remove any detail. Rigging holes were drilled in the floats and struts. A simple jig was created to keep the floats square to each other when the glue for the horizontal struts cured. Trusting the struts to keep the floats vertically aligned was a mistake. The jig should have included cradles.
None of the photos from my research showed the kit supplied cross struts that run from the bottom of the fuselage to the main struts. I suspect that AMT included those pieces to aid in alignment and add strength. They were not used in this build and the rigging was optimistically relied upon keep everything square, which meant, until it was secure, the struts and floats attachment was precarious. Given that floats and struts are the same color as the fuselage, they were added before painting. During the rigging process, (with monofilament thread) a twist was induced. This was addressed by sanding the keel of one float at the step and portion of its rudder.
After a wiping the assemblies with alcohol, it was time for paint.
| COLORS & MARKINGS |
 Using Tru-Color Beige, the wing,
tail surfaces, fuselage sides, cowl sides, and spinner were airbrushed. The
tail, sides, and cowl were masked and enamel insignia blue sprayed on. This
dried flat and the non-enamel gloss coat used was unsatisfactory, so the masking
was removed and the beige areas were sanded and repainted, then masked again.
This time Testors Dark Blue enamel was used and the result was a nice, glossy
finish. Masking for the beige markings was removed.
Micro Set was brushed on the wing before the registration number decals were applied. The rest of the decals were small enough to dispense with the Micro Set. The decals behaved nicely. A top coat of Vallejo acrylic polyurethane sealed the decals and the clear parts were unmasked.
The cowl/engine subassembly was attached next. A little bit more filing was needed to get the wing to fit and alignment checked one more time before glueing. As the glued cured, the model was compared with the grid on the cutting mat. Returning to the engine, the prop was installed and the spinner added last.
| CONCLUSIONS |
This is the third time in nearly four decades that I have built this kit (the others are wheeled) and I’m glad to have the previous experience and accumulated many more tools since the first try. If you wish to tackle this kit, bring your short-run kit assembly skills. Like any kit of its era, a lot of filling, filing, and sanding is needed for most seams. It is not complicated; it is just time consuming.
The floats add another layer of complexity and extended the build time considerably. All the attachment points for the struts could have been more positive, which would have made it much easier to glue and keep aligned. Not only were they nerve wracking to assemble, they were difficult to handle afterward.
Regardless, The Vega is an elegant subject, even on floats. The result is worth the effort. I wish that Dora Wings would produce this variant of their kit.
24 Octob er 2024
Copyright ModelingMadness.com. All rights reserved.
No reproduction in part or in whole without express permission. If you would like your product reviewed fairly and fairly quickly, please
contact
the editor or see other details in the
Note to
Contributors.