RS Models
1/72 Zlín Z.XII
| KIT #: | RS72041 |
| PRICE: | $19.96 from umm-usa.com |
| DECALS: | Five options |
| REVIEWER: | John Anthony |
| NOTES: |
Excellent short-run quick-build, unusual subject. |

| HISTORY |
The historical importance of the Zlín Z-XII rests in the fact that it was one of
the last and most popular touring planes of the so-called Golden Age of
Aviation. Built in  production
model quickly became a mainstay of sport and courier flying throughout
The plane is a tandem two-seater low-wing aircraft designed by Jaroslav Lonek.
The airframe is constructed entirely of wood and the power plant consists of a
Persy II engine delivering 45 horsepower. The Z-XII came with the option of an
open or enclosed canopy, and a choice of two different horizontal stabilizer
layouts. Most of these planes, if not all of them, were destroyed during the
Second World War. I could not locate any extant examples of the original
aircraft. I did however discover one static replica on display at the Kbely
museum in
| THE KIT |
Despite its small size and rather modest subject material, this kit
exhibits a consistently high quality throughout its elements. The box is small
but sturdy and features an elegant artist’s rendition of the aircraft flown by
J. Ambruŝ in the 1937 Race Over
For a look at this kit in another boxing, visit this preview. Ed
| CONSTRUCTION |
This build begins by fabricating a color scheme for the internal details
as all the photographs of the original plane are in gray-scale. I simply chose
something that would complement the exterior color with a bit of thirties’
art-deco feel. (Your guess is as good as mine!) The construction is
straightforward but the placement of the parts has to be carefully checked
against the diagrams in the instruction sheet as there are no alignment pins or
tabs. One can dispense with the photo-e tched
rudder control pedals as they are eventually hidden from sight.
Once the cockpit was painted and assembled I mated the fuselage halves.
There are some ejector pin stubs on the inside of the fuselage sections that
have to be removed for the pieces to mate correctly, but they are ultimately
hidden from view and don’t require any subtle surfacing work. I also discovered
an instrument panel on the sprue that had somehow gotten neglected in the
directions – I believe it was meant for the forward pilot as he is not given a
film/PE panel, so I installed it as such. At this point I also installed the
seat belts and secured them with a bit of lacquer, and I attached the film/PE
instrument panel onto the baffle that divides the cockpit. This baffle is
slightly too wide to allow the canopy to fit correctly so it needs to be
carefully sanded down with numerous canopy dry-fits to insure a proper
alignment. (Take care sanding though - the plastic in this kit is quite soft.)
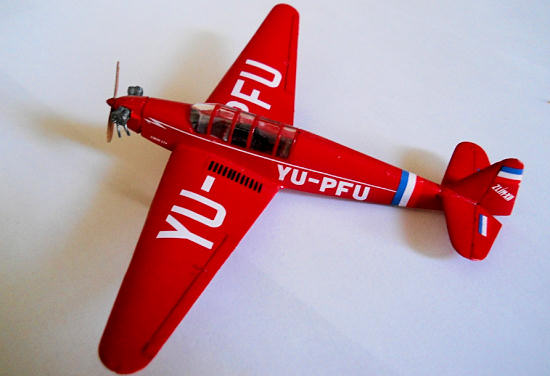
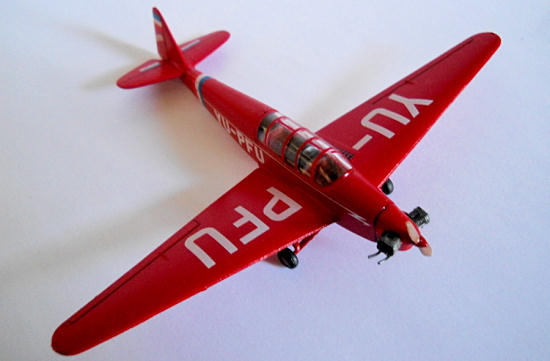
The wings and stabilizers all connect to the fuselage with butt joints so I attached everything slowly, one piece at a time, double-checking and adjusting the dihedrals as the glue set. The instructions include good diagrams of the airframe for reference. (Be sure to select the horizontal stabilizers that match your chosen scheme – there are two options.) The resin nose was attached without any problems, then I muddled my way through the tripod landing gear – these are not my favorite type of gear to assemble by a long shot, especially in a small scale, but I did my best.
| COLORS & MARKINGS |
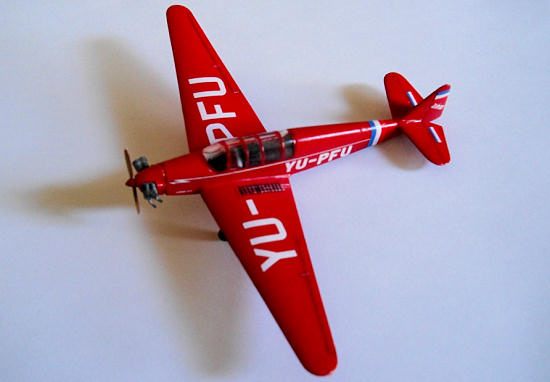
I started painting with a coat of Tamiya Fine White Primer, then I gave
the model several thin coats of Tamiya Italian Red. (The color call-out for the
scheme I had chosen merely indicated “red” so I assumed I could exercise some
poetic license.) Fin ally
the last few pieces were painted and installed: the canopy, wheels, propeller,
and air-cooled cylinders. The directions call for stretched sprue to be used to
create the exhaust pipes – I used 0.5 mm Evergreen rod.
The decals by Propagteam are exquisitely-printed but quite thin – the
thinnest I’ve ever worked with in fact.
I added a drop of dish soap to the soaking water and that allowed me to
position them without any tearing, a problem I’ve had in the past with those
long straight stripes one frequently finds on civil aircraft schemes. One could
add a bit of rigging between the horizontal and vertical stabilizers but I found
photographs of the original plane with and without rigging, so I assume that’s
optional. I also assume that these little recreational aircraft were kept fairly
clean so I did not weather the plane, other than to add a bit of wash into the
gaps between the control surfaces and airframe.
The particular aircraft I modeled is first listed in Czech civil air registries
in March of 1938 as OK-LZM. Then in August of 1939 it appears in Yugoslavian
registries as YU-PFU, owned by the Bata Company based in Borovo, an eastern
municipality of modern day
| CONCLUSIONS |
 This may be a small kit of a simple aircraft with a minimal number of
pieces, but it is not a project for the complete beginner. It is however an
excellent undertaking for the experienced beginner who wants to expand his
skills into the realm of photo-etched details, resin, and elementary
scratch-building. My only criticism is that the canopy plastic is too thick - it
is not to scale and distorts the excellent cockpit detail. But considering the
superior quality of the rest of the kit, that’s a minor criticism –
nevertheless, an experienced modeler may want to vacuform his own canopy.
I enjoyed this quick-build kit very much and I’ve got a few more in the
stash to pull out when I want to whip something together in a short time.
(Excluding drying time the build only took about three hours of construction.)
Kits of Golden Age civvies aren’t that common either. This one’s a real pleasure
to assemble, and the finished product does a great job of cheering up a shelf of
somber bombers! Bravo RS Models.
| REFERENCES |
I also consulted goldenyears.ukf.net for the registry information on YU-PFU.
November 2010
If you would like your product reviewed fairly and quickly, please contact me or see other details in the Note to Contributors.