
Hasegawa 1/48 F-86E Sabre
| KIT #: | Any 1/48 Sabre will do |
| PRICE: | $ |
| DECALS: | ? |
| REVIEWER: | Tom Cleaver |
| NOTES: |
Scobie-do Productions slatted wing used; Aeromaster
“Top Guns of the USAAF” sheet used |

| HISTORY |
The F-86E Sabre began life as the NA-170, with initial development
commencing on
Externally, the F-86E was identical to the late production F-86A, except
for an "all-flying" horizontal stabilizer, which was the result of testing on
the 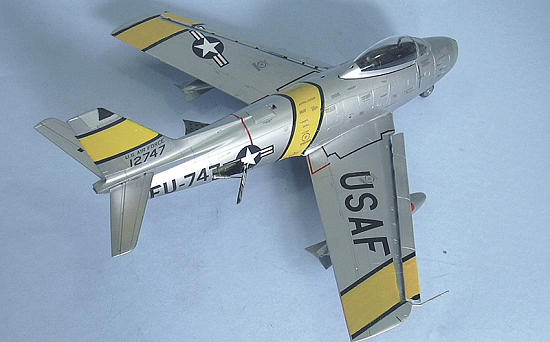 standard
equipment the A-1CM gunsight-AN/APG-30 radar combination first installed in the
last 24 F-86A-5-NA. The aircraft was powered by the J47-GE-13 engine rated at
5450 lbs. thrust.
F-86Es began rolling out of the factory in early 1951.
The first F-86Es were sent to the
The F-86E-5 was produced in
369 F-86E Sabres were produced, and they equipped both the 4th
and 51st FIWs in
“Bud” Mahurin:
When “Bud” Mahurin used to give talks out at The 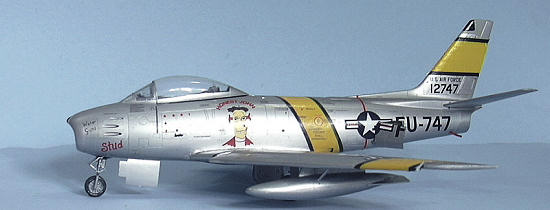 nd
51st Fighter Wings in Korea.
Bud crashed his first P-47 in August 1943, horsing around with a B-24.
When he got too close, his tail got chewed up by the outer propeller of
the Liberator. Given a $100 fine by
CO Colonel “Hub” Zemke, he was then assigned his most famous airplane, the
P-47D-5RE “Spirit of
In 1951, Bud volunteered to go to
| THE KIT |
Hasegawa introduced their F-86F Sabre in 1997, and it has been available
in various sub-types and limited-edition releases ever since.
The kit is accurate, though it really benefits from the addition of a
resin cockpit and ejection seat.
True Details, KMC, and Hawk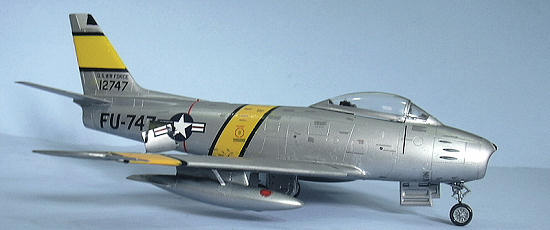 eye
Resins made these sets, though none are in production and currently available.
Harold Offield of
| CONSTRUCTION |
I used a Hasegawa QF-86F kit I obtained for a cheap price in the estate
sale over at my local hobby shop.
Any Hasegawa F-86F kit will work, as will the nearly-similar Academy kit, since
you are not using the wing.
Construction began with a clean-up of the little bits of flash on the
resin wing. Care needs to be taken
here not to break off any of the delicate arms for the wing slats.
 I then test-fitted the wing to the Hasegawa fuselage, and saw that I
would want to sand off the area immediately ahead of the wing cutout on the
fuselage, and would need to cut off the fuselage panel that is integral to the
lower wing part of the kit. This
was done easily, and once I had the fuselage sanded smooth there I rescribed the
panel lines. I also filled in the
intake in the right rear fuselage just ahead of the speed brake, and sanded that
area smooth.
I then assembled the fuselage, which is very easy, and made sure to put
sufficient weights in the nose. One
thing I did differently from previous Sabres was to attach the nose intake to
the intake trunking before attaching the trunking in the fuselage.
This insured a good tight fit with the intake and enabled me to smooth
the interior of the intake. When
attached to the fuselage, gluing the nose in proper position insured the
trunking was correctly fitted. The
F-86E cockpit was black, and I did that with Tamiya “Flat Black,” with detail
“popped out” by dry-brushing with Tamiya “Flat Aluminum.”
Attaching the wing was not difficult. I filled the gaps between the
fuselage and upper wing and between the lower wing and fuselage fore and aft
with cyanoacrylate glue. I let that
set up overnight, sanded smooth, then applied a coat of Tamiya “Mr. Surfacer”
replacement to those areas and the centerline seams of the fuselage, and sanded
that smooth. I finished off by
rescribing where necessary.
| COLORS & MARKINGS |
Painting:
I had recently experimented on an old model with an idea I had for
producing “multi-hue” natural metal finish, and the success there led me to do
it to this model. What this
involves doing is applying an overall coat of Tamiya flat aluminum, then
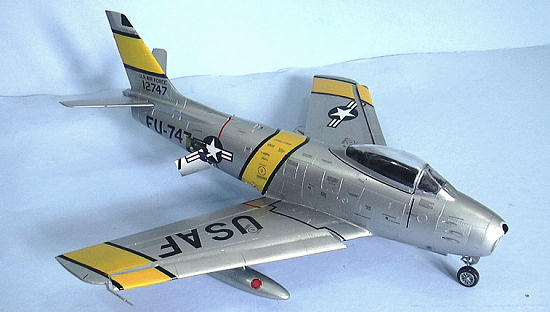 masking
various panels and painting them with different shades of light grey or white.
I then apply a thinned coat of Auto-Air Colors “aluminum base over the
entire model. This results in an
overall “metal finish” in which the final coat takes on different hues depending
on the underlying color it was applied over.
I then let the model dry overnight and applied two coats of Testors
Metalizer Sealer to protect the very fragile Auto-air paint.
This beats the daylights out of applying different shades of metallic
paint, since you are using easy-to-apply Tamiya paints, then covering everything
with only one coat of metallic paint.
The result is subtle enough that it may not show op all that well in
photos, though it looks great in person.
The wheel wells and dive brake wells and dive brake interiors were
painted with Interior Green.
Decals:
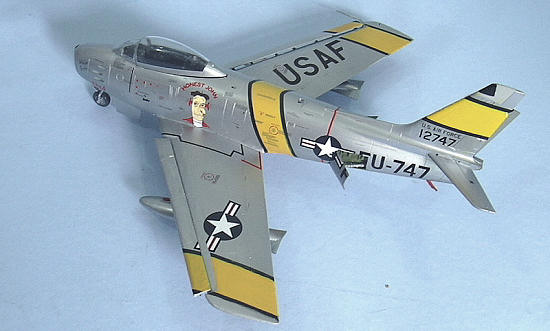
I used the decals from the old Aeromaster special release “USAAF/USAF Top Guns” to do the individual markings and serials for Bud Mahurin’s F-86E-5NA “Honest John” in which he was shot down in May 1952 after scoring 3.5 victories. I used the Cutting Edge “F-86 Sabre stenciling” sheet for the stencils, and the national insignia from another Cutting Edge F-86 sheet. The ID bands came from another Cutting Edge sheet of 1/48 Sabre ID bands.
| FINAL CONSTRUCTION |
I attached the slats and the landing gear, and opened and attached the
dive brakes. You will notice that the canopy is closed right now and that the
there’s no seat in there. That’s
because I am waiting to open the canopy and put one of Harold Offield’s great
F-86 ejection seats in there when they come out in late May.
| CONCLUSIONS |
If you - like every other Sabre fan - has wanted a slatted-wing Sabre in
your collection (or maybe more than one) then these wing sets from Scobie-Do
Productions are “da bomb.” They are
nearly foolproof to use by anyone with average skills, and the result is a very
distinctive Sabre model that didn’t drive the builder nuts to create, as would
be the case with the other alternatives.
Highly recommended. (Of
course, there is the problem that there are not too many F-86Es portrayed in the
decal sheets that are out there, not to mention most of the sheets are long out
of production. That should be no
problem for the possessor of a nice, deep “Decal Dungeon.”)
April 2009
Copyright ModelingMadness.com. All rights reserved. No reproduction in part or in whole without express permission.
Review kit courtesy of my wallet. Review wings courtesy of Scobie-Do productions.
If you would like your product reviewed fairly and quickly, please contact me or see other details in the Note to Contributors.