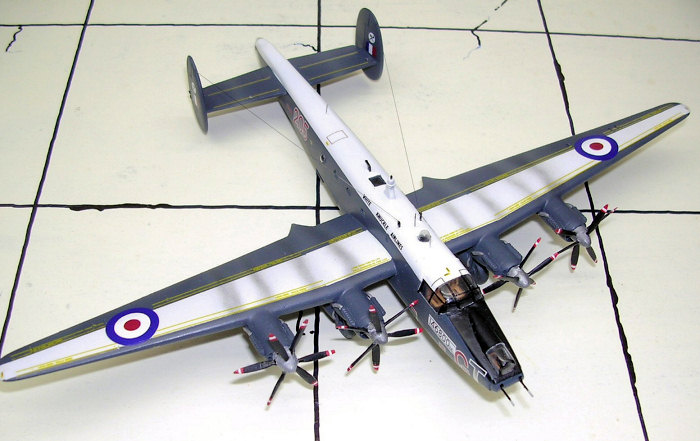
CMR 1/144 Avro Shackleton
| KIT #: | ? |
| PRICE: | $? |
| DECALS: | Looks like five options |
| REVIEWER: | Carmel J. Attard |
| NOTES: | resin |

| HISTORY |
 The Shackleton aircraft is famous for its variety of roles
during its service life. This includes its role as a search and rescue aircraft,
Airborne Early Warning and anti submarine warfare roles. Evolving from its
famous predecessor the Avro Lancaster the Shackleton performed 38 years of
service full of exciting if not daring rescue missions, as well as anti
submarine and maritime reconnaissance missions by day and by night during the
cold war and later towards the later years of its service life as an Airborne
Early Warning aircraft. Named in honour of the great voyager and explorer, the
Shackleton entered service with coastal command circa April 1951 as a Mk 1
version. In due course an improved version was developed being the Mk2. The more
powerful Mk 3, which had a tricycle undercarriage, then followed this the AEW
version entered service that was again back to the tail sitter version.
| THE KIT |
 Having already built a 1/72 scale vac form kit of the
Shackleton Mk 2 by Gerald Elliott, and later the injection moulded Frog Mk 3, I
was wondering what the new CMR kit in resin was going to offer. This is a
1/144-scale model of the Shackleton and obviously was going to be a much smaller
model than the other previous kits I built. The kit comes either as a Mk2 or an
AEW 2 version, thus providing parts needed to make either of the two.
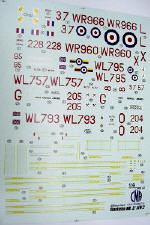
There is a one-page exploded view to facilitate assembly of the parts. Instruction detail and decals provide six different Shacks to choose from that include the MK2 or AEW2 version. The decal sheet is very comprehensive, and is well printed providing fine yellow walkway stencilling, squadron markings and perfect registered roundels and fin flashes. Squadrons represented are those of 205, 204, 37, 228 and 8. I was rather disappointed not to find one representing an RAF Luqa, Malta based 38 Sq one until I realised that there were enough registration and squadron markings provided that a 38 Sq one could still be made. Accurate side view drawings depicted on an A4 size sheet identifies the location of the markings and paint detail with respect to the Squadron one prefers to do the kit.
| CONSTRUCTION |
The parts are basically made of light tan colour resin that
contain fine surface detail to control surfaces, door, windows, recesses in the
fuselage for the correct location of the wing parts which would need the general
clean up of parts as it is with all resin kits. Otherwise the parts are of
accurate shape and outline. The tiny rectangular windows and one round window on
the fuselage side  are only partially open and needed to complete using fine
square and round needle files. This was a simple task of shaping these to the
correct aperture. The assembly drawing shown on an A4 size page indicates that
the recess that appear on the integrally moulded nacelle inner part with the
wing was intended to receive the outer engine nacelles but upon careful
examining one soon realise that this is not so because there is no male part to
coincide with the recess and therefore fitting of parts has to be carefully
aligned as best one can.
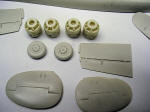
At this small scale the Shackleton kit still works out into a reasonably sized model, with a wingspan of 10 3/16 inches and an overall length of 7 ¾ inches. The parts are packed in sealed polytene multiple packs to prevent damage of parts from damaging each other if these were packed together in one bag. These were then enclosed in a sizeable bag that also contains a colour double profile card. One needs to be careful with the small resin parts such as the 3 blade sets of propellers as three out of the eight provided already had a blade detached from the rest. These were fixed back into one piece using a tiny drop of super glue. The kit also contains 17 shiny silver parts made of white metal which include the twin tail wheel undercarriage parts, main landing gear struts,, eight exhaust pipes and various roof antennae to choose from. These needed fine sanding of the joint mould parting line again using fine set of files. Clear parts which are vac form type are provided in duplicate in the event any of the spoilt during cutting and fitting. Among the resin parts are the belly Radom which comes in two parts if fitted in the retracted position or with a separate extended part if kit is built as “in flight” configuration with the random in fully lowered position. All wheel well doors contained guides to help fix these in their correct placement.
| COLORS & MARKINGS |
 Obviously before
one start to put the fuselage halves together it would be wise to paint the tiny
interior to ones liking and colour reference. In my kit the pilot office and
nose compartment parts were a bit proud and if left this way could not allow the
two fuselage halves to come together, so these needed slight filing from the
sides. The interior was painted black and seats in drab brown with tiny straps
in a different colour to make contrast.
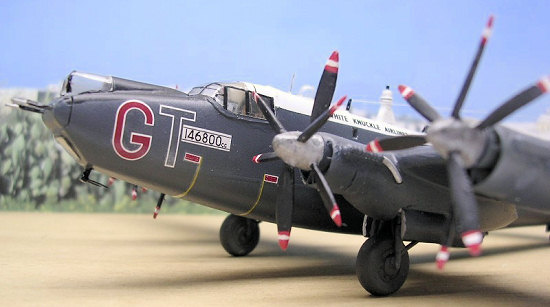
As I chose to build the Mk 2 version I did not need the extended radome and AEW radome. However I chose to make my model in the landing configuration with the undercarriage fixed in place. With the exception of the upper wing areas and upper fuselage which were semi matt white the rest of the Shackleton was painted in overall extra dark sea grey. Anti glare panel in front of cockpit as also the undercarriage were in matt black. In all cases I used Humbrol brand of paint.
| CONCLUSIONS |
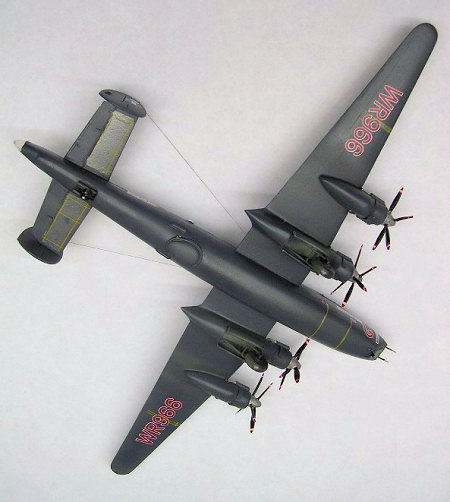 The Czech Mini Master resin kit turns into a pretty little
model and looks so realistic with the correct dihedral wings and when placed on
the undercarriage it has the definite correct sit angle, that brings so many
memories of the type Mk 2 quietly resting on the tarmac at its dispersal at Luqa
airfield many a Sunday quiet evenings. Enough information is provided and other
reference material could be made to SAM Vol 12 No9 June 1990 and Aircraft
Profile 243, both of which I happened to have and both of which have detail for
all the versions. A good Shackleton web site would be
www.home.aone.au/shack_one which contains history of even the ones that are
represented in the kit. One point that I want to raise is that since there is
provision for the kit to be built in flying configuration and randome fully
extended, then a simple stand could have been provided. Otherwise I am very
pleased with the final result which, have all the characteristics of the
aircraft.
May 2007
Copyright ModelingMadness.com. All rights reserved. No reproduction in any form without express permission from the editor.
If you would like your product reviewed fairly and fairly quickly, please contact the editor or see other details in the Note to Contributors.
Back to the Review Index Page 2025