| KIT #: | A06103 |
| PRICE: | £18-99 |
| DECALS: | Two options |
| REVIEWER: | Frank Reynolds |
| NOTES: |

| HISTORY |
As World War 2 drew to a close the pace of development of the Supermarine
Spitfire and Seafire series showed no signs of abating.
 61 engine.
This resulted in the Spitfire 21, an aircraft that had progressively evolved
from the original Spitfire in such a radical way that there was a serious
proposal to name it the Supermarine Victor, since it could be considered a new
type. However it was late 1944 by the time that this upgraded type began to
enter service and the end of the line was in sight, with newer more powerful
fighter types coming into service and the advent of jet propulsion. The result
was that the later, more developed of the Supermarine fighters were produced in
smaller numbers. The next development was the essentially post war Mk.22 which
featured a cut down rear fuselage. A new and much enlarged tail assembly was
added to improve stability.
| THE KIT |
This is a relaxing build since everything for a basic model
is provided in the Airfix Seafire 46/47
kit, including decals, so this is a straight from the box exercise.

This kit has been minutely analysed over the two decades since it first appeared
and there is evidence that the propeller blades have an incorrect profile, and
that the rear canopy is too short and too low in profile. These are not major
flaws in my opinion and the kit still builds into an effective and convincing
Seafire
Compared with Airfix’s new generation of Spitfires there are good and bad
points. The surface detail is arguably more delicate than newer offerings. By
contrast the cockpit detail is fairly basic and some details, such as the under
wing rockets are decidedly
clunky.
The
instructions consist of a 16 page A4 style booklet with the 29 stages of
construction in a logical pictogram form. Two pages in colour set out the two
finishing options with paint colours keyed to the Humbrol range.
| CONSTRUCTION |
 I elected to build almost straight from the box and the only addition would be
cockpit seat belts fashioned form masking tape.
Holes in the lower wing have to be opened up for a choice of weapons fit. I
thought it unlikely that a training squadron aircraft would have much in the way
of under wing armament so I restricted the external fit to the centre line drop
tank.
Construction is as straightforward as any standard Airfix kit and begins with
the interior, this simply consists of front and rear skeleton bulkheads with a
moulded instrument panel and a pilot’s seat fitted to an armoured bulkhead. The
interior is mainly standard cockpit green, which I airbrushed in Xtracrylix
XA1010 aircraft grey green while the upper side walls of the cockpit above door
sill level are finished in flat black. A simple instrument panel is provided on
the decal sheet and seat belts were added from small strips of masking tape.
The wing consists of a full span lower section, with separate left and right
upper wing panels. Separate flaps can be set in the lowered position but the
ailerons are moulded fixed in place. I fixed the flaps in the up position. As
with most Spitfire kits I first glued the whole lower wing to the fuselage then
added the separate upper outer wing panels later. This allows the upper wings to
be trimmed if necessary to ensure a snug joint at the wing root.
 Construction proceeds relatively swiftly by adding the one piece horizontal tail
parts, the rudder with lower arrester hook and separate fairings to the upper
nose of the engine cowling. The separate drop down door to the cockpit was glued
in the closed position and the gun sight added to the cockpit.
Next the pilot’s headrest is fixed and the whole airframe left overnight to dry.
While this was going I masked up the windscreen and canopy with Tamiya tape.
Before the canopy is glued down it is necessary to paint the area of the
fuselage behind the pilot’s headrest with the finished upper surface colour
since this will show through the closed up canopy
The main airframe assembly was completed by adding the under wings flaps in the
closed position, the chin cowling and carburettor air intake and lastly the
radiator assemblies. The latter components are handed so care has to be taken to
ensure that each is glued to the correct wing under surface.
Finally the masked canopy components and wing cannon were glued in place and the
basic aircraft was checked ready for painting. Small areas of filler were
required on sinkage areas to the upper wings and fuselage sides and along the
main joint of the fuselage halves. This was achieved with Squadron Green Putty,
smoothed down with sanding sticks from the same company.
The whole airframe and remaining small components on the parts frame were primed with grey auto primer from a rattle can. This also shows up any small scratches and imperfections that need to be cleaned up.
| COLORS & MARKINGS |
State of the art for Airfix, the decals have good colour density; they are
sharply printed and have good adhesion, responding well to decal fixing
solutions.
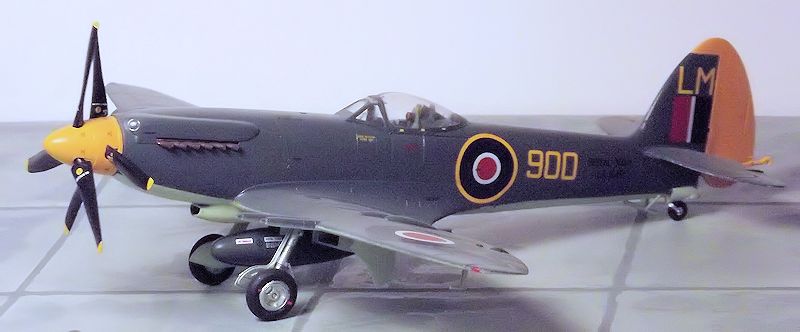
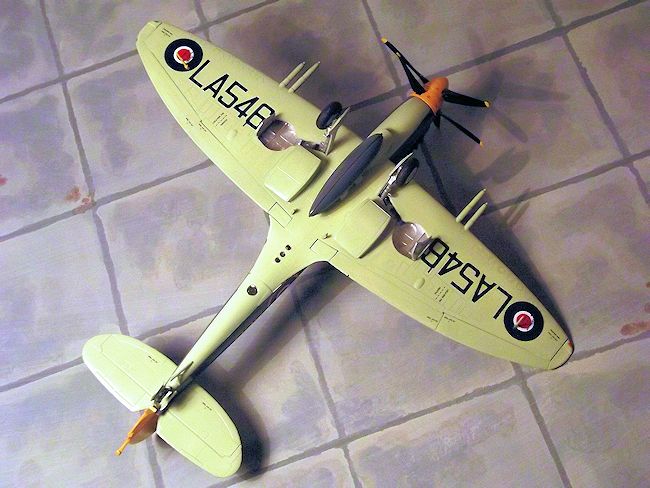
One of the choice of colour finishes is new to this recent boxing of the kit. It
is just what I needed, offering a land based Seafire 46 of the Station Flight,
Lossiemouth, Scotland in 1948, in the standard scheme of
 Sky under surfaces and
Extra Dark Sea Grey uppers, relieved with a bright yellow rudder and spinner.
This displays yet another variation of the Royal Navy’s confusing profusion of
post war paint jobs with the Dark Grey carried right down the fuselage sides and
covering the tail fin. There is a comprehensive set of stencils and wing walk
stripes.
The camouflage finish came from Hannants
Xtracrylix range, applied with my trusty Iwata HP-C airbrush. The Freeman
book shows some late Seafires carrying a Dark Sea Grey drop tank so I allowed
myself a little artistic licence and adopted this finish for this version. The
spinner and rudder were finished in Xtracrylix XA1011
RAF Trainer Yellow. The undercarriage legs and wheel hubs were finished in
Tamiya XF-16 Flat Aluminium and the tyres in XF-85 Rubber Black.
The decals went on well over a brushed coat of Future/Kleer and responded
effectively to Micro Set and Micro Sol. The revised decal sheet is a
considerable improvement over the 1990s original, both in quality and detail.
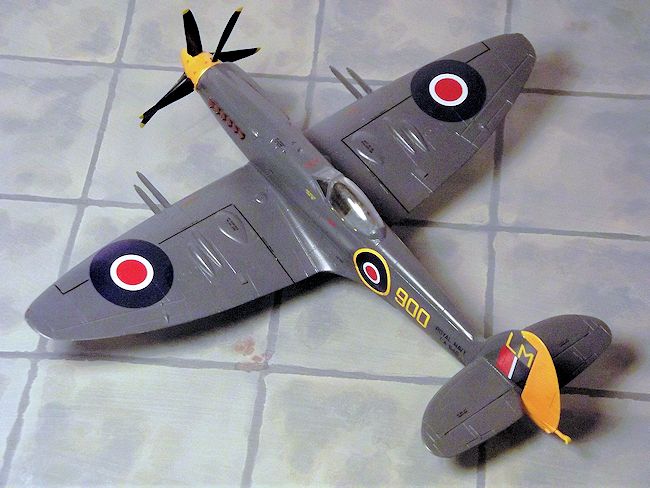
There was one area of query, however. The Airfix decals and instructions show
the upper wings to have “B type” wartime style upper wing roundels in the style
of Blue, with a Red centre disc i.e. no white ring. The Freeman book from the
Aviation Workshop, detailed below, has a colour thee-view of the identical
aircraft with upper wing roundels in the “C1” style, that is with a thin White
ring around the
 centre Red area. Now in this particular era of aircraft colours
there was much change under way, so I had a dilemma. Right or wrong I chose the
Freeman interpretation for a 1948 period aircraft, the three-colour roundel it
would be. Later, I found buried in my archives a dog eared copy on the Aircam
book listed below and in that Richard Ward also went for the three colour
roundel, so it is two to one in favour of the C1 type. The necessary roundels
came from a spare sheet of decals from this kit’s close cousin, an Airfix
Seafire 17.
It just remained to add the things that dangle down from a naval aircraft, the
undercarriage legs, wheels and doors, the tail wheel guard, pitot tube and
underwing aerial.
The whole was then finished in a misted airbrushed coat of Xtracrylix Satin
varnish. This gives just a hint of the semi-gloss finish found on post war
British aircraft
| CONCLUSIONS |
The Seafire 46 is pure standard Airfix fun. A good honest plastic kit that is
recommended all round and the whole package costs just £19-99 in the UK.
| REFERENCES |
Spitfire, the History by Eric B. Morgan and Edward Shacklady, Key Publishing,
2000
Aircam Aviation Series No.8.
Supermarine Spitfire Mk. XII-24/Supermarine Seafire Mk.1-47. By Ted Hooton and
Richard Ward. Osprey Publications Limited 1971.
September 2014
If you would like your product reviewed fairly and
fairly quickly, please
contact
the editor or see other details in the
Note to
Contributors.