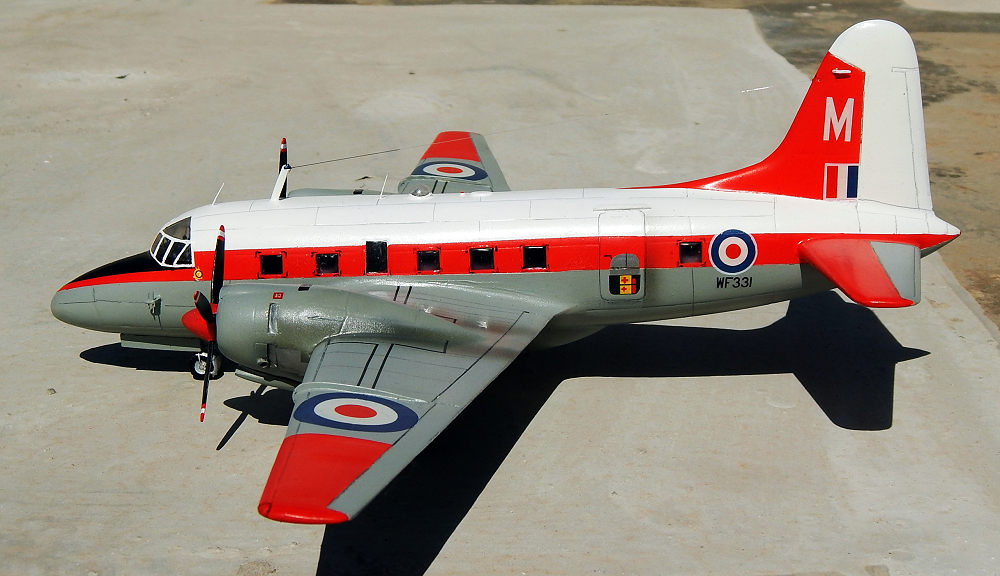
Airmodel 1/72 Vickers Varsity T.1
| KIT #: | 10 |
| PRICE: | $17.60 |
| DECALS: | none |
| REVIEWER: | Carmel J. Attard |
| NOTES: | Basic vacuform kit. |

| HISTORY |
The Varsity was developed from the Vickers Valetta/Viking airliner for use as an aircrew trainer. Among its new features were a lengthened nose, a tricycle undercarriage and a prominent ventral pannier housing or bomb aimer position. With a life span of 25 years in RAF service the Varsity was responsible for the training of many thousands of pilots, navigators and other branches of aircrews. All these crews remember the delightful of the twin Hercules radial engines as much as I remember it when a full squadron of Varsities flies into Luqa airfield, Malta, during many weekends and their trainer colourful markings was something of attraction that one could spot from a far away distance.
| THE KIT |
 A little
known type outside the RAF it was very unlikely that kit manufacturers would
ever think of producing a Varsity and it was Airmodel that came to the rescue.
Years later Aeroclub also issued the kit. Both Airmodel and Aeroclub rendering
of this splendid old aircraft in form of a vac form kit. The Airmodel kit comes
in two white styrene sheets of a reasonably thick styrene, which contains all
the blistered parts to complete the model. Instructions come in two pages on one
side there are three suggested side views along with a 1/72 scale front
elevation and side elevation that are useful to refer to during construction of
the model. On the opposite side there is an exploded view of the vac form parts
and there are also indicated other detail parts which are not included with the
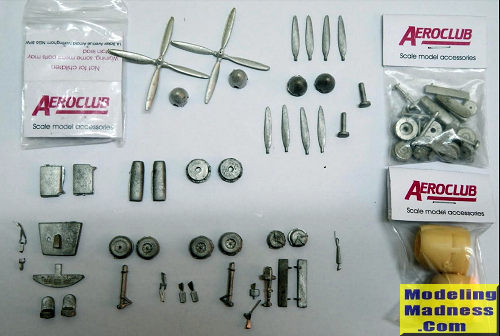
model. These are items like, gear legs, propellers, wheels, prop hubs and
cockpit interior parts like instruments, side consoles, crew seats and control
wheels. Fortunately one should not bother about these items as they are issued
as a set by Aeroclub unless one was willing to make the parts by oneself..
Aeroclub also provides two superb decal sheets for either a
 n
early scheme or the later trainer scheme. The Airmodel kit has deep panel lines
mostly on the fuselage parts and one may either fill these up or hope that paint
will reduce their depth.
I had the Varsity model for a number of years and just as I enjoyed building earlier the Valetta I assumed that the Varsity would equally well be an enjoyable build and in fact it was. The first thing I did was to get a good set of scale plans either Aviation News. At the time I was able to acquire a set of scale plans from Aeroclub which also came with the decals that I ordered for the kit. First thing I did was the kit parts for the correct outline in fact both the nose of the model shape was increased by some 3/16 inches and also the top of tail fin and rudder were reshaped to a wider area. From these true shapes I produced from thin plastic card a thin outline profile that would be sandwiched between the kit halves during construction in order to project the new profile. The kit clear parts were the cockpit canopy and the roof astrodome.
| CONSTRUCTION |
The fuselage halves and four main wing parts were first marked and gently scribed just as I did with the other kit parts as engine nacelles, tail planes airman gondola, wing fences, cockpit floor and fuselage interior bulkheads. These parts are separated from the backing sheets in the usual fashion and breaking away excess plastic. This is followed by the rubbing down of mating faces using medium wet and dry sheets making sure not to remove too much plastic.
 Windows
apertures were then marked and cut in the fuselage side using a pointed Exacto
blade and flat file. I used the Aviation News side view to ensure the right size
and position of windows. Glazing of windows was completed at a later stage using
Kristal Kleer after final painting is completed. My model was to feature lowered
undercarriage. Therefore the nose wheel doors are cut and a nose wheel well
compartment built from surplus backing plastic. To one side of the fuselage were
added all the cockpit accessories like seats, side control, central console and
instrument panels. Control wheels, cockpit bulkhead etc. Nose weight was also
added to an enclosed compartment inside the nose. Interiors were painted medium
gray with black instruments and leather brown seats etc. I also added two crew
figures painted in RAF outfit. Fuselage halves are now closed together.
Fuselage section was cut out to enable canopy to be fitted. The acetate canopy is cut using scissors and then trimmed to size with a sharp blade in order to avoid cracking. This was fitted in place using super glue.. Filler was added to blend the canopy to the fuselage. Ventral pannier was cut and brought to size in depth to match scale plans. There was no scope of glazing the front panel apertures as the inside was dark and nothing could be visible. Glazing was made using gloss black decal squares.
Attention
is turned to the wings. These had gear wells built up with thick plastic card
added to lower wing half. A small square aperture was cut to allow the wheel leg
to be inserted. This was I white metal and attached in place using super glue.
Main dore are left closed like it is on the real aircraft and a small square
door was cut and fitted at rear of leg. Wings were sanded and mated together..
At one point I also added an extension of 3/8” to each wing in order to bring
them to correct size.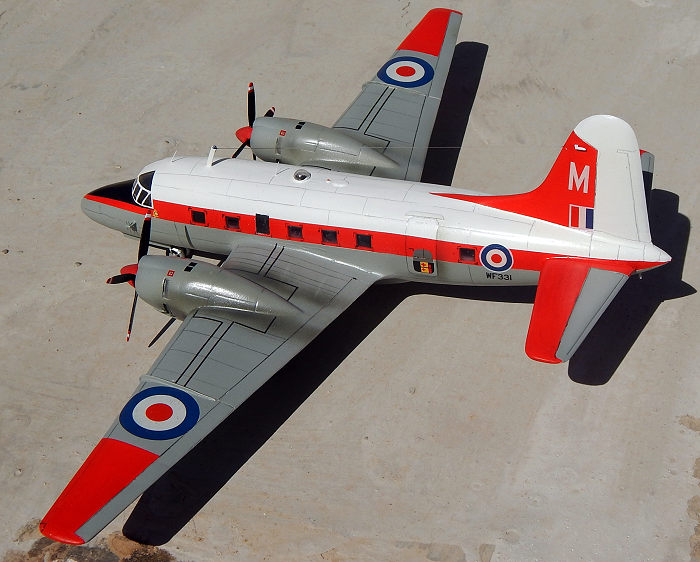
Tail plane halves are cut, sanded and glued together. A long sprue piece is inserted through the rear fuselage and a 1 inch extension was allowed to each side of fuselage . Tail planes were then inserted in place and a level tail plane was checked over to ensure correct fit and alignment with fuselage. I also replaced the Airmodel engine nacelles with a pair I got from Aeroclub. These had exhaust pipes incorporated and metal radial engine and prop shaft comes with the set. Engine nacelles are attached to circular bulkheads already fitted to main wing section and faired over with a small amount of filler forming strong complete nacelle continuity.
The complete wing has now the excess plastic trimmed from the roots end and the wings were now correctly aligned to fuselage using a long rectangular insert that passes through the fuselage and secures both wings together with the fuselage. The insert itself forms the main wing spar and ensures that the wings have a slight dihedral when in place. Wing fences are also added to each wing, being made and shaped from a thin section plastic card.
All that is left is to added detail to fuselage as astrodome, aerials to nose and top of fuselage and reshaping and blending the nose and fin top to blend with the prepared templates mentioned earlier.
| COLORS & MARKINGS |
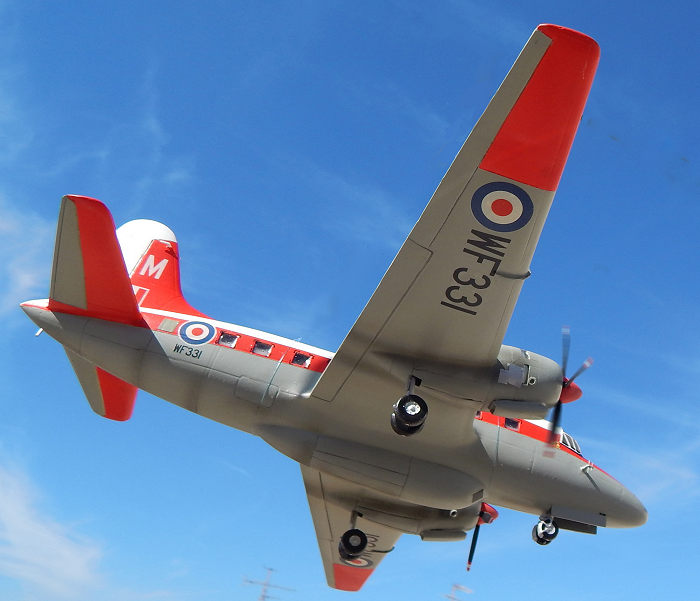
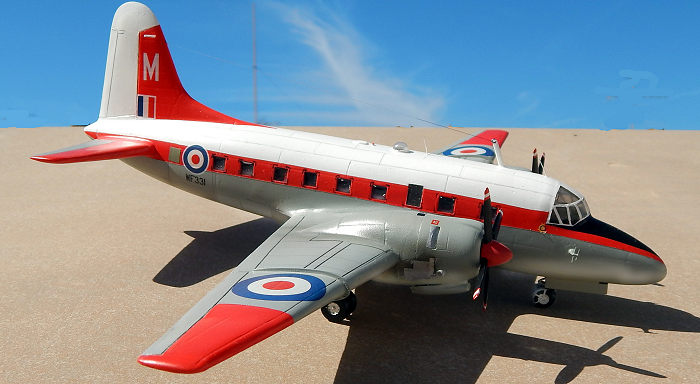
The Varsity is made to represent WT331/M when serving with the Air Navigation School at Finningley in 1976and it was a No5 FTS aircraft based at Oaklington.. This was painted light aircraft gray fuselage and wings with bright red wings and tail areas and to the long fuselage trim. Upper fuselage was white. Decals all came from Aeroclub set including roundels and walkway lines.
| CONCLUSIONS |
This was a somewhat tough model to make but in the end it was rewarding and turning into a pleasing model that brings many nostalgic memories to all those who trained on the type or spotted during the life time service.
19 March 2018
Copyright ModeingMadness.com
If you would like your product reviewed fairly and fairly quickly, please contact the editor or see other details in the Note to Contributors.
Back to the Main Page Back to the Review Index Page Back to the Previews Index Page