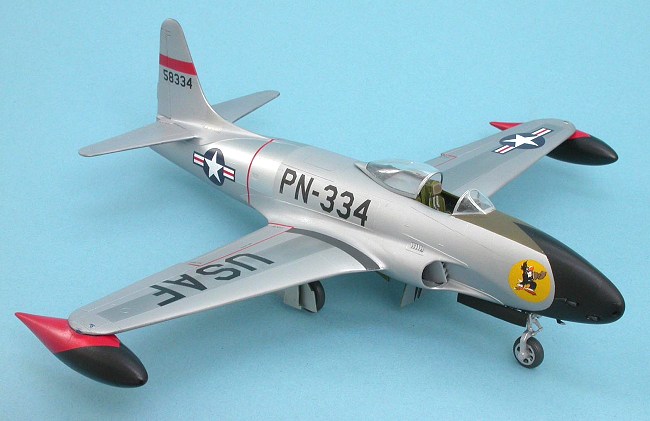
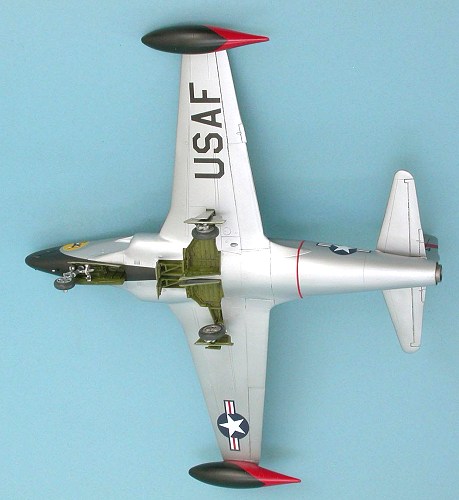
Monogram 1/48 F-80C Shooting Star
|
KIT # |
? |
|
PRICE: |
$Currently OOP |
|
DECALS: |
One option |
|
REVIEWER: |
Lee Kolosna |
|
NOTES: |
True Details seat used. |
|
HISTORY |
|
THE KIT |
Released in 1977 by Monogram, this relatively simple kit
includes a number of interior details. The fuselage is engineered to
split into two, exposing the rear portion of the J33 jet engine, with a
stand provided to hold the back half of the fuselage. The port gun bay
hatch can be positioned open to expose simplistic detail of the six .50
caliber machine guns. The speed brakes can be posed open. The flaps are
separate pieces as well, although detail is provided only on the opposite
side of the flaps themselves and not in the top of the wings or the
exposed areas of the fuselage. The kit is molded in silver styrene with
fairly prominent raised panel lines. Three different sets of wingtip
fuel tanks are included, and two 500-pound bombs can be mounted on pylons
underneath the wings. Detail in the cockpit is merely adequate. Black
Box makes a resin  replacement set, although the cockpit is such a snug
affair that most of the detail will be nearly impossible to see when the
model is assembled.
replacement set, although the cockpit is such a snug
affair that most of the detail will be nearly impossible to see when the
model is assembled.
The clear pieces are nicely transparent, if a little
thick. The modeler will need to attach the bubble canopy to a frame.
Decals are typical for Monogram for the time period: poorly printed,
super glossy, and impossibly thick. There are a few Super Scale F-80
sheets available in the secondary market and the modeler is advised to
find a sheet if building this kit.
Those readers with good memories will recall a Modeler’s
Musings column in 2002 where I cried about failing miserably to build
one of these F-80 kits. Just about everything that could go wrong did.
My airbrush broke in the middle of the project, so I had to use a backup
single-action airbrush and ended up applying the SnJ Spray Metal paint
too thickly. While polishing the windscreen, I accidentally snapped it
in two. I tried to make a new one with Thermaform, which resulted in a
misshapen blob that barely resembled a windscreen. Trying to attach it
to the newly painted model, I got glue on the thick layer of SnJ and
messed that up. I tried to sand out the blemish and repaint, but the
repaired sections looked awful and I ended up just stripping all the
paint off the model to start over again. The Polly Scale Easy Lift-off I
used to do this attacked all the joints and the model fell apart. I
glued everything back together again, redid all the seams, and primed the
model for Alclad II lacquer, which I wanted to try for the first time.
The Alclad went on beautifully over the Krylon sandable primer I used,
showing every single imperfection in the primer coat. I realized that I
hadn’t sanded and polished the primer as well as I should have. At that
point, I gave up and threw the model in the trash can. It wasn't a
vicious departure (I don't hurl things in anger very often), but more of
a dejected resignation. The kit defeated me and I had lost the will to
continue.
But stubborn I am. Over the next two years I searched for another kit, and finally got one in a trade for a Monogram AT-6. The timing was right for me to start working on it right away, and this time I was determined not to repeat the mistakes of the past.
|
CONSTRUCTION |
 process. The
cockpit was painted overall Interior Green with flat black instrument
panel and consoles. I used a True Details resin injection seat instead
of the kit seat because of the better representation of seat belts. As
stated above, it is very hard to see much of anything in the cockpit when
the model is built, so I didn’t spend a huge amount of time detailing
it. A wash in the recesses and a drybrush of the instruments was good
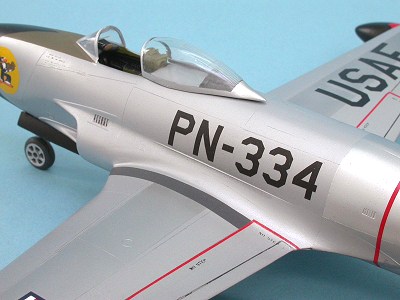
enough. The gunsight is really crude, so I cut it off the coaming,
reshaped it to a more accurate representation, and added a clear piece of
acetate for the glass. I glued several fishing sinkers inside the nose
to insure the model would sit on its landing gear properly. I added the
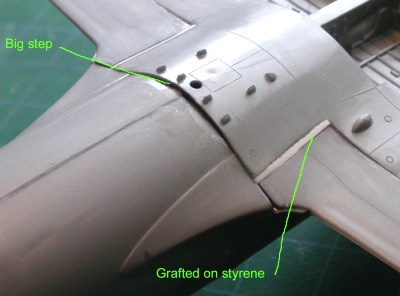
cockpit tub and nose wheel well to one fuselage side and glued the
forward fuselage quarters together. The resultant seams were pretty
significant, especially along the spine of the aircraft.
process. The
cockpit was painted overall Interior Green with flat black instrument
panel and consoles. I used a True Details resin injection seat instead
of the kit seat because of the better representation of seat belts. As
stated above, it is very hard to see much of anything in the cockpit when
the model is built, so I didn’t spend a huge amount of time detailing
it. A wash in the recesses and a drybrush of the instruments was good
enough. The gunsight is really crude, so I cut it off the coaming,
reshaped it to a more accurate representation, and added a clear piece of
acetate for the glass. I glued several fishing sinkers inside the nose
to insure the model would sit on its landing gear properly. I added the
cockpit tub and nose wheel well to one fuselage side and glued the
forward fuselage quarters together. The resultant seams were pretty
significant, especially along the spine of the aircraft.
|
COLORS AND MARKINGS |
|
FINAL CONSTRUCTION |
The landing gear wheels and speed brake wells, painted
Interior Green, received a wash made from Burnt Umber oil paint and
Turpenoid to dirty them up. Att aching the undercarriage was uneventful
until I tried to put on the nose gear doors. Talk about an exercise in
frustration! A person will need four hands to get those suckers glued
onto the model right. I finally glued the two doors together to the
retraction strut that spans between them, then carefully placed the
subassembly together onto the model and tried to get them all lined up as
best I could. It’s much sloppier than I would have preferred.
aching the undercarriage was uneventful
until I tried to put on the nose gear doors. Talk about an exercise in
frustration! A person will need four hands to get those suckers glued
onto the model right. I finally glued the two doors together to the
retraction strut that spans between them, then carefully placed the
subassembly together onto the model and tried to get them all lined up as
best I could. It’s much sloppier than I would have preferred.
I drilled out the front of the gun barrels and glued them into their slots on the nose. The pitot tube was glued on. How long it will last there in its precarious position is anyone’s guess. The wingtip tanks took a bit of fiddling to get properly aligned as the attachment point allows for some play. The final task was to attach the canopy bubble, which I bedded on the top of the fuselage spine with a tiny blob of Blu-Tak. With that last step, I was thrilled to be done and have the curse of the Monogram F-80 lifted from my shoulders!
|
CONCLUSIONS |
I love the classic Monogram kits, and have built most of
them during my modeling career. I sadly have to say that the F-80 kit is
the most disappointing one of this long and proud line that I've built.
The fit is poor, the interior detail is sub-par compared to other
Monogram kits of the same vintage, and the panel lines are heavy-handed.
With no small amount of effort it still builds up into an accurate
rendition of a very important aircraft. I believe that this subject
would make an excellent project for a new-tool design. An enterprising
manufacturer could get a lot of variations on the molds for the F-80,
including the T-33 series and even the early F-94 fighters. Modelers
would find lots of colorful markings from many different countries to
apply to these kits. Hey Classic Airframes, Accurate Miniatures -- any
of you guys listening out there? The modeling world could use a new
F-80, dudes!
Thanks to Stan Pearce, Steve “Snake” Mesner, and Tom Curda
for their assistance on this project.
|
REFERENCES |
Davis, Larry: P-80 Shooting Star in Action
Menard, David W.: USAF Plus Fifteen
April 2004
Copyright ModelingMadness.com. All rights reserved. No reproduction in part or in whole without express permission.
If you would like your product reviewed fairly and fairly quickly, please contact the editor or see other details in the Note to Contributors.