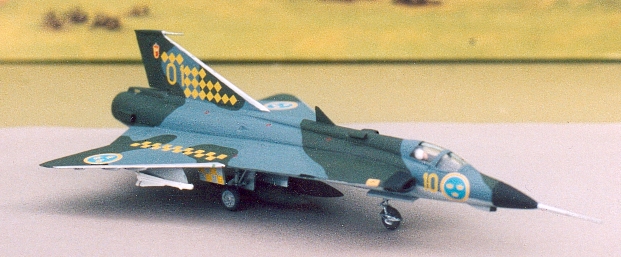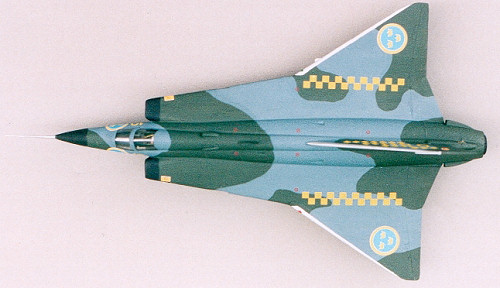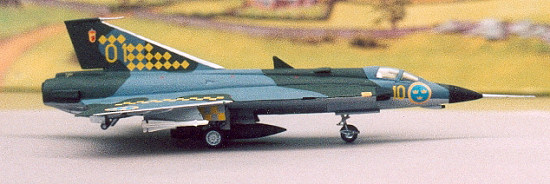
| KIT: | Airfix 1/72 Saab Draken |
| KIT #: | 02039 |
| PRICE: | £3.99 MSRP |
| DECALS: | Two options |
| REVIEWER: | Tim Mansfield |
| NOTES: | Pre 1980s kit for MM Group Build |

| HISTORY |
What can I say. Noisy, fast guardian of Swedish neutrality – at the height of the cold war. Star performer at air-shows, where it demonstrated parity with anything on offer by the West – and, we find out later, the Red Star. Primarily an Air-to-Air interceptor, the Draken also has Attack, Reconnaissance, and anti shipping roles – and it can disperse from airfields to operate from short strips of road! Developed from a requirement raised in 1949, the Draken first flew in 1955 – and was finally withdrawn from service in 2005.
| THE KIT |
The kit is
embossed 1970 on the inside – making it ideal for Modelling Madness’ Group Build
project. To add to ‘The way we used to build models’ feel – I’m not going
to spend more than a weekend on this project or add
 any aftermarket detail!
The kit consists of 52 soft grey plastic parts, and a single piece clear canopy. Surface detail is raised and interior detail limited a pilot on a VERY crude seat.
The kit retails for £3.99 in the UK – but mine was £1 at North Somerset model show in 1999. What a bargain!
I had built a previous Airfix Draken in 1987 (the one in flying mode) – which was also built in the same manner.
| CONSTRUCTION |
All I can say is straightforward and quick – just follow the instructions. No need for special tools or jigs. I did use liquid paper on the outer wing joints, and tail – but nowhere else. Also, I was more careful to remove moulding gates and check mating surfaces – than I was in 1987.
Airframe was completed one Friday night, and dried sufficiently to be painted later that night.
| COLORS & MARKINGS |
 rey
camouflage pattern. Completed by 10am Saturday.
rey
camouflage pattern. Completed by 10am Saturday.Decal Application
| FINAL CONSTRUCTION |
Undercarriage
legs and wheels were fitted late on Saturday night, along with fuel tanks and
nose-cone – before being left to set overnight. This model has an air-gun
pellet in the nose for ballast.
Undercarriage doors were fitted on Sunday morning – this model sits well on its undercarriage.
The outer wing missiles were painted white overall – then left to dry.
On Sunday evening the model was given an overall coat of Humbrol MattCote, before having the missiles fitted.
I went overdrawn on my ‘one weekend only’ timescale – by silvering the wing leading edges a few nights later. For this I drew the outline with gel-pen – then infilled with Humbrol silver paint.
And there we have it – another Draken enters my loft air force.
| CONCLUSIONS |
I’m not going to measure this model for accuracy – but will ask “does it look like a Draken?” The answer is undoubtably YES!
The kit is not upto current standards – as I’d imagine the Hasegawa kit is – but that was known from its pedigree at the start.
Was this project FUN? YES, many thanks to Scott – for his group build idea.
March 2006
If you would like your product reviewed fairly and quickly by a site that has over 300,000 visitors a month, please contact me or see other details in the Note to Contributors.