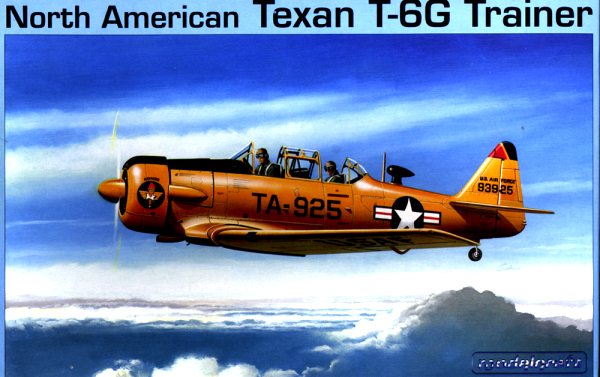
Modelcraft 1/48 T-6G
|
KIT # |
48-013 |
|
PRICE: |
$20 |
|
DECALS: |
Six Aircraft |
|
REVIEW & PHOTOS BY: |
|
|
NOTES: |
|

|
HISTORY |
The AT-6 Texan was one of the most extensively used aircraft in history, with some 15,495 Texans being built by North American between 1938 and 1945. The Texan’s design evolved from the BC-1 Basic Combat Trainer, which the Army Air Corps ordered in 1937. Over 10,000 Texans went to the Air Corps, with the rest going to the Navy (as the SNJ) and many allied nations. Because of the shortage of aluminum during World War II, North American built about 3000 Texans out of wood.
 After the
war, the aircraft was redesignated the T-6. In 1948, some 1800 T-6s were
modernized and redesignated as the T-6G. During the Korean War, some of these
aircraft flew spotter “mosquito missions” to mark targets for other ground
attack aircraft (a forerunner of the combat air controller mission that later
really matured during the Vietnam War).
The T-6 was capable of all types of aerial maneuvering, and was designed to provide the best training across as many combat mission roles as possible. A Pratt and Whitney R-1340 Wasp engine developing about 550 horsepower powered the original T-6. With this engine, the Texan could cruise at 145 mph and reach a top speed of 205 mph.
Due to its maneuverability, simple design, and relatively inexpensive maintenance and operations, numerous Texans still exist and are owned by private individuals. They are also a common sight at the Reno Air Races. As one anonymous individual put it, the T-6 was "The best machine ever built to turn gasoline into noise."
|
THE KIT |
 This kit
essentially is a reboxing of Occidental’s 1/48th Harvard kit, No.
0211, with a new decal sheet (for a complete review of the kit’s plastic parts,
see Scott Van Aken’s excellent
preview. Modelcraft’s boxing even includes the ordinance (rocket launchers
and wing gun pods) found in the Occidental kit. The kit parts are molded in gray
plastic on two sprues and one clear sprue. The instructions claim that the kit
contains parts for both the older and newer style canopies, but I couldn’t find
extra canopy parts in my kit. After an email message to Modelcraft, however, I
was informed that the modeler gets the two different canopies by painting the
frames differently. All panel lines are engraved and even the rivet detail is
engraved.
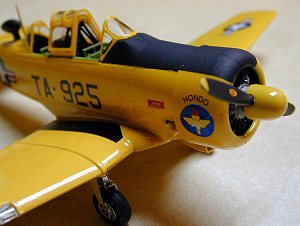
The cockpit consists of 12 parts and is rather sparse by today’s standards (even when compared to the Monogram cockpit, which has much more detail from an instrumentation standpoint). The seats are somewhat thick and have molded-in shoulder harnesses. The instructions are vague and even confusing in some places and require some studying prior to assembly. The engine consists of 4 parts, and detail here is also somewhat sparse when compared to other companies’ offerings. While both these areas of the model appear sparse, they nevertheless build up into more than acceptable replicas of the prototype’s cockpit and engine.
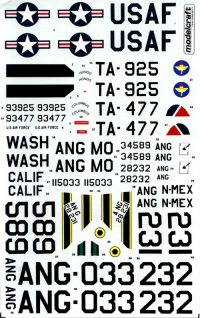
The kit’s decal sheet provides markings for six different aircraft: two Air Force training command aircraft, one from Hondo AFB, Texas and the other from Columbus AFB, Mississippi; and four Air National Guard aircraft from Washington, Missouri, California and New Mexico. The decals are quite good, respond well to setting solutions, and lay down nicely on the finished kit.
|
CONSTRUCTION |
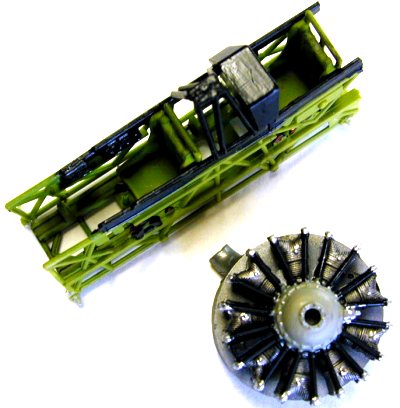 As usual, I started with the cockpit and essentially assembled it
straight out of the box. Once assembled, I painted the interior with Testors
chromate green and then painted the various instruments and boxes flat black,
picking out the instrument details with white, yellow and red paint. The cockpit
“cage” was painted with Testors flat black.
Next, I assembled the engine, painting it Pactra steel, then dry brushing the cylinders with Testors aluminum. The pushrods were hand painted with Humbrol chrome silver, while the front engine cover was painted with Pactra rebel gray.
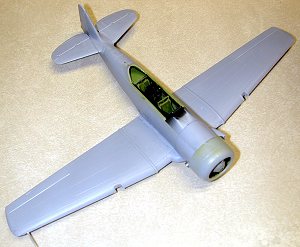
The major parts of the model go together fairly well, and only a few areas required filling and sanding to get a good seam. Probably the most noticeable area is where the wing meets the wheel wells on the underside of the aircraft. This requires some careful mating, filling and sanding to achieve a good appearance.
Given the multiple canopy sections (5), I opted to leave the canopy off the model until after I painted it. I would later paint the canopy sections separately after masking them. At this point, the model was ready for the old paint shop.
|
PAINT & DECALS |
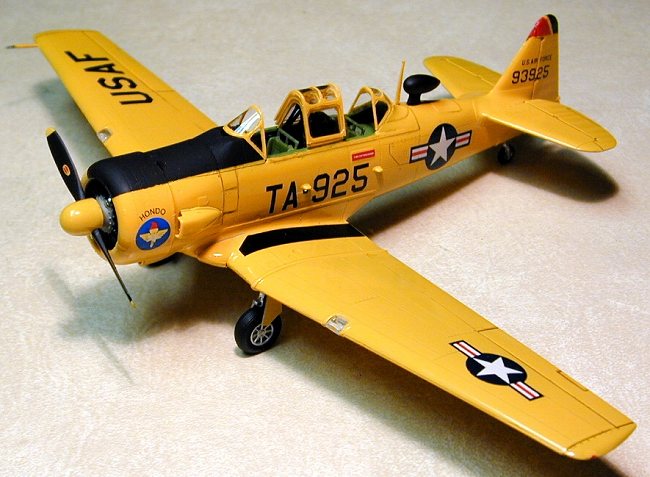
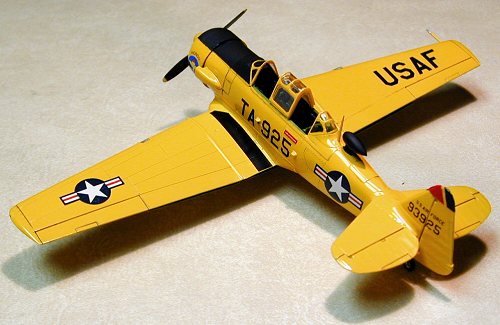
 I wanted to do a gloss trainer yellow paint scheme, so I opted
for the kit’s Air Force Training Command markings for Hondo Air Force Base,
Texas, from the mid-1950s. The kit instructions say to use Chromate Yellow (FS
13538) for the trainer yellow scheme, so I got out my bottle of Model Master
Chrome Yellow.
Prior to shooting the overall color, I stuffed Kleenex into the open cockpit and the engine cowling. The kit instructions said to paint the wheel well interiors the same as the body, so I left these open (I couldn’t find any references that would tell me otherwise, so I opted to go along with the instructions, even though, as previously stated, they aren’t the greatest in the world!). I masked off the area for the anti-glare panel with Scotch Brand Magic Tape, and then shot that area with Testors Flat Black. Once this was dry, I masked over the flat black, and the model was ready for its chrome yellow paint job.
Since chrome yellow is a glossy paint, if I did this right, I
could avoid having to coat the
 model with Future or some other gloss surface
prior to decaling. So using my tried and true gloss painting techniques
developed over the years from building model cars (see…there is a benefit to the
Dark Side after all!), I shot a very glossy coat of chromate yellow all over the
model and set it aside to dry for a few days. The flaps, propeller spinner,
radio antenna mast, and landing gear doors were painted separately. The interior
sides of the flaps and the gear doors were sprayed with Model Masters chromate
green.
While the chromate yellow dried, I painted various other parts (wheels, propeller, and dorsal antenna housing) flat black. The landing gear and wheel hubs were sprayed with Model Masters non-buffing aluminum. (Note: the kit instructions say to paint the landing gear the body color. I was able to find pictures of T-6s with their gear painted both ways, but the ones that had body-colored landing gear were restored aircraft, so I just felt they would look more authentic painted aluminum.)
Once the model was completely dry, I applied the kit decals. As previously stated, they went on really well using Micro Sol and Micro Set. Once dry, all of the decals nestled down nicely onto the model’s surfaces.
 Once the decals were dry, I opted to not shoot a coat of clear
gloss over the decals. Rather, I polished them using Model Wax. This gives them
a slight shine in keeping with the model’s overall glossy appearance. Finally, I
used a diluted solution of Liquitex’s ivory black acrylic to highlight some of
the model’s panels. I wiped up excess solution using Q-tips.
My last painting job was the canopy. I masked all of the glass areas with Scotch tape, and then covered the inside of each canopy section with tape. I taped the sections down to a piece a paper to hold them steady, then shot the sections with chromate yellow. Once they were dry, I carefully lifted off the scotch tape with an Exacto knive and a pair of tweezers.
To complete the assembly, I attached all of the previously painted parts to the model. Finally, I attached the canopy and landing gear light covers using white glue.
|
CONCLUSIONS |
This was a fun kit to build, and I think it looks quite good when finished. Construction was relatively simple and the overall time to complete the kit was well within my ever-decreasing attention span! The Monogram kit is still the old standard, but this kit has better exterior engraving than the Monogram kit (larger rivet detail and raised panel lines). The more adventurous might try slamming the Monogram cockpit into the Modelcraft body just for fun. Overall, I highly recommend this kit as a great addition to one’s model collection.
|
REFERENCES |

1. “North American T-6G Texan,” Air Force Museum Website, http://www.wpafb.af.mil/museum/early_years/ey19.htm, 2001.
2. “T-6 History and Specifications,” http://www.warbirdadventures.com/page2.html, 2002.
3. “North American History: The War Years, 1939-1945,” http://www.boeing.com/companyoffices/history/bna/waryr.html, 2002.
If you would like your product reviewed fairly and fairly quickly, please contact the editor or see other details in the Note to Contributors.