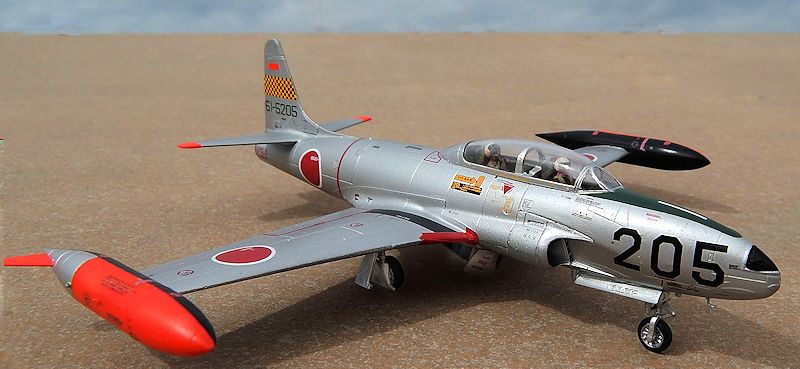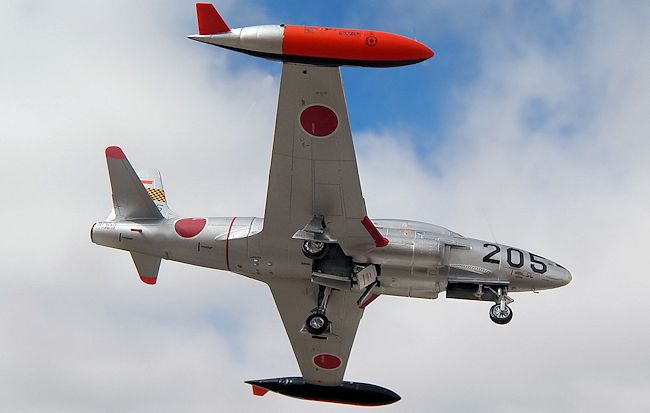
Platz 1/72 T-33A 'Hamamatsu Air Base'
| KIT #: | AC 11 |
| PRICE: | $37.00 |
| DECALS: | Five options |
| REVIEWER: | Carmel J. Attard |
| NOTES: |

| HISTORY |
Hamamatsu Air Base is known as the birthplace of the JADF. located in
Hamamatsu Shizuoka in Japan. The air base is well known as the place of the
JASDF’s aerobatic, demonstration team Blue Impulse’s
 inauguration. In 1954
the Japanese ASDF established a flight training school and since then this
place has played an important part of the air force air-training category.
The T-33 was the first jet trainer for the JASDF flight training. The US Air
Force developed the T-33A from the Lockheed P-80/F-80 shooting star adding
two seates and longer fuselage. Many countries all over the world adopted
the T-33 for their training and the production quantity was over 6500 units.
In 1955 the USAF supplied the T-33A to JASDF and Japan started operations
with this aircraft as the main trainer.
The T-33 was nick named T-bird or
San San for more than 30 years until the T-4 trainer started to arrive.. The
T-33s were gradually retired. In March 1990 the T-33 squadron that used the
T-33 dissolved along with their T-33As. The last flight ceremony of the
squadron was held in September 26th in 1990. All of the T-33As were retired
by June 2000. The retired T-33As are now being displayed at some museums in
Japan.
| THE KIT |
This is a very nice model of the T-33. The first thing that captures you
when you open the box is the impressive decal sheet which features any one
of the six options on offer. The markings take you back to the mid 1950s at
Hamamatsu air base that was the home for 68 T-33s. No photo etch parts are
included and the decal sheet can produce a great model.
 The moldings of parts look of high quality on every single part of the 58 gray
plastic items. No flash to remove and parts have fine recessed panel lines and
other fine surface detail. There was one shallow sink mark on the fuselage side
at mid section just behind the air intake area. This is hardly noticeable and a
little filler will remedy the situation.
Back to the decal sheet, this really amazed me with the wealth of detail that
included a good number of fine legends which in spite of their size can be
readable.
These included
instruments for the pilot instructor and trainee, wing sidewalk ways; flaps
warning stripes, aircraft numbers, anti glare patch and unit tail markings. The
headache is to locate each of over 200 separate decals that I regarded as an
enormous challenge to identify on the instruction sheet where they are clearly
indicated and with some effort can all be located. Cartograf of Italy printed
the sheet including the well-registered roundels. The 6-page instructions are
well illustrated and were easy to follow the assembly stage by stage sequence.
| CONSTRUCTION |
 Construction starts with assembling cockpit office, comprising two
instrument panels, two seats, a cockpit tab complete with side instruments,
and two control sticks. There is also a canopy arch which raises the canopy
and fits inside. Painting and decals to fit inside are also done at this
stage. All of the parts fit so well to one side of the fuselage and checked
for correctness when both fuselage halves are checked together. Nose balance
weight was added and secured with white glue and the fuselage halves were
glued together. The fuselage is split into a forward and a rear assembly, so
that the cockpit area is to one part and exhaust detail which fits in the
rear part. These were then glued together.

| COLORS & MARKINGS |

| CONCLUSIONS |
This was an enjoyable build. The only extra bit I added was the tiny ‘L’ shaped antenna located under the nose that I replaced with one made from metal wire. I recommend the kit to anyone with an attraction to jet trainers or those interested in post war colourful Japanese aircraft.