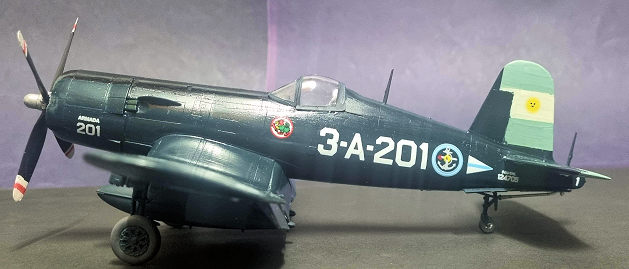
Hasegawa 1/48 F4U-5N Corsair
| KIT #: | 09075 |
| PRICE: | $ |
| DECALS: | Two options |
| REVIEWER: | Francisco Santoro |
| NOTES: | Condor Decals 48043 |

| HISTORY |
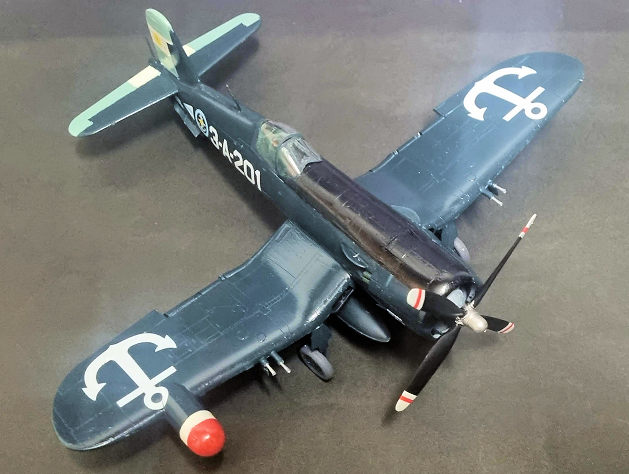 The Corsair
was incorporated into the Armada Argentina in 1956 to be used in the aircraft
carrier Independencia and on the continent. The 26 machines were divided in
three: the F4U-5 fighter bomber, F4U-5N nightfighter, and F4U-5NL all-weather
fighter bombers equipped with the AN/APS 4 radar. The Corsairs are gathered and
form 2° Escuadrilla de Ataque, which was divided in two groups, a day and night
dedicated squadrons. In 1959 the Corsairs were operating on board Independencia.
Fast forward to 1965, they were last seen by the public on a July 9th parade for
Argentina’s Independence, being removed from service in November of 1965. 2°
Escuadrilla is deactivated on Januay 20th 1966.
| THE KIT |
Typical from Hasegawa, the model comes inside a single bag, risking possible scratching, breaking, or breaking away of the parts while the kit is in transit. The plastic is molded in a hard and dark grey colour. The radar comes as a separate part, and there’re four polycaps that allow for the prop to spin.
Decals are for two USMC aircraft during the Korean War, one painted in black and the other is Dark Sea Blue.
| CONSTRUCTION |
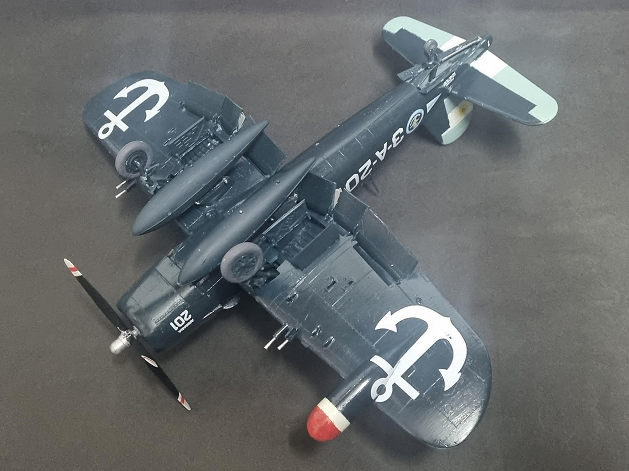 I started by
painting as many parts as possible on the sprues. Cockpit parts were painted in
Interior Green (Revell 48 Sea Green) with a black instrument
panel. I then glued the cockpit to the fuselage and opened the holes for the
flamedampers. Once that was done, I glued the fuselage halves
together. Wings were glued and the lower wing hardpoints were
added. The wings were then mated to the fuselage, together with the horizontal
stabilizers. The radar was then glued. I then glued the engine to its mounting
point and left it to dry for a bit. When I dry-fitted the cowling, I discovered
it wouldn’t fit if not trimmed, so I grabbed my knife and removed some plastic
from the locating lip, that way the cowling fitted. I then filled everything
with Vallejo’s putty.
While the entire airframe was drying, I painted the fuel tanks, landing gear parts and wheel hubs in Dark Sea Blue from Vallejo, making sure to previously prime everything with Light Grey (Light Grey 76 from Revell). The prop was painted black with white and red tips and metallic hub.
| COLORS & MARKINGS |
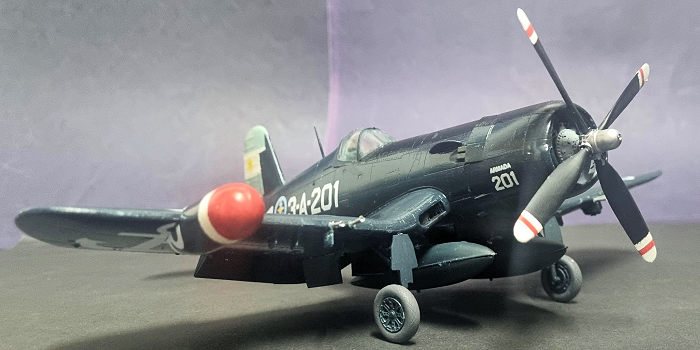 The entire
model was primed with the aforementioned Light Grey, and was then painted
entirely in Dark Sea Blue. The anti glare panel was painted black. Then the
model was glossed with Revell’s Gloss Varnish.
Decals came from Condor Decals’s 48043 set. They’re a bit tacky, so make sure you flood the surface with water. I was worried about the anchor that was to go over the radar wouldn’t conform to the surface, but careful trimming and some Mr. Mark Softer (or Microsol, can’t remember) made every decal sink into the panel lines. The model was the glossed again (my Revell matt varnish leaves a white residue. I have since replaced it with a new varnish from EQ Arte).
I painted the clear parts and glued the wheels, fuel tanks and prop in place, and the build was complete.
| CONCLUSIONS |
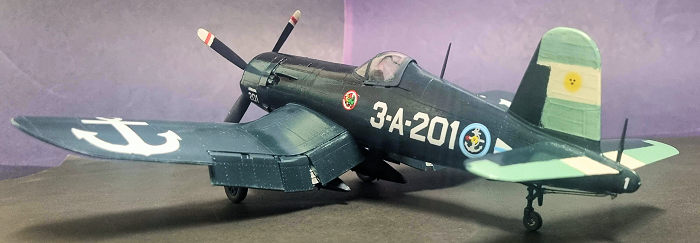 Another
(almost) winner from Hasegawa. The cowling lip threw me off a bit, but was
solved easily. The other option two this offering is the Hobby Boss one, but the
wings have the fabric texture of earlier Corsairs, the -5 variant having metal
wings (they can be filled and sanded, but why bother when you have the Hasegawa
kit).
| REFERENCES |
https://amilarg.com.ar/vought-f4u-corsair.html (Spanish language)
3 September 2024
Copyright ModelingMadness.com. All rights reserved. No reproduction in part or in whole without express permission.
If you would like your product reviewed fairly and fairly quickly, please contact the editor or see other details in the Note to Contributors.