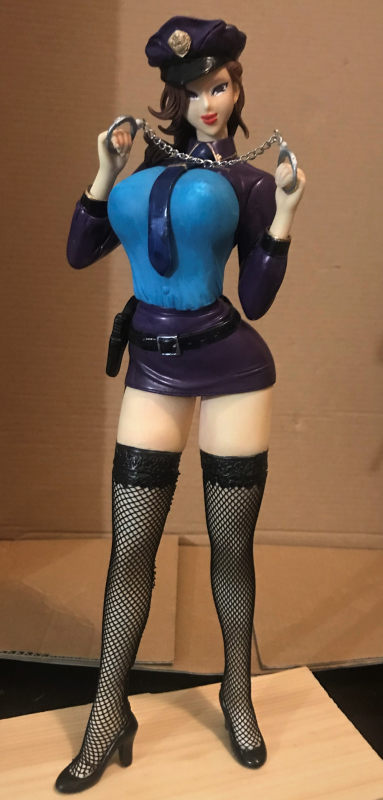
 Not much is known about this. E2046
didn’t provide a history either……All I know is she’s a policewoman in a very
sexy outfit with big bobbies and a nice caboose…That’s it.
 | KIT #: | FG 10668 |
| PRICE: | $50.00 |
| DECALS: | For the eyes |
| REVIEWER: | Donald Zhou |
| NOTES: | Extremely detailed, Excellent resin casting, Very sexy figure, two body options Disadvantages Some parts are small, takes work to get the nylon stockings on, |
| HISTORY |
 Not much is known about this. E2046
didn’t provide a history either……All I know is she’s a policewoman in a very
sexy outfit with big bobbies and a nice caboose…That’s it.
| THE KIT |
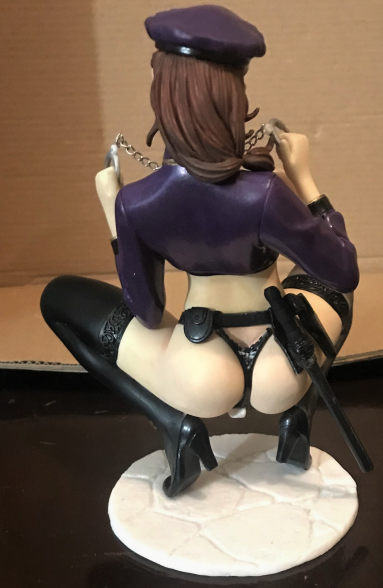
I was trolling E2046 web site when they had one of their many sales and this figure popped up. The kit arrived around three months ago, took me a while to make it since I got several other projects going on and was trying to work out a plan of attack for her nylon stockings. The package contains around two dozen pieces, mainly two separated lower body pieces. Which is separated into even more pieces to ease painting. This includes both a standing upright fully clothed version (well, I made it fully clothed) and a lower, squatting much much more NSFW version that leaves very little to the imagination! The upper body shoulder piece is separated so you can switch between bodies since its snap tight. Well, mostly. I had to use a hairdryer to heat it up quite a bit to get it to go into the slot. Because of this, all the accessories, the belt, the walkie talkie, the baton, pistol etc come with two of each so you can easily make both lower bodies to switch between both at any time. The kit also contain a good size nylon “sheet” to make her nylon stockings and a metal chain for her handcuffs. Other than that, it’s you average standard resin kit.
| CONSTRUCTION |
Main construction is minimum. Again, resin figures,
especially this one with colors all over the place, means you have to keep all
the parts separate or else you will have a hell of a time later when it comes to
painting. Since the upper shoulder can be removed and attached at any time
between the two lower bodies, I made both, but just not yet. The squatting NSFW
body, I attached the legs to the lower body. I decided not to put the nylon
stockings since I can’t see how I can get the nylon in between the folds of the
legs. This meant I also had to do several putty sessions to close up the seams
for the nylons there.
 The remaining body parts are still kept separate
especially since a belt goes on top of the waist and then a lingerie upper piece
goes on top of the belt before her chest goes on top of that. The standing body
has the belt molded on but the lower and upper body have different colors, I had
to forgo attaching them. The only exception is with her shoulder, I superglued
her arms into her shoulder sockets. I then puttied up the area in
between her standing legs so as to make her far safer to look at in her standing
mode! Other than that, to the paint shop we go!
| COLORS AND MARKINGS |
Now, there are two sets of eye decals provided so I’m gonna use those. Just a hint, these decals are a complete sheet, which means you have to cut them to shape and never EVER use Mr. Marks Softer as that EATS these decals! Anyways…
Painting begin with a spray of Testor’s Flesh base on every relevant part, which are a lot. Then the upper body and her skirt, which I sprayed first with Pearlescent Purple before washed them with various light purple shading to get the glossy purplish look. Going for the shiny vinyl plastic here. The upper body containing her chest blouse, I painted with turquoise blue, washed with white and light blue. Her belts I painted rubber black with black gun holsters, flat black walkie talkies and rubber black batons. For her flesh parts, hands, squatting body, face, I used Tamiya flesh as a shadow, with Testor Flesh Warm, as offset color for her darker skin parts and then very light sun kiss peach for shading. Hair, red brown was sprayed on first, before it was washed with cherry red and even heavier flag red for her red head. The whites of her eyes were then drawn out before the eye decals were placed on. I also used black to mark her privates downstairs to make sure she wore a pair of panties instead. For her squatting legs, since I forwent the nylon stockings, I taped up her flesh bits, then heavily diluted semi-gloss black before spraying it all over. After that was dried, I then used flat black, heavily diluted it and washed it all over to simulate regular black stockings. All in all, Painting took a while just due to the amount of different colors and all the flesh shading that I used.
| FINAL BITS |
There is a lot left.
 First her squatting body. Her heels are first super
glued onto her feet. There are two different pair of heels. You can’t mess this
up since her squatting pose has her on the tip of her toes so the squatting
heels is bent much more upwards than her standard standing heels. Then the belt
was attached before her stomach was added on top. Finally, her chest was
attached here. I had to test fit this piece several times to make sure contact
was seamless and there are no cracks that develop cause everything was already
painted. Thankfully, the lacy lingerie molded on helped greatly with this! Now,
before I forget, you do get a lacey panties to cover up her nasty bits in the
squatting pose. I painted it black but left it off mostly cause of….reasons…You
can choose to put it on to make her slightly safer for work but that’s you and
your choice!
Now, the standing body….
First things
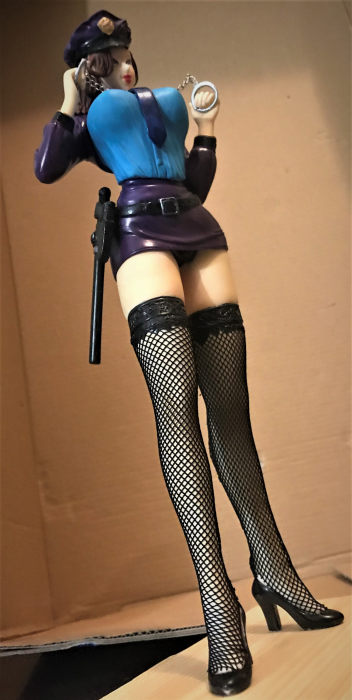
first, after watching Leona’s YouTube tutorial on how to make nylon stockings, I
decided to tackle this…Funny….The nylon sheet contains the lacy upper part but
the lace are already molded onto her separated legs! GO FIGURE. This meant I had
to use the bottom where the lace was not present. I first used E6000 glue since
it does not dry nearly as messy and fast as super glue so I can have a little
leeway. I first sprayed flat black into a narrow strip onto her legs (having
previously already taped them up), then using the E6000 glue, I added a small
globule to where the black strip starting and finishing line is, at the very
top, and then working sequentially downwards, I added a globule every inch or so
until it reached the bottom. This way, the starting “line” nylon was sticked
onto the black strip firmly. I waited until the glue is completely dry before
wrapping the nylon around the legs tightly, but not so tightly as to stretch it.
Then using a very sharp hobby knife (watch your fingers!), I sliced the top most
part open, then quickly jammed it down with both E6000 glue and a slight drop of
superglue so it can quickly dry. After that, it’s cinch cutting up the nylon to
shape, following the contours of the leg. After that is done, I used superglue
to glue the rest to place before using my decal cutting scissors, which are very
small and great for these types of things, cut off the excess before taking a
lighter to burn the rest that I can’t cut off! As can be imagined, this takes
practices and DO NOT hold the flame too close or long or else you will burn the
nylon! After that was done, I did the same for the other legs. As it turned out,
the only mistake I made was I didn’t put the nylon far up enough along the legs
so that when they were joined with her hip, they did not meet the lacey upper
part of the  stocking. I feared if I put them too upward, it would interfere with
the joint but there are enough of seams that you can get the stockings up there
without worrying about the legs not fitting. I had to break the stocking loose
and then jab them up there with a hobby knife and use putty to fix the mess.
Hence why you see all sorts of lacey “Triangles” along the stockings. It’s to
cover up the mess.
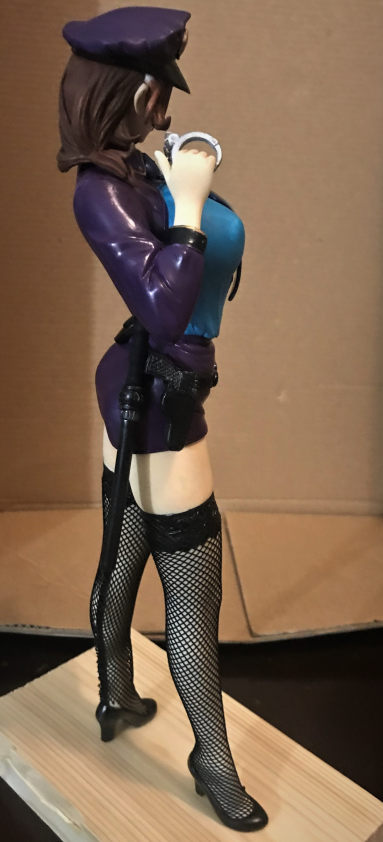
Anyways, after the legs got attached to the hip, I added her heels. Again, there is no way you can confuse the two sets of shoes. Then her skirt was added on. Since the belt is molded on with this body, I decided to add all the accessories on the belts at this point for both bodies, namely the pistol, baton, walkie talkie etc. One of the baton will not stay on, forcing me to use E6000 glue as an extra but both eventually got finished.
Next is her chest blouse I guess. This is blue in color to offset the main body color.
Finally, her face. After putting on the eye decals, I attached the multi-piece hair. The hair is in multiple pieces due to the details and the fact her cap goes on top of here. Notice the badge in the middle is separate so you can paint it gold without worrying about nasty taping. In fact, after I finished both bodies, gold details were added throughout the standing body especially, along the collar and sleeves. The head is then attached on to her neck. With that, you can now choose to put the shoulder on to the two bodies any time you wish for a “Safe and Sexy” or “Completely NSFW” pose
The last two pieces are her neck tie and cuffs. These are separate and can be attached to their place without glue since they are designed to be removable if you decide to switch bodies. The neck tie I painted dark sea blue. For the cuffs, I painted the cuffs silver but when it came to attach the bare steel chain, I somehow can’t find my strip of thin copper wire so had to superglue them. The end result is that the chain just barely have the correct length to stay in her hands without falling short! But still, I got them to go and yes, model complete.
| CONCLUSIONS |
A lot more complex than initially thought cause again, the painting need some serious thoughts as it’s multitude of colors you need to do both bodies since it’s designed to allow you to switch in between them. Yes, I mostly have it on her “safe and sexy” standing pose and have the “completely NSFW” squatting pose hidden in a shelf somewhere so my two kids don’t find out! Still, this is highly recommended cause it’s a striking figure despite her squatting pose and can be made into a stunning piece. Now you, yes you! Come over here! You are under arrest by little ol’ me, Policewoman Akiko, now put your hands above your head and stand by that wall so I can get these cuffs on you!
17 January 2022
Copyrights ModelingMadness.com. All rights reserved. No reproduction in part or in whole without express permission.
If you would like your product reviewed fairly and fairly quickly, please contact the editor or see other details in the Note to Contributors.