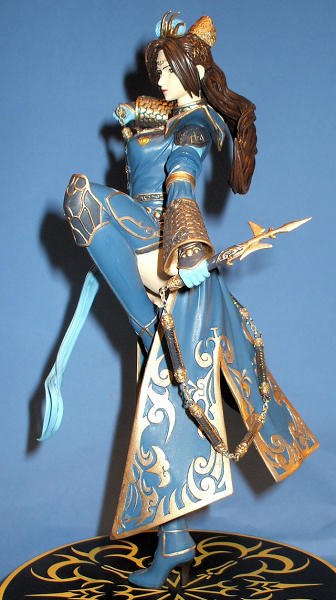
 E2046
1/6 Fei Yang
E2046
1/6 Fei Yang| KIT #: | FG 4758 |
| PRICE: | $47.00 |
| DECALS: | Some included for outfit and weapon details. |
| REVIEWER: | Dale Rannals |
| NOTES: | Resin with some metal pieces. |
 E2046
1/6 Fei Yang
E2046
1/6 Fei Yang| KIT #: | FG 4758 |
| PRICE: | $47.00 |
| DECALS: | Some included for outfit and weapon details. |
| REVIEWER: | Dale Rannals |
| NOTES: | Resin with some metal pieces. |
| HISTORY |
There really isn’t much
to tell about Fei Yan’s history, as I don’t believe she belongs to any animated
series. She is part of E2046’s Ori
project and grouped in their “Elegance” series. I believe she is an in-house
design.
This is the small
background from E2046:
| THE KIT |
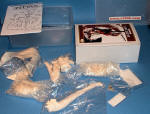 I was quite impressed when this package showed
up at my doorstep from
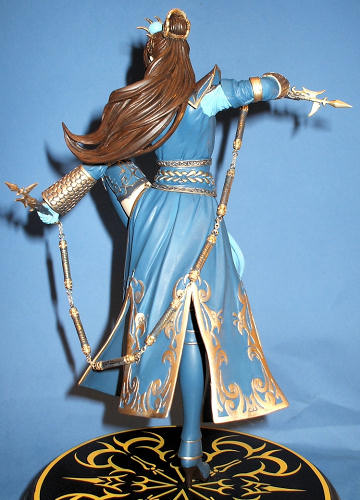 Upon closer inspection the resin pieces were
indeed beautifully cast…..no air bubbles or flaws anywhere……and most of the
parts already had any mold seams sanded down.
The kit is engineered to hide/cover any assemble seams, so aside from a
couple small casting blocks to remove, this kit was ready to go.
| CONSTRUCTION & PAINTING |
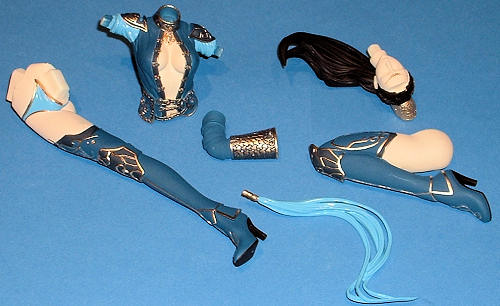 First step in this build was deciding on a
color scheme. She is shown at their
website and on the included photos in a red, black, and gold outfit, which I do
think is very nice. I however,
decided to do things a bit different and go with a blue/black/gold combination.
So first thing was to go off to the spray-booth with some tan acrylic
paint I had mixed up and sprayed the skin areas.
This was allowed to dry for a day and then I sprayed the clothing with
some Testors dark blue (little bottle).
That was it for the airbrushing sessions for this construct, as the rest
of the painting gets done by brush in front of a magnifying glass.
Next on the agenda was painting the black areas
of the ensemble. Here I used my mix
of “VDG” paint I use on all my kits.
Nothing super secret, so I can tell you it is just a mixture of Very Dark
Grey I use instead of straight black.
Straight black is just too intense for models, in my opinion; I think
going with a very dark grey looks better.
YMMV.
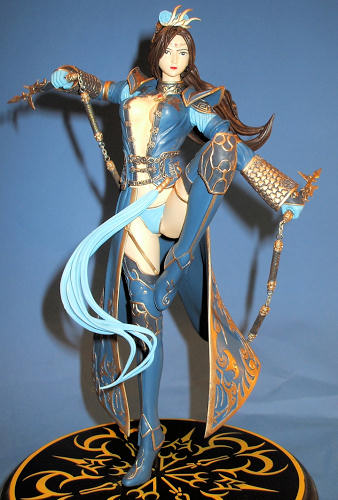 The light blue areas were painted next; again
Testors little bottle. Somewhere
around here I painted her hair with Testors Rubber (yep…little bottle) and
highlighted it with some lighter brown oil paints and set it aside to dry
thoroughly.
The next couple weeks were spent doing the
detail painting with a tiny brush, magnifying glass, and gold paint, Testors…..you
guessed it…..little bottle. This
went fairly well and was actually a very nice change of pace.
I did this in small sessions of maybe a half hour to an hour at a time.
Any flubs were corrected after everything had dried.
The odd weapon was then painted, decaled, and assembled. Here I drilled a small hole in the end of each segment and screwed in the connecting chain bits. Everything at this point was glued together with the exception of her head, as I still had the most frightful part for me to paint…her eyes. These can obviously make or break a figure kit, so I took my time working from the photos. Finally, with a little glue, she was no longer headless and, in fact, complete.
| FINAL CONSTRUCTION |
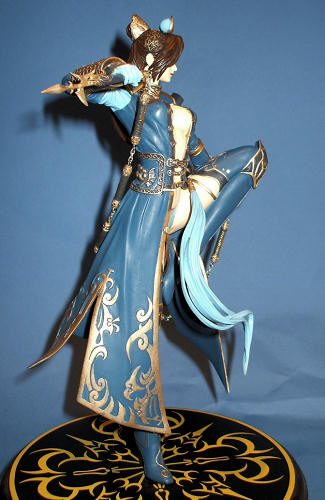 When I ordered this kit I also ordered a base
for it….wood, round, and with a nice black and gold pattern on it.
I added a metal rod to the bottom of her foot and then marked and drilled
a hole in the base.
She now stands gracefully ready to kick
someone’s butt.
| CONCLUSIONS |
Thanks for reading this far!
June 2010
If you would like your product reviewed fairly and quickly, please contact me or see other details in the Note to Contributors.