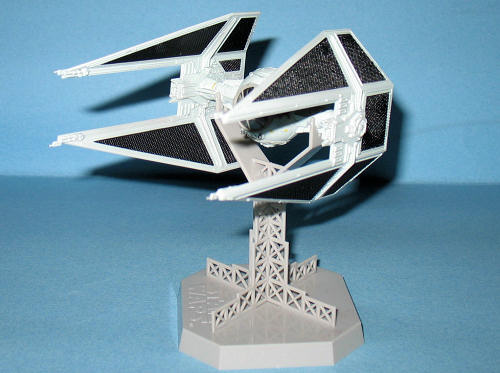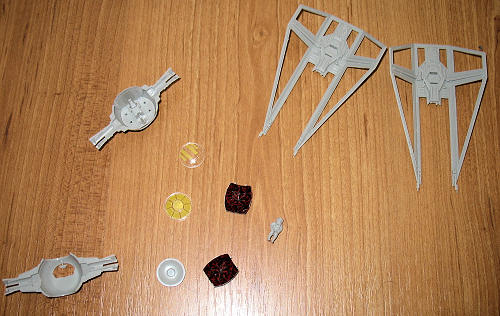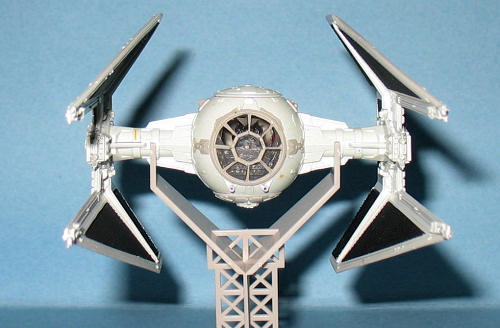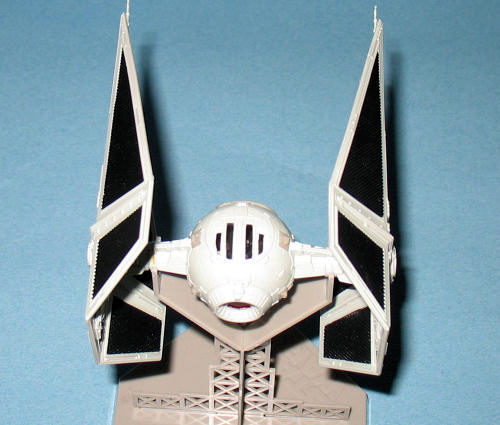
Fine Molds 1/72 Tie Interceptor
| KIT #: | SW-5 |
| PRICE: | $24.00 or so from www.hlj.com |
| DECALS: | One Option |
| REVIEWER: | Dan Lee |
| NOTES: |
Includes crew figure and masks. |

| HISTORY |
The “Serious” History
Combat experience with the
Rebel Alliance showed that the standard
 These faster more powerful
interceptors were replacing the standard
The Movie and Game History
The
Despite that, the
| THE KIT |
See my preview of the kit.
| CONSTRUCTION |
 Having built the
As I waited for the decals to dry, I masked off
the clear pieces using Tamiya tape and a sharp number 11 blade.
Fine Molds supplies adhesive paper masks, but I’ve
found they don’t work as well as Tamiya tape.
The cockpit side panels were sprayed with flat
black while the interior, exterior parts and the cockpit window were sprayed
with Tamiya XF-20 Medium Grey instead of the suggested Neutral grey because
I was painting an F-15 Eagle at the same time (I was too lazy to change to a
similar grey.)
I worked on the pilot figure, cleaned up the mold
marks and sprayed it gloss black when I sprayed the wing panels.
When all the paint on the
interior parts was dry to the touch, I built up the cockpit and glued it
into the rear half of the
The front half of the fuselage was sprayed with
XF-63 German grey.
When it was dry, I covered the front area with a
piece of wide Tamiya tape and cut carefully around the circular area as a
mask.
The fuselage was then glued with a combination of liquid glue
and CA glue.
The areas that would require filling and sanding were done
with CA glue while the areas that did not were done with liquid glue.
I did this to reduce the time for the glue to fully
cure and thus remove the possibility of phantom seams.
Since the seams were already filled all that was
needed was sanding.
The seams were sanded carefully using 400 grit Wet/Dry sandpaper and then polished with 3200 grit sanding cloth.
| COLORS & MARKINGS |
Painting
The instructions call for an Air Superiority Blue.
I don’t have Air Superiority Blue (whatever light
blue that is) in my large collection of paint, but I do have Gunze Duck Egg
Blue which was good enough for me and which I used for the main color on the
fuselage, the top hatch, the bottom plug and the framing of the “wings.”
 The Solar panels and the pilot were sprayed Acryl
Gloss Black while the “canopy” and various surface bits were painted Medium
grey as per instructions.
When the base paint was dry, I took some Citadel
Mithral Silver, brush painted the engine nozzle and then brush painted on
Tamiya Clear Red to give the engine nozzle some life.
The instructions recommend that you use German Grey.
Markings
Once the paint was dry, I added the decals. There were only a few exterior stencils to do (most of the markings are for the interior and pilot) and they went on well except for two triangle pieces that preferred to stick to my fingers and I ruined. I replaced them with a careful dab of yellow paint. Once they were in position, I used a small dab of Micro Set (they are not typical Japanese decals) to get them to snuggle down.
Weathering
| FINAL CONSTRUCTION |
The “wings” were assembled next as I followed the
instructions and glued each solar panel into its respective section.
Make sure you identify each part as some of the
panel sections are almost identical with very subtle differences that will
make assembly a pain in the rear.
 Next I added the lasers to the wings and then
glued each wing onto the fuselage using Tamiya liquid glue.
I’d almost recommend that you use superglue here
instead as I had to clamp the two wings with my hand to keep them in
position long enough for the glue to harden (approx 20 minutes.)
The chin laser muzzles were glued on next and then
carefully brush painted with silver.
The final touches were the additions of the bottom, entry hatch and the forward canopy using Tamiya Thin, Tamiya Thin and white glue.
| CONCLUSIONS |
The Fine Molds series of
These kits are great for any level of modeler
and/or Star Wars Fan.
Highly recommended.
Kit courtesy of my wallet.
March 2009
Copyright ModelingMadness.com.
If you would like your product reviewed fairly and fairly quickly, please contact the editor or see other details in the Note to Contributors.
Back to the Review Index Page 2018