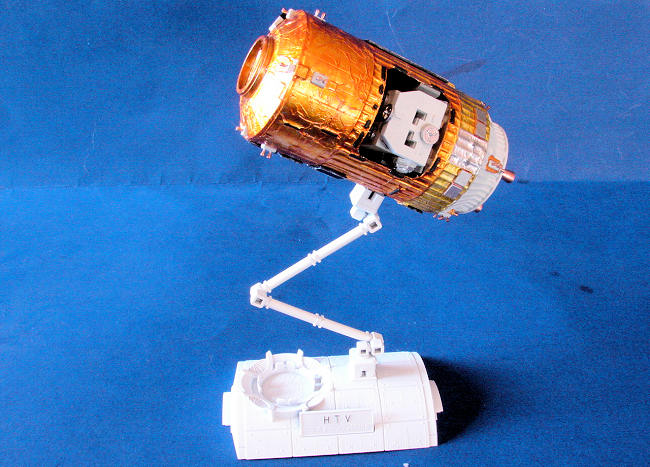
Aoshima 1/72 "
| KIT #: | 46648 |
| PRICE: | 2000 yen SRP |
| DECALS: | None |
| REVIEWER: | Mark Hiott |
| NOTES: |
Interesting subject, #2 in a series |

| HISTORY |
 The H-II Transfer Vehicle (
On September 11, 2009, the
After the scheduled Space Shuttle retirement in 2011, the
| THE KIT |
Molded in gray and clear blue plastic, the detail is nicely done and crisp. The
solar panels are the clear blue parts and should make for a very colorful model.
Parts breakdown is quite simple, but there are some very small parts that will
need care when attaching. A section of ISS is provided as a stand and you get 3
options on how to display the completed model.
The
instructions are all in Japanese, but there
 are
enough notes in English to get the job done. Paint callouts numbers are in Gunze
colors I believe, but there are English names. There are 7 assembly steps, each
broke down into smaller steps.
There are no decals as none are needed, but I was surprised there wasn't at least a Japanese flag.
| CONSTRUCTION |
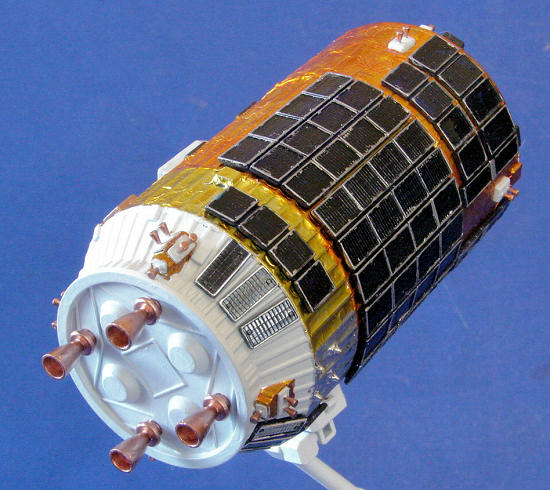
Construction is straight forward and starts with the main body. The main body
painted, and the various solar panels
 were
added. At this point I should mention that the thrusters are VERY tiny and care
will be needed to get the parts attached. The only thing that gave me trouble
were parts #5, I had to remove the inner lip in order to get them to fit
properly. Other then that, there were no problems. No seams to fill and parts
fit was very good.
were
added. At this point I should mention that the thrusters are VERY tiny and care
will be needed to get the parts attached. The only thing that gave me trouble
were parts #5, I had to remove the inner lip in order to get them to fit
properly. Other then that, there were no problems. No seams to fill and parts
fit was very good.
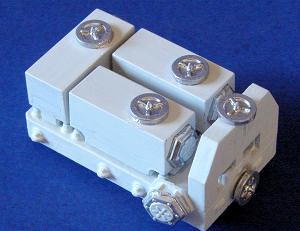
The
payload is the last assembly. There were more parts to this then I expected,
with the containers each being 4 parts, with the "cart" it makes for a total of
20 parts.
| COLORS & MARKINGS |
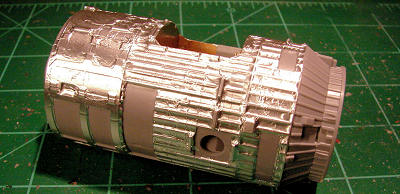 I
followed the instructions color callouts for the most part. My research shows
that the solar panels were a blackish/Kevlar color, not blue. I painted the
backs of the solar panels flat black and used chrome silver to outline each
panel. Doing it this way gave the panels just a hit of blue. The main body has
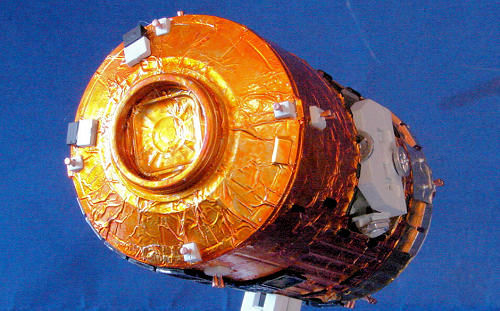
the wrinkled foil covering us space nuts have come to know so well. In an effort
to replicate this, I first covered the main body with Bare Metal Foil that I
wrinkled as best I could. The effect was not quite what I was after, but looks
better then just the smooth plastic. The body was then painted with Tamiya Clear
 The
RCS nozzles were painted copper with neutral gray mounts. The RCS mounts on the
Propulsion Module were first painted MM Chrome and the over coated with Tamiya
Clear
The
interior of the unpressurized cargo section was painted gold and the containers
neutral gray.
The
ISS section and Canadarm were painted in a thin coat of MM Flat White that left
just a hint of the gray plastic showing through. The
| CONCLUSIONS |
A
great kit of a unusual subject. Anyone who likes Real Space subjects will love
this kit. Easy to build, low parts count, no decals... even a beginner will find
this a fun build.
| REFERENCE |
 Photos
from the internet
Japan Aerospace Exploration Agency webpage for the history.
January 2012
Review kit courtesy www.dragonmodelsusa.com via your editor.
If you would like your product reviewed fairly and fairly quickly, please contact the editor or see other details in the Note to Contributors.