Anigrand 1/144 Martin X-24A
|
KIT #: |
AA-5007 |
|
PRICE: |
$64.00 for a set of five aircraft
|
|
DECALS: |
One option |
|
REVIEWER: |
Richard F |
|
NOTES: |
Resin |
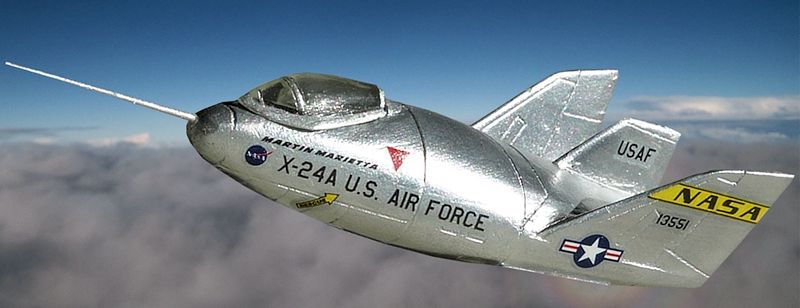
One of the key questions of the design program for what ultimately
became the space shuttle was whether a lifting body shape could be
glided in from re-entry to make a precise, controlled landing on a
runway. The early Northrop designs, the HL-10 and M2-F2/F3, were busy
exploring this during the mid and late 1960s.
Martin Marietta had a crack at the lifting body program with two
major designs - this one, the X-24A, was the first. It first flew on 17
April 1969, and first fired its rockets on 19 March 1970. It achieved a
top speed of Mach 1.6 and a maximum height of more than 71,000 feet
during its 28 flights.
 According to www.astronautix.com,
"the X-24A handled well as a glider, but in powered flight it exhibited
a nose-up trim change that prevented it from flying at low angles of
attack. Air Force interest then focused on 'high fineness lifting body'
configurations and the X-24A airframe was converted to the X-24B
configuration".
But that wasn't the end of the road for the X-24A. Much later, in the
late 1990s, Scaled Composites won a contract to develop a Crew Return
Vehicle that could get 7 people off the International Space Station in
an emergency - a space lifeboat. Scaled Composites, of course, is the
company started by Burt Rutan and now owned by Northrop Grumman. This
company famously built a range of experimental aircraft including
SpaceShip One, the first commercially-built suborbital spacecraft;
Voyager, the first plane to fly non-stop round the world; and the Global
Flyer, the first jet plane to do the same thing.
Scaled Composites looked back to the lifting body program and
settled on the X-24A as a good shape for what would be known as the
X-38. The rear end was reconfigured and of course it was made larger to
fit 7 astronauts inside.
 The biggest difference, conceptually, was that the X-38 would
have a jettisonable de-orbit engine to get it away from the ISS and on
its re-entry flight path, and then, once inside the atmosphere, it would
pop out a steerable parafoil (like a modern-looking parachute), which
would slow it down sufficiently to glide in at a safe speed and plop to
a very short landing roll. There is a cool video of it on the X-38
wikipedia page, linked below.
The X-38 was cancelled in 2002 for budget reasons, and the ISS
continues to rely on the workhorse Soyuz ships, which, like the X-38,
can trace their lineage back to the heyday of space research, the 1960s.
I previewed this cool little combo set from Anigrand
right here on MM.
The set comes with four other kits,
making each one about $12. Three have been reviewed right here on MM
- the
HL-10
,
HL-20
and
M2-F3
.
 Like the other lifting bodies in the set, this one has
a single piece fuselage, three winglets or tail fins, canopy parts,
and bits for the undercarriage. There is not much to it. It has a
cavity for the cockpit with a basic little ejection seat and flat
area for an instrument panel.
I didn't realise until I started the kit that there
are not enough yellow NASA stripes to go around. The thinner ones
fit the HL-10 and M2-F2/3, but you need thicker ones for both the
X-24A and B (unless you do the -A in the scheme with white rudders,
as pictured on the box instead of the totally bare metal scheme set
out in the instructions).
Another lifting body - another easy build. Remembering
my safety mask, I sanded off the seams from the resin body,
trimmed down the other parts, and put it all together with super
glue. Like the other kits in the set, there is little sanding
required. There really is not much to these kits, so it was off
to the paint shop.
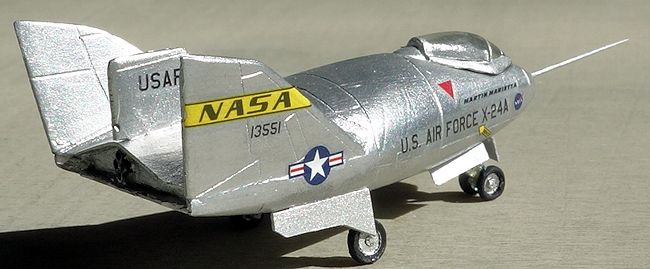
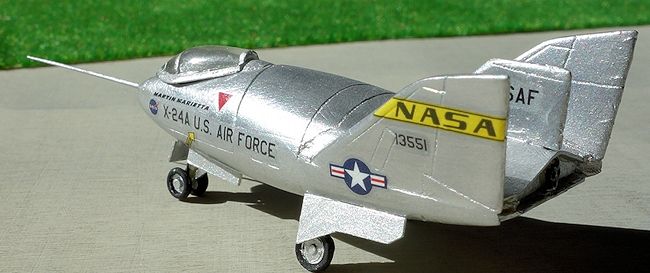 After painting I put the wheels on. The main wheels
should face outboard. I had them facing inboard and had to break
them off at the stem and repair them. Nothing a bit of superglue
can't handle. After the mistake I made with the M2-F2/3, I used
white glue on the canopy instead of superglue. And I used a bit
of stretched sprue for the air data probe instead of the kit
piece. Although the main gear doors should have a slight curve,
mine don't because I made them out of plasticard. I sacrificed
the curve for the thinner appearance. The kit parts are way too
thick.
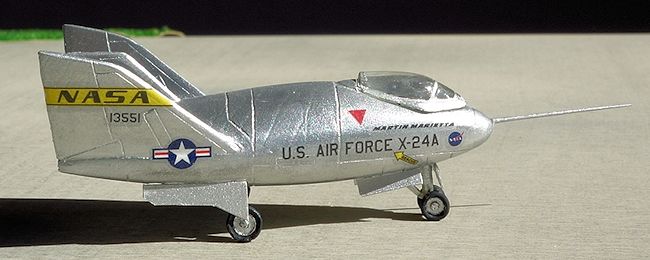
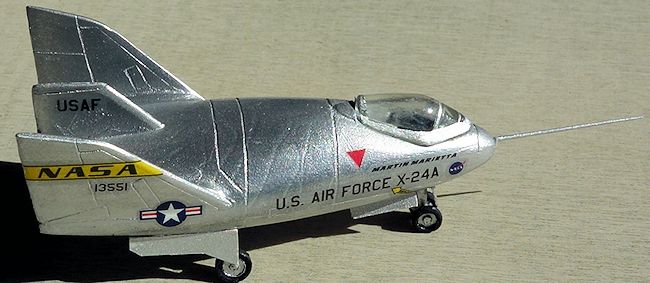 The X-24A has a simple bare metal scheme. Check your photos
carefully though - it also flew with white rudders and just the
very front of the yellow NASA stripes rather than complete ones
on the fully unpainted version. Some of the markings differ. But
I have found photos online of the scheme suggested in the
instructions and it seems pretty accurate. That's the way I
built mine.
I sprayed it with Tamiya TS-17 but then decided it
wasn't bare-metal looking enough. So I painted, by hand, some Mr
Color metaliser over it (using the "stainless" one) and then
buffed it for a while with a make-up removal pad. It came up
nice and shiny, I thought.
Another cool lifting body. Easy to build, great for your first
go at resin, or if you like real space. Recommended.
Richard F
April 2015
If you would like your product reviewed fairly and fairly quickly, please contact the editor or see other details in the
Note to
Contributors.
Back to the Main Page
Back to the Review
Index Page


 According to www.astronautix.com,
"the X-24A handled well as a glider, but in powered flight it exhibited
a nose-up trim change that prevented it from flying at low angles of
attack. Air Force interest then focused on 'high fineness lifting body'
configurations and the X-24A airframe was converted to the X-24B
configuration".
 The biggest difference, conceptually, was that the X-38 would
have a jettisonable de-orbit engine to get it away from the ISS and on
its re-entry flight path, and then, once inside the atmosphere, it would
pop out a steerable parafoil (like a modern-looking parachute), which
would slow it down sufficiently to glide in at a safe speed and plop to
a very short landing roll. There is a cool video of it on the X-38
wikipedia page, linked below.
  Like the other lifting bodies in the set, this one has
a single piece fuselage, three winglets or tail fins, canopy parts,
and bits for the undercarriage. There is not much to it. It has a
cavity for the cockpit with a basic little ejection seat and flat
area for an instrument panel.
 After painting I put the wheels on. The main wheels
should face outboard. I had them facing inboard and had to break
them off at the stem and repair them. Nothing a bit of superglue
can't handle. After the mistake I made with the M2-F2/3, I used
white glue on the canopy instead of superglue. And I used a bit
of stretched sprue for the air data probe instead of the kit
piece. Although the main gear doors should have a slight curve,
mine don't because I made them out of plasticard. I sacrificed
the curve for the thinner appearance. The kit parts are way too
thick.
 The X-24A has a simple bare metal scheme. Check your photos
carefully though - it also flew with white rudders and just the
very front of the yellow NASA stripes rather than complete ones
on the fully unpainted version. Some of the markings differ. But
I have found photos online of the scheme suggested in the
instructions and it seems pretty accurate. That's the way I
built mine.