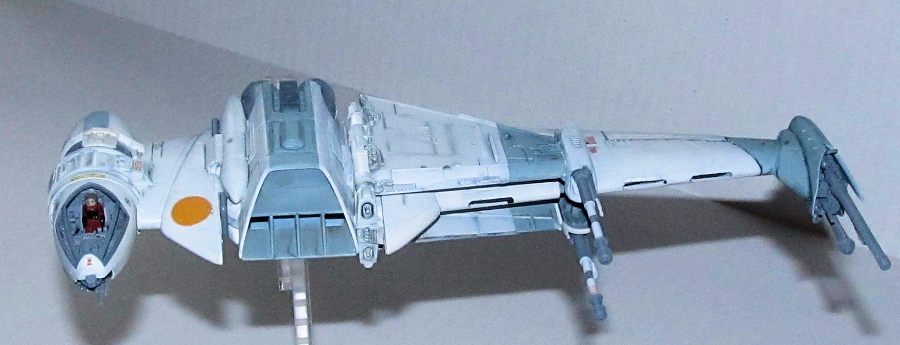
Bandai 1/72 B-wing
| KIT #: | 230456 |
| PRICE: | 4860 yen |
| DECALS: | One option |
| REVIEWER: | Dan Lee |
| NOTES: | Snap Fit Kit with water decals and stickers |

| HISTORY |
 The A/SF-01 B-wing starfighter, manufactured by Slayn & Korpil, was 16.9
meters long. The B-wing was a relatively poor dogfighter, but it was primarily
designed as a "blockade buster" to attack and destroy large capital ships. As
such, it was equipped with weaponry and systems normally reserved for much
larger craft.
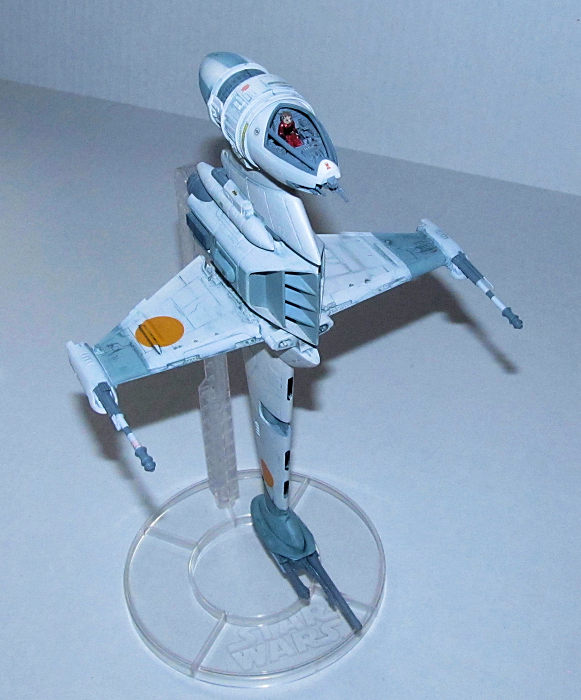
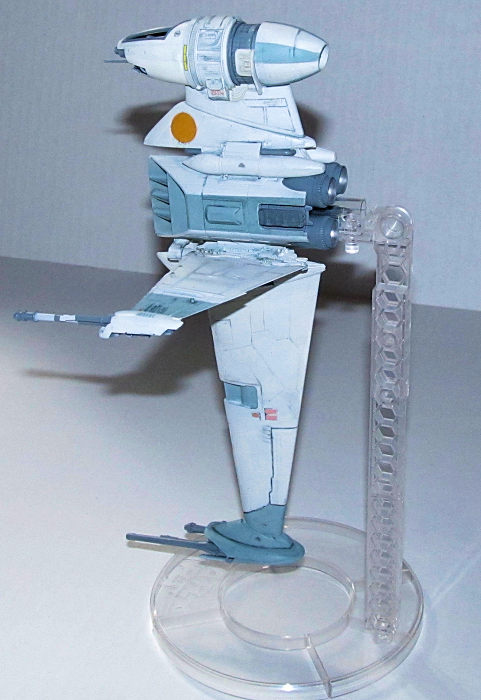
The primary airfoil took up the length of the hull, with the cylindrical cockpit at one end and a weapons pod at the other end, and an engine cluster in between. Two S-foils just below the engine on either side of the main airfoil could be extended to deploy twin ion cannons. It held a total of three ion cannons, and was also armed with a laser cannon, a twin auto-blaster, and two launchers for proton torpedoes. Quad lasers and laser-guided bombs could also be carried. The B-wing also had a unique gyroscopic control system that could keep the rotating cockpit module level with a horizon no matter how the body of the craft was positioned. The starfighter was equipped with a Class-2 hyperdrive and had four engines capable of reaching 950 km/h in atmosphere. The cockpit had a tactical display for the pilot as well as a targeting computer. The avionics packages were on par with those used by small capital ships. Advanced targeting systems allowed pilots to synchronize attacks across multiple B-wing fighters.
 The prototype starfighter, B6,
built by the Mon Calamari Quarrie (named after the late concept Artist Ralph
McQuarrie) featured a composite-beam laser weapon that could inflict heavy
damage upon cruiser-class targets, but its range was short, and use interfered
with the hyperdrive. The B6 also had a second gunner's cockpit at the opposite
end of the main airfoil. Neither of these features were included with later
production models, where the primary weaponry focus shifted to missiles.
The B-wing fighter was originally designed by Joe Johnston and Bill George for Return of the Jedi. The craft derives its name from the fact that the crew labeled the two new Rebel Alliance starfighter models in Return of the Jedi as "A fighter" and "B fighter". Bill George had so much input into the starship's development, that his colleagues nicknamed it the "Bill-Wing Fighter". Years later in Star Wars Legends the name "Blade wing" was devised as an in-universe nickname, which was canonized by the Star Wars Rebels production team.
The craft's unusually thin shape was problematic for blue-screen photography, because the model tended to blend into the star field. As a consequence, some planned sequences with the B-wing were cut from the original release of Return of the Jedi, and the B-wing is not shown in action during the Battle of Endor in the film. In fact, after the ships fly away from the still-active Death Star II shield at the start of the battle, the B-wing is hardly seen at all. The rotating cockpit design of the B-wing was based on early concept art for the Millennium Falcon.
| THE KIT |
 I have wanted this kit ever since
I saw the B-Wing in action in the movie Return of the Jedi in 1983. MPC made a
1/94 scale version at the time of release, but for reasons I don't remember I
didn't get that kit. Fast forward some 30 years later and the news that Bandai
got the Star Wars model license from Fine Molds. Fine Molds did a very good job,
but only released the more common Star Wars vehicles. It was hoped that Bandai
would come out with the Star Wars model version of the Holy Grail, updated kits
of the rarely seen B-wing and A-wing. They did not disappoint. First with the
A-Wing and now the aesthetically challenged B-wing.
The actual kit comes on six sprues. Sprue A is the multicolor sprue with various parts for the cockpit, engines and weapons. Sprue B and C are made of off white colored styrene for the main hull and wings. Sprue D contains grey colored inserts. Sprue FB is the clear stand. Sprue SWE has the clear red blaster pieces. It also comes with a color instruction sheet and an identical set of stickers and decals.
The detail is extremely good with no flash whatsoever except easily sanded mold markings. It comes with various options such as moving wings, a choice between an open framed canopy or closed clear canopy and the stand can allow for multiple poses.
| CONSTRUCTION |
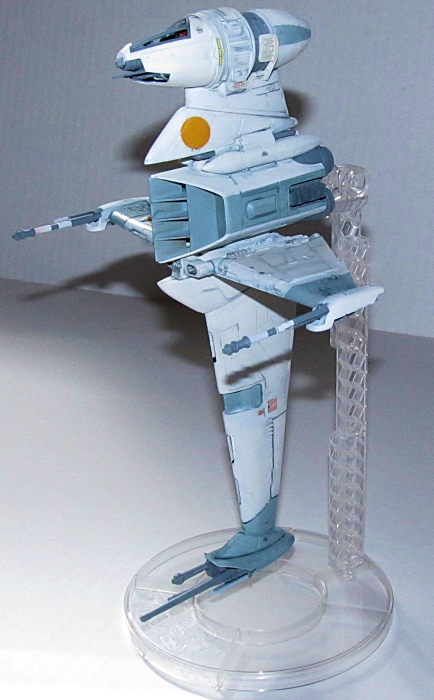 I began with the upper part of the
fuselage. It quickly snapped together. I glued the internal posts with Tamiya
extra thin cement while the visible seams were glued using CA glue to remove the
possibility of the dreaded phantom seam. The wings were glued together and added
to the upper body.
Next the bottom “blade” was built in similar fashion as to the instructions. The seams for both sections were sanded smooth then the top and bottom glued together (the weapons pod at the bottom required some Vallejo plastic putty to fill the seams.) I left off all the inserts and cockpit for painting purposes. At this point and a mere couple of hours of work, the craft was ready to be painted.
| COLORS & MARKINGS |
The instructions gave out instructions as to how to mix colors, but I decided to see what I could use based on regular paints. The dark grey was easy to pick out as it was close to Tamiya XF63 aka RLM-66. The light blue was an almost exact match for XF23 light blue. The main off white color didn't match anything I had on hand so I mixed about 2:1 Flat White to Light grey XF80 which was close enough for me.
The dark grey parts including the cockpit were sprayed XF63 first because I had to mask off certain areas of the blaster barrels which were to be painted off white. Next the light blue sections and parts were were painted XF-23. When the paint was dry, these areas were masked off and then the rest of the model was sprayed with the off white mixture. I was lucky on two accounts as I had mixed enough paint just to cover the model and didn't require any paint touch up. A day later, the B-wing received a thin gloss coat for the decals.
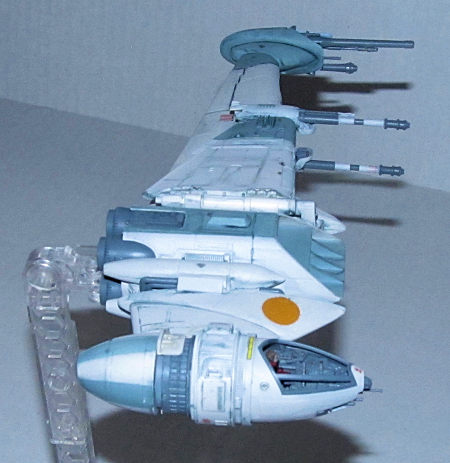 I selected the decals instead of
the stickers as per usual. The B-Wing had numerous stencils so I went through
adding each one at a time without much issue. The only decals I didn't use were
the ones where I had masked off and painted the areas. The orange “meatballs”
were added and I used Microsol and Microset to get the decal to snuggle over the
raised details. Lastly I added the cockpit decals which turned out to be more
problematic than I had hoped.
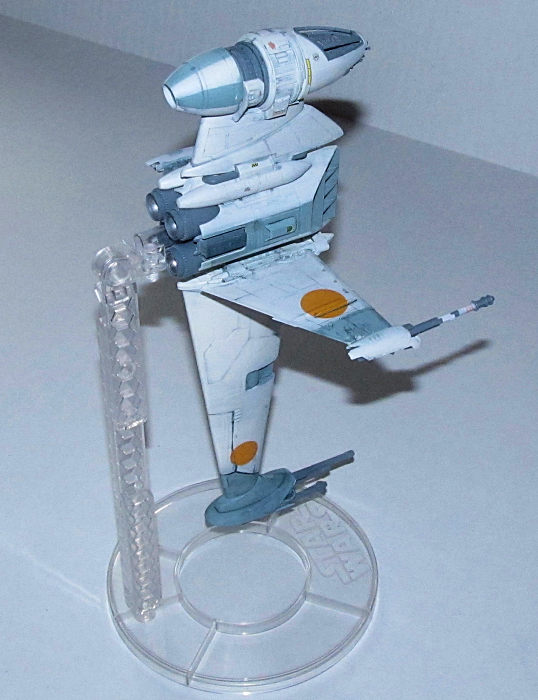
Since it is a Rebel spaceship and it needs to look a bit used (as per the rules in a Galaxy far far away) I went with a wash. Mostly black watercolor with some use of the Tamiya enamel brown panel line wash. The excess was cleaned away with damp Q-Tips and the B-wing was just dirty enough.
I sealed in the wash with a flat coat. I still had to carefully remove excess watercolor as the wash ran a bit when I sprayed on the flat coat a bit too think. This is one of the drawbacks to using watercolors as the wash may run which is why I spray on the final coat in light coats.
| FINAL CONSTRUCTION |
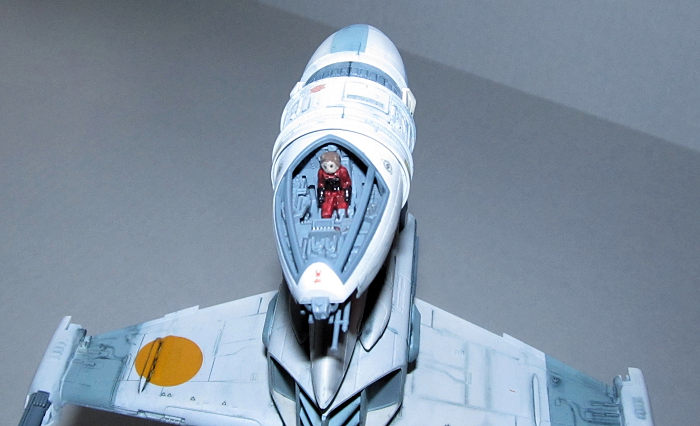 The rotating cockpit was added and
then removed as I discovered that I didn't remove all the excess plastic in the
neck as I scraped off some of the paint trying to rotate the cockpit. It took
some quick work with a knife to remove the offending plastic and add the
rotating cockpit again. The front and back fuselage pieces were glued in place.
All the prepainted inserts were added including the engines. I put a dab of clear yellow over the four posts of the clear engine insert which would show if I ever get the Bandai lighting kit. Everything was glued in place except the engine mount.
Next the pilot was brush painted using Model Master Acrylic Insignia Red, Tamiya Dark Grey, Buff and flat black. I am a little better at painting figures now so the pilot didn't look like a disaster. When dry, the pilot was snapped into place. I added the canopy frame with no “glass” and snapped it in place. Lastly, the clear plastic stand was assembled and the B-Wing was posed and mounted onto it without any glue.
| CONCLUSIONS |
Aside from the masking and painting, the B-Wing was another straight forward masterpiece from Bandai. The beauty of these kits is that you can do as much as you want and still have a good looking model as they were designed to be built by casual fan boys/girls all the way to experienced modelers looking for an easy, but satisfying kit to build, paint and weather.
Highly recommended for any Star Wars fan.
Dan Lee
11 December 2018
Copyright ModelingMadness.com
If you would like your product reviewed fairly and fairly quickly, please contact the editor or see other details in the
Note to
Contributors. Back to the Main Page
Back to the Review
Index Page
Back to the Previews Index Page