| KIT #: | 676-R2 |
| PRICE: | $29.00 or so when new |
| DECALS: | One option |
| REVIEWER: | Frank Reynolds |
| NOTES: |
Advantages: Well detailed, simple, and easy
to set up for lighting. Disadvantages: Some very prominent fit issues, alignment issues and no Aztec decals. Enterprise-B clear parts and Aztec decal set from Don’s Light and Magic used |

| HISTORY |
The Federation starship USS Enterprise, NCC-1701-B was
an Excelsior Class starship launched approximately 2293 under the command of
John Harriman. She was christened with a bottle of Dom Perignon, vintage 2265.
She was a slightly modified version of the Excelsior class (What I like to call
a “Flight II Excelsior”, just like the real life Los Angeles class submarines,
which was divided into various “flights” depending on the modifications and
technological advancement). The outward differences include two extra impulse
engines on the rear of the saucer, to improve the chief complaints of lack of
power at sublight, and a modified boat like secondary hull that added more space
for scientific research and crew berthings that were lost when the two impulse
engines were added, another complaint from the original Excelsiors. For the
launch there were bevy of press present, to cover the soon to be legendary new
Enterprise and several dignitaries, including the famed Captain Kirk and his
 chief
engineer Scott and Chekov. The ship was incomplete. She was without her tractor
beam, medical staff (and facilities) and wasn’t equipped with photon torpedoes.
These were not due until next Tuesday. After Kirk was given the honor of
ordering the ship out of dry-dock, she was just supposed to cruise around the
solar system for a “milk” run but it went completely awry when she received a
distress signal from two Federation transports transporting El Aurian refugees
trapped in an unknown type of wave (later known as the Nexus wave).
She went in for the rescue since there were no other ships around the area. But because she was still brand new and without a lot of her equipment, she was unable to rescue any survivors from one ship before the Nexus wave tore her apart, and barely was able to rescue 45 survivors from the other ship before she too was destroyed. Among them Guinan, who would later become a bartender on the Enterprise-D.
It was at this point that she was trapped herself in the wave and unable to get out. Scotty, as always, was able to come up with a crazy plan of modifying her deflector to fire an antimatter beam to “jam open” a doorway. However, the modifications have to be done by hand. At first, John Harriman volunteered but Kirk then step up, arguing that the captain is needed on the bridge and went down to modify it. Just as the work was completed and John ordered the deflector dish activated, she was struck by a rogue beam at decks13 through 15, junction 20-28. Her early beginnings soon became notorious because of this, as at that time, it was thought Kirk was killed when the rogue beam ripped open the hull to space.
 In fact,
Kirk was not killed. He survived in the Nexus wave for what seemed to be the 80
years or so because time did not apply in there and then came back with Captain
Jean-Luc Picard to the future to stop Dr. Soran from destabilizing the Veridian
III sun in order to gain access to the Nexus wave.
For the Enterprise-B, after returning to port and an agonizing several months of fixes, she went out for a successful career that lasted 27 years, contacting no less than 20 different species and successfully cataloguing several dozen plants and involved in notable incidents like the Tomed Incident. She disappeared in 2320 after the crew contracted a plague of some kind. She was succeeded by the Ambassador class explorer, NCC-1701-C Enterprise, the fourth ship to bear the name
| THE KIT |
I actually bought this kit back in 2013…Took a while to complete as you about to see why. This is the Round 2 reissue. The original was released under the old AMT/Ertl in 1994 with the release of Star Trek: Generations. I never got that kit as I had well, one hell of time with the old Excelsior kit….Thinking the kit was just as bad as that one, I didn’t get it. This time, Round 2 promised they corrected a lot of what was wrong with the old kit. Did they? Yes they did. But all? I don’t think so. As you are about to find out, the new reissue created some new headaches that got this kit put on the shelf of doom for quite a while.
To further add some realism to the kit, I also got the
Enterprise-B resin part sets and the Aztec decal detail set from Don and Don
Light and Magic…Hey have to go for it! The guy has the same name as me…HEHEHEHE!
These parts include the clear parts for the new bussard ram scoops, the clear
blue navigatio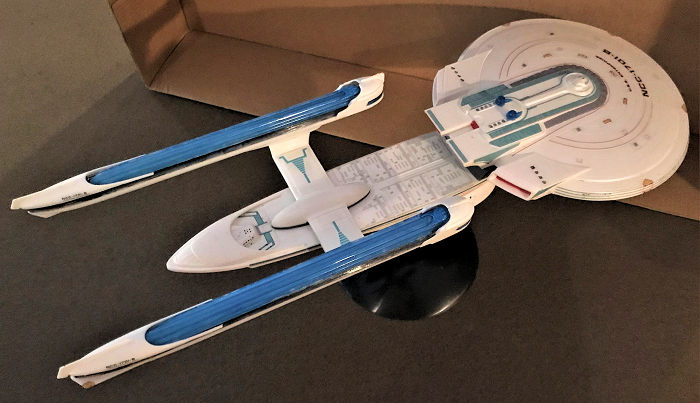 nal
deflector dish, a new a much much much better rearward firing photon torpedo
launchers, clear bridge and rear shuttle bay parts (in case you want to light
them up), detailed neck probe launch tubes, clear planetary sensor parts, and
several studs for the phaser emitters. All of these parts are well casted and
the detail is much better than the kits parts.
As for the decals, the decals only contain the details for the saucer and lower hull. The full Aztec was not provided. You can get them elsewhere. These are well printed and show great fidelity. Also, an addendum set to correct the fonts in the original AMT/Ertl decals are included. These include the decals for the USS Lakota…Which by the way, IS the original USS Enterprise-B! You see, for Generations, the producers still want to keep the original Excelsior. To do this, the model makers designed the Enterprise-B with her extra impulse engines, then added the boat like secondary attachment to the secondary hull, especially so it can be damaged when the Enterprise-B was struck by that rogue Nexus wave…..As it turned out, the glue used to glue these parts to the Excelsior became permanent…And they can’t remove the parts without damage the Excelsior underneath. Now stuck with it, the Enterprise-B model was eventually converted into the USS Lakota, seen in Star Trek: Deep Space Nine episode of Paradise Lost.
| CONSTRUCTION |
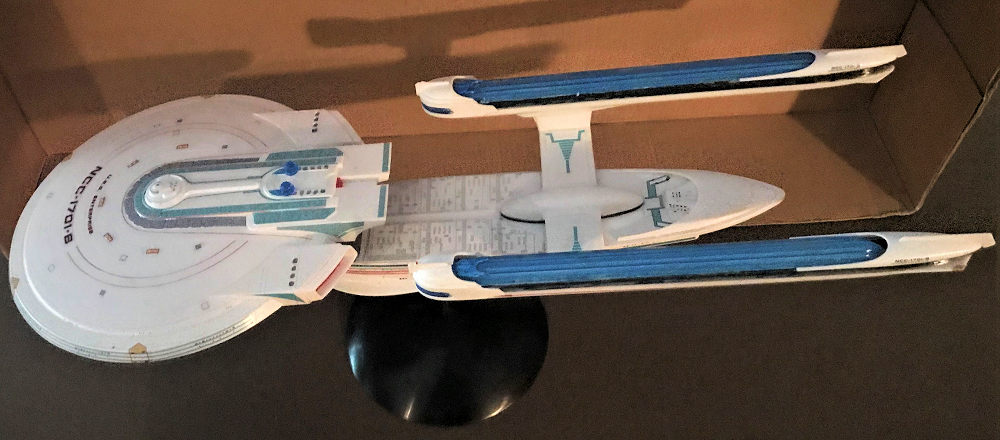
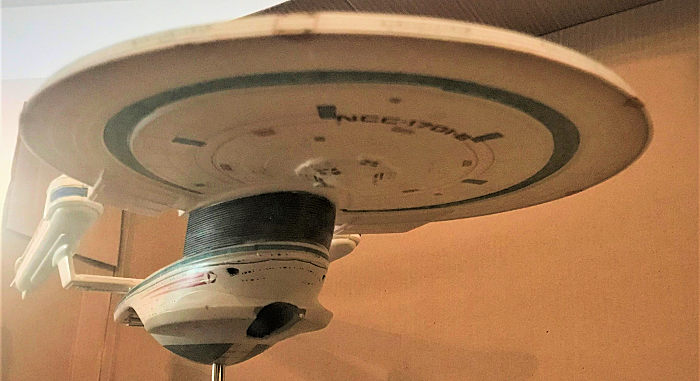
Anyways, upon opening the box, I immediately started to examine the parts. Yes, some parts have been improved. The most is in the saucer. It fit much better now, and the details are far more correct with the smooth saucer ridge and trench lines on the saucers (That are too deep in my opinion). The second improvement is in the rear, where the neck joins with the saucer. Previously, it just join directly to the neck. This is incorrect as shown in this kit. There should be a ridge just in front of the neck to saucer joint that is now captured by the new saucer. However, the big problem is in the rear, with the impulse engine main bottom plate. This part is from the original AMT/Ertl Excelsior kit and it just did not match the new saucer part. Which took me a lot of effort and putty to put down. Also, unless you are trying to light up the kit, Don’s clear bridge part is now redundant since the bridge part is improved, with host of windows details etc. However, what is welcome are the clear blue impulse crystals. I chopped off the molded on ones, which isn’t all that great and super glued them on instead.
The neck now also has more details, specifically, the
probe launchers are now molded in. Previously, they were just blank plates.
Hence why Don offers the correction sets for the previous AMT/Ertl kits. Now,
when joined, since the neck is in three pieces, it does produce a rather nasty
line down in the middle and since the neck has all the ridges, it’s very hard to
correct. There is no seam. But the glue line is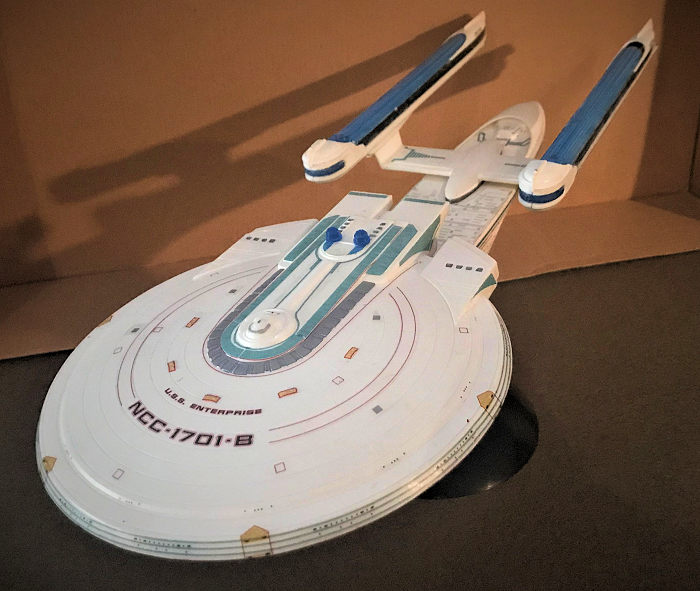 very prominent. Now, a third party does produce a single piece resin casting for
this for those who just can’t stand it. But I just use a nail file and tried to
file the line down as much as I can without ruining the ridges.
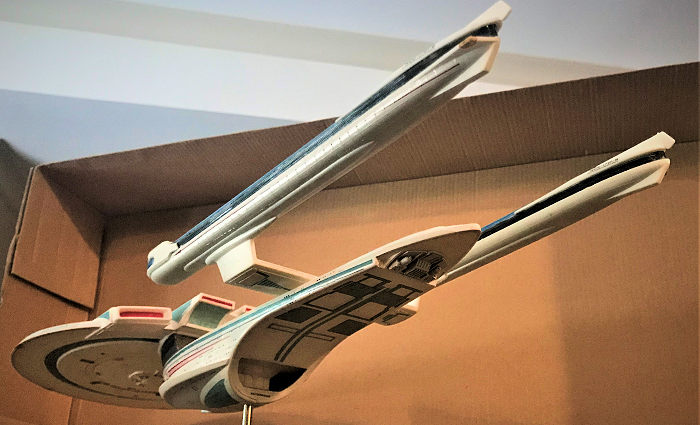
The secondary hull is both improved and…ahh…ohh….regressed too. The improvements came from the details. The mystery ridges on the hull are gone. The only ridges left are the guidance points for the light blue markings on the hull. However, it also regressed, massively with the mysterious separation of the hull into three pieces…This left a rather huge problem since the guidance and location pins are still measly small and too few of them. This created a huge misalignment issue in which I cemented the lower hull to one side! This is the biggest reason why this ship took so long to make as I left it on the shelf of doom for a good two years and only started making it back a year ago first by spending two days of puttying with Squadron White putty (which is slightly like milly putt) to correct the now misaligned hull sides and plenty of red spot glazing to fix the seams that resulted. I got it pretty corrected down but looking carefully right down the line, you can still tell were the misalignment happened. How the hell did Round 2 messed this up is a huge ????????????!!!!!!!!!! Now, the clear rear shuttle bay piece from Don’s is now also redundant since the details on the new shuttle bay is far more pronounced and clear, not unless again, you want to light up the kit. However, I did use the clear blue navigational deflectors and the much more pronounced, correctly shaped and sized and detailed rear photon torpedo launchers. Comparing the much more correct Don’s resin piece to the kit piece, which is still the original AMT/Ertl is almost laughable! The kit piece is best tossed!
The warp pylons are still the original kit. They still work but just becareful with the outer pylon support pieces. It’s too easy to reverse them as I did here. I left the clear warp impellers off for later since all of them have different colors. The big work out was the front, with the new bussard ram scoop covers. On the original and this kit, they are molded onto the covers themselves. Don offers two clear blue pieces. In order to fit them in, I had to use my dremel with a steel cutter to cut through the opaque molded on ram scoops and then fit the clear blue resin from the inside. Took some work but they look a lot better than before.
| COLORS & MARKINGS |
Main painting is semi-gloss white, the closest to pearlescent white. I use Testors since I still got a few bottle left from my 1/350 Enterprise-A. The big problem is the neck and the warp pylon main center support pieces. These are gunmetal (I used Tamiya). After thinking about it, I painted these pieces gun metal, and after paint dried, glued the neck to the bottom hull and the warp pylon support to the bottom of the pylons. From the inside, I reinforced these joints with super glue as there will be some weight put on them. After they are completely dried, I used blue painter’s tape and taped them off.
The main painting session begin with the saucer. It
was blasted with several coats of semi-gloss white i n
sequence. The coverage was better due to the kit’s smaller size. Detailed
painting include silver for the bridge dome and bridge windows. Various grey for
the back impulse dome and yellow for the phaser emitter stations with silver
emitters.
Secondary hull was treated the same way. I painted the inside of the deflector dish housing silver.
The warp pylon was next. I should’ve taped off and painted the sensor lines light blue but laziness overcame me and I left it alone.
Now the warp engines themselves. The expellers were painted dark sea blue from the inside and the top covers light sky blue. Now, in order not to interfere with Don’s clear bussard ram scoops, I clipped the front of the expellers off. The scoop covers do a very good job of covering this. After all the paintings and details are picked out, I can finally start the decals.
Now, just a warning, Don’s decals are pretty thin and will roll on you. Learned that the hard way but does react well to not only Mr. Marks but also Testor’s decal solution. The solution I had to use initially because I couldn’t get my hands on Mr. Marks. The kit’s decals also contains a lot more details, including decals for the thrusters (which is also included with Don’s sheet, including the missing tail end thruster decals that are on the tail fins but missing from kit’s), windows (again, they are all black. Could use some “on” windows), and the sensor lines that run along the saucer ridge. They go down easily and react well to Mr. Marks also. Just make sure you are doing this when the kits are separated as when joined, some decals will never reach their destination since they will be covered up. Now, to bring everything together.
| FINAL CONSTRUCTION |
Now, to bring all the parts together. I first cemented
the pylon onto the secondary hull. Since there are paint on the glue spot, I
dabbed a bit of super glue to the front and the end of the support and used
cement for the center. This is a lesson learned as kid when I first build the
AMT/Ertl Excelsior class. These parts are too heavy and cement will not hold, e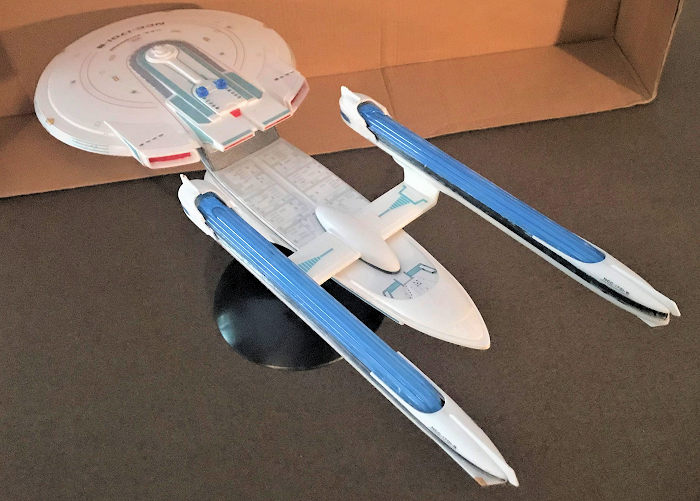 specially
if there are paint there. The super glue does a nice job of holding the pieces
in place while the cement goes to work. Also, do not put any of the warp clear
pieces onto the pylons. The weight will make sure the pylons will not hold onto
the secondary hull!
Once the superglue has taken a grip, I moved to the saucer. Before that can happen, I dried fitted the saucer to the neck. Sure enough, just like the original Excelsior and my Enterprise-C and E kits, the neck screw and push the saucer on the left, causing the saucer to slant to the right. I quickly cut off the location ridge on the left side to the bare minimum so the saucer will fit straight and even on the neck. Because the location ridge on one side is now basically gone, I had to resort to super glue again. The left side and half of the rear is now glued on with super glue, to not only help with the missing ridgeline problem, but also to again, grip the saucer firmly onto the neck while the cement on the right side can go to work. After the superglue was dry, I put it onto the display stand and allow the kit to settle for an entire day before coming back.
Finally, the warp clear pieces can go on. First are the expellers. These were reinforced from the inside with super glue. The front bussard ram scoops are settled down with again, super glue and the top clear cover are now inserted in before the rear top covers are cemented on. The final decal pieces are the “NCC-1701-B USS Enterprise” markings on the rear end covers. Model done!
| CONCLUSIONS |
Well, I have to say despite the faults and problems
with the kit, I finally got Enterprise-B also…Now, to get the stupid original
1/350 USS Enterprise, NCC-1701 no bloody A, B, C, or D (now E) done so I can
have them all…..Hehehehehehe…Although the TOS Ent erprise
will not be a while since I do have the lighting kit here! Stupid me, why do I
torture myself sometimes?
Still, have to say this. This kit is now out of the market and I don’t know when Round 2 will put it back (Amazon and evil-licious Bay is asking minimum $100 for this kit now). But if they do, I hope they can copy the new Excelsior (see my preview) secondary hull…That is such an improvement over the original is not even a joke! Those six massive plugs alone will ensure no fit or alignment issues! If they do that and give me a complete Aztec decal set like the Excelsior and the Reliant, then I may just double dip cause let me tell you(and yes, I will do a review for BOTH my Excelsior kits), the Excelsior kit is simply a blast to build despite some minor miscues.
Copyright ModelingMadness.com
This package courtesy of my wallet.
If you would like your product reviewed fairly and fairly quickly, please contact the editor or see other details in the Note to Contributors.
Back to the Main Page Back to the Review Index Page Back to the Previews Index Page