
| KIT: | Frog 1/600 HMS Repulse |
| KIT #: | NF 40001 |
| PRICE: | $48.00 Singapore Dollars from www.hobbybounties.com |
| DECALS: | None |
| REVIEWER: | Len Roberto |
| NOTES: | Ex-Airfix mold |

| HISTORY |
HMS Repulse, a
26,500-ton Renown class battlecruiser, was built at Clydebank,
Scotland. Completed in August 1916, she joined the Grand Fleet following
post-trials modifications and operated in the North Sea for the remainder
of World War I. The light protection of this class of two battlecruisers
was a considerable cause for concern and, soon after the Armistice,
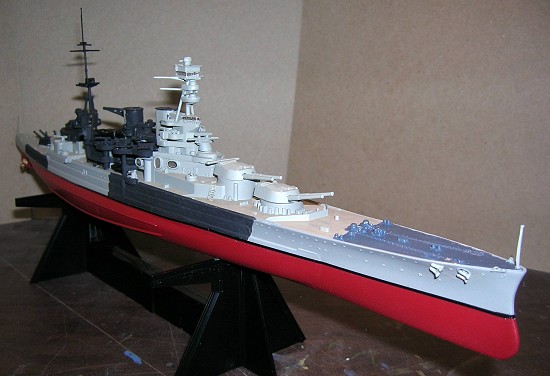 Repulse
received an extensive refit. This significantly increased her armor, and
her displacement, which rose some six-thousand tons. The work was completed
in 1922, after which the ship began a peacetime career of fleet operations
and long-distance cruises.
In 1933-36, Repulse was again modernized, emerging with improved deck armor, a hangar and catapult for aircraft, and a greatly increased anti-aircraft gun battery. She operated with the Home Fleet in the North Sea and Atlantic during the first two years of the Second World War, taking part in the pursuit of the German battleship Bismarck in May 1941. Later in the year she was sent to the Far East, accompanying the new battleship Prince of Wales. The two ships arrived at Singapore just before Japan began the Pacific War. As soon as hostilities commenced, both steamed northwards to intercept a reported invasion force. While returning to Singapore on 10 December 1941, Repulse and Prince of Wales were attacked by Japanese high-level bombers and torpedo planes. Repulse was moderately damaged by bombs early in the action and was later hit by several torpedoes. After receiving this heavy underwater damage, she sank rapidly, followed less than an hour later by the Prince of Wales.
| THE KIT |
Please visit the preview to see what comes in the box.
| CONSTRUCTION |
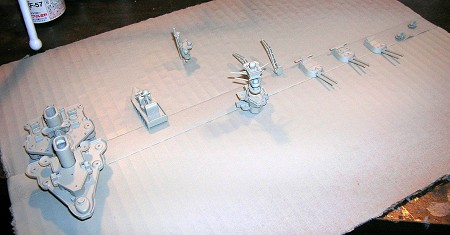 I can sum this up
in just a few phrases: lots of cleanup, lots of test fitting, lots of
swearing and lots of compromising…this one was to be a straight out of box
build and it was a struggle at times.
As noted this is the old Airfix kit so it shows its age. The plastic is very soft and every part requires sanding and clean up work.
Construction is
traditional with 2 full hull halves, 1 main deck and a smaller stern deck
inserted into the hull. This step was not that bad- requiring you work
your way around the hull by gluing and holding for a few seconds to make
sure the deck is seated into the
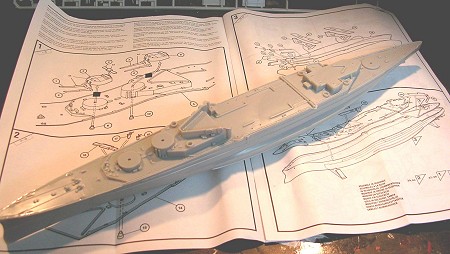 hull properly to
minimize gaps.
Next, you work on sub-assemblies like the main turrets, bridge and superstructure, and aft deckhouses. Fit here was OK- dry-fitting is a must because there were some areas where parts not meet properly and I knew it would throw off alignment in a future step. The superstructure assembly just did not assemble easily and I was worried about what would happen when it came time to attach to the deck.
I left all the AAA guns as well as main and secondary armament until after main painting had been done. Once all the sub-assemblies were ready, I made plans to paint.
| COLORS & MARKINGS |
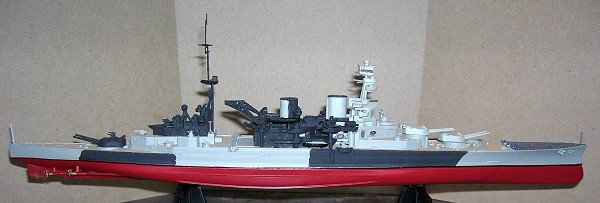
Instructions call for a
rather unique paint scheme- significantly different than US dazzle
schemes. It calls for a dark grey- almost black color on a large portion
of the ship probably to confuse the enemy at long range as to the type of
ship that was  coming
at them. The overall color was a lighter grey with a natural wood deck.
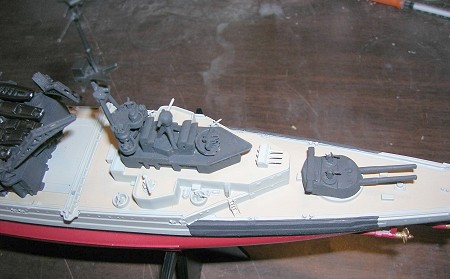
I started by spraying Colonial Red for the underside of the hull. When dry, I masked and sprayed the main light grey- I think I used Light Aircraft Grey Model Master Spray Can I had laying around. Then it was on to the boot stripe. I actually used black decal strips for the waterline boot since I am terrible at masking and painting a smooth boot stripe! Next up was the deck. I used a mixture of Tamiya Buff with a little Sky Grey mixed in- this was brushed on. Finally, I used Model Shipways Iron Cannon Black for the additional camo- this is a great color for dull black/ very dark grey but it is not an easy paint to brush.
When all was dry and the armament was painted as well- it was time to put it all together.
| FINAL CONSTRUCTION |
 The deck has large
locating notches for the main superstructure part. Of course, it would not
fit over these so off came the notches. It still would not sit smoothly so
I sanded down the bottom of the assembly and it was better but still not as
flat as I’d like. The rest of the parts attached with little fuss except
for the very fiddly starfish platform and masts/ tripods. It takes care
here to line them up and attach them without bending or mangling them out
of shape.
After the armament was attached and any other remaining bits like flagpoles- construction was done. I could not resist adding some photoetched ladders- some out of necessity because the plastic ones had broken off. I wanted to keep this a clean model so the only weathering was a black wash flowed into window areas. I hesitated to try rigging for fear of breaking the tender masts and ruining the model. When I try the Frog Prince of Wales- I plan to contrast it with this kit by using the White Ensign PE set and doing it as a waterline model.
| CONCLUSIONS |
 The Airfix 600th
scale ships are a great size to model- bigger than 700th but
not as monstrous as 350th- they are inexpensive yet big enough
to allow easier Photoetching for a new ship modeler. I have not done many
of these and have heard that some are fairly good and others a trial. The
Repulse kit is old and had lots of pre-assembly work to do. The kits do
look “bare” without any photoetching to dress them up but the lines of HMS
Repulse are classic and look good in profile in the display case.
September 2005
| REFERENCES |
http://www.history.navy.mil/photos/sh-fornv/uk/uksh-r/repulse.htm
http://www.forcez-survivors.org.uk/
Many thanks to Frog Models for the review sample. Visit them at www.hobbybounties.com for more information.
If you would like your product reviewed fairly and quickly by a site that has nearly 300,000 visitors a month, please contact me or see other details in the Note to Contributors.