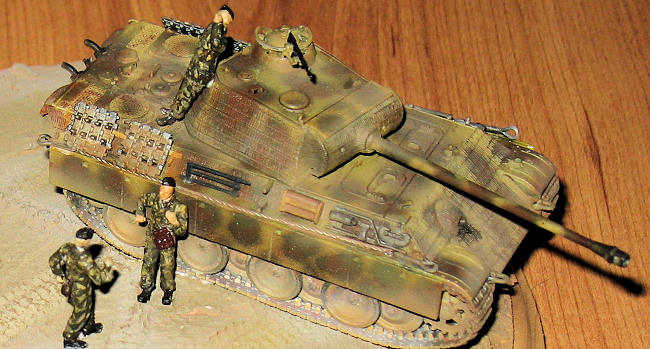
Dragon 1/72 Panther G plus crew
| KIT #: | 7363 |
| PRICE: | @$20.00 MSRP |
| DECALS: | Four options |
| REVIEWER: | Dan Lee |
| NOTES: | Includes crew and photo etch parts |

| HISTORY |
For information on the Panther, look up Scottís preview of the kit here:
http://modelingmadness.com/scotts/misc/military/dragon/7363.htm
| THE KIT |
Again, see Scottís preview.
| CONSTRUCTION |
I started building like how I build the typical armor model, by sub assemblies.
Turret, body, road wheels and tracks.
The turret was straight forward to assemble except the
gun mantlet.
The gun is designed to elevate, but the rod did not fit well so I
just glued the gun in place with liquid cement as well as the PE mantlet cover
with CA glue.
The body of the tank went together quickly, but there
were some gaps that needed to be filled and I used Vallejo Plastic Putty to
quickly fill them in without needing to sand down the zimmert surface detail.
 I
discovered that some of the road wheels were short shot which meant that they
had to be glued carefully so as not to be out of alignment.
They were painted Panzer yellow and then rubber portion
of the road wheel was done with a black Sharpie marker.
The short shot road wheels were placed in the middle so
they would not be noticed.
The build order did not make the best sense to me.
Best that you donít follow the instructions regarding
the armored skirt and tracks.
I didnít add the armored side skirts till after I glued
on the tracks otherwise it would make for an incredibly difficult assembly.
I sprayed the tracks on with a combination of gunmetal
and Metallic Gray.
Unfortunately, my track record with rubber tracks is
poor and this kit was no exception.
Once I had finished painting the tank, the tracks were
stretched to get them to fit properly, but I
couldnít get them to fit properly without bending the
fragile road wheel posts.
My solution was to CA glue the tracks to the wheels and
hide the track join with the armored skirts.
The various small plastic bits (machine guns etc) were
painted with their respective colors and glued in place.
I misplaced the actual tracks and had to use the spares
provided with the kit instead.
As Iím not building for accuracy nor am a Panzer/Panther
expert, I can live with this.
The kit also comes with PE.
After a mental block regarding the engine cover screens
and with some help from folks on the forum, I glued the screens over the
plastic.
I didnít use the other PE bits for the screen supports (apparently) and
the track racks (because I lost the track parts that fit these PE bits.)
| COLORS & MARKINGS |
Painting
I decided to use the paint scheme for the Pz.Abt.1, Pz
Rgt1, 1Pz Div ďLAHĒ Normandy 1944 which is a Panzer Yellow base color with Red
Brown patches surrounded by Dark Green.
The model was preshaded with metallic gray and then
sprayed with two light coats of Tamiya Dark Yellow, the equivalent of Panzer
Yellow.
My airbrush does not do fine lines in 1/72 well so I decided to spray
the green (Tamiya Dark Green) on first.
I spaced the markings as best as I could and tried to
conform them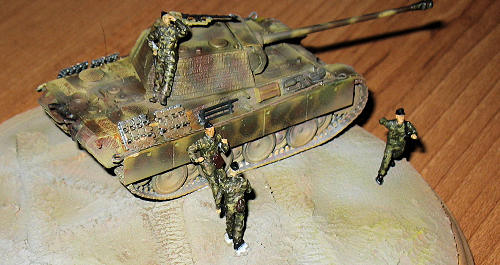 with the shape of the Panther.
Once I was done with the green, I loaded it up with
Tamiya Red Brown and set the compressor to low pressure so I could control the
over spray better.
The shapes were not as sharp as I wanted, but
considering how weathered this tank was going to get I could live with it.
Weathering
This step began once I finished up the entire tank.
I began to dirty up the tank by running a watercolor
wash of burnt sienna and black into the zimmermit and any panel line I could
find and did not bother to clean it off.
Next, I used
Finally, I used thinned flat black to spray the
exhausts and gun muzzle.
| FINAL CONSTRUCTION |
Since the kit came with figures, I decided to make my
first ever diorama so I read a Shep Paine diorama book and checked out John
Reidís notes on his amazing diorama in the forum for hints and tips.
I will say that building the tank was much easier than
thinking out what you want to with a diorama.
Trying to make the thing fit proved to be more of a
mental challenge than I thought especially if you have no idea what you are
going to do in the first place which is one major reason why it took me so long
to build this review kit.
Iím usually a pretty decisive person, but apparently
there is a tortured ďartistĒ within my psyche that I had no idea about.
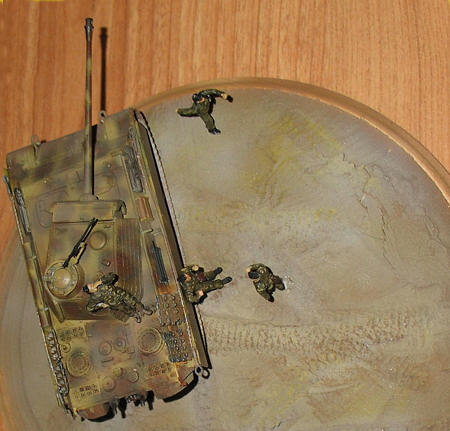
My choice would be ultra simple, a muddy field.
Strangely enough, it took me a week to select such a
simple piece of terrain.
The diorama base was a $2 wooden circular plaque from
the local art store and the surface texture was created with drywall filler.
Before it dried, I took the Panther and pushed the
tracks into the filler to create the track impressions of sever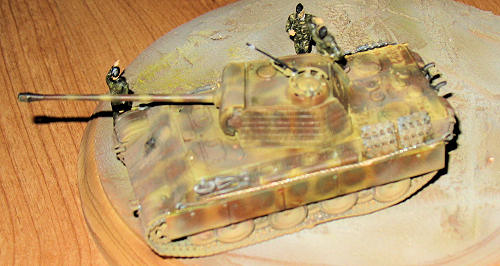 al
Panthers.
I also used the figure legs to make footprints, but these do not
show up in well and can not be seen in the photos.
Once the filler hardened a couple of days later, I
took various shades of brown, grey and yellow to create my version of a muddy
field in Normandy.
However, I do not know the exact color of Normandy dirt
so I based it on the dirt around my bungalow.
The figures were posed in various poses with the gaps
filled in with Vallejo Plastic Putty then hand painted.
I based the figures camo on a pics of a Dragon 1/6
figure I found on the net.
I used Tamiya OD as the base color.
Tamiya Buff and dark brown blotches were hand painted or
dry brushed on for the camo pattern.
The flesh was done with Tamiya flesh, but I did not do
any facial detail (Iím sure that someone can do this with 1/72 scale eyeballs,
but Iím not that talented.)
The figures came with equipment, but not weapons so I
opted the Panzer crew to have sidearms so they all had pistol holsters.
Iím not sure if shoulder holsters were issued to Panzer
crew, but for the sake of being different one crewman has one.
The tank and figures were glued onto the base and
voila, I had my first simple diorama.
The tow cables were done next.
The kit comes with a metal wire to simulate a 1/72 tow
cable.
Initially I tried to use the plastic versions, but both broke because
the bits were very fragile when I cut them from the parts gate.
The cables were glued on using CA glue then weathered
with rust and dark brown.
For a final touch, I took one of the numerous hairs
that has fallen off the top of my head and carefully glued it on the antenna
mount as a whip antenna.
| CONCLUSIONS |
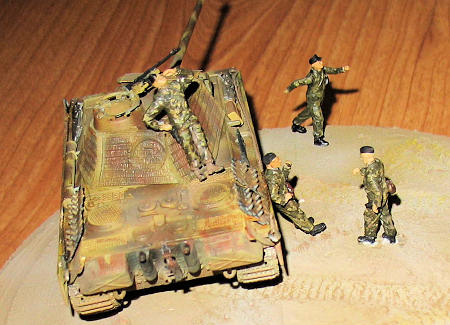 The Dragon
Panther is a very nice simple kit to build and I recommend it for modelers of
all types and ages.
There are a couple of issues with it, but nothing that a
little bit of modeling skill canít fix.
The addition of figures turn this kit into the basis for
a simple diorama and can help diorama novices like myself to make their first
diorama.
ďAchtung-Jabo!Ē
The scene consists of a (not so
bright) Panther Crew taking a break in a farmers field on a overcast day when a
flight of P-47s appear out of nowhere.
Two of the crew (including the tank commander) has
spotted the planes while two other crewmen are oblivious of the approaching doom
as they enjoy their cigarette ration.
March 2009
Thanks to www.dragonmodelsusa.com via your editor for the review kit.
If you would like your product reviewed fairly and quickly, please contact me or see other details in the Note to Contributors.