| HISTORY |
Airfix 1/76 88mm Gun and Tractor
| KIT #: | 02303 |
| PRICE: | @5 € |
| DECALS: | None |
| REVIEWER: | Frank Spahr |
| NOTES: | Vector Conversion Set ($26.00) |

| HISTORY |
 The
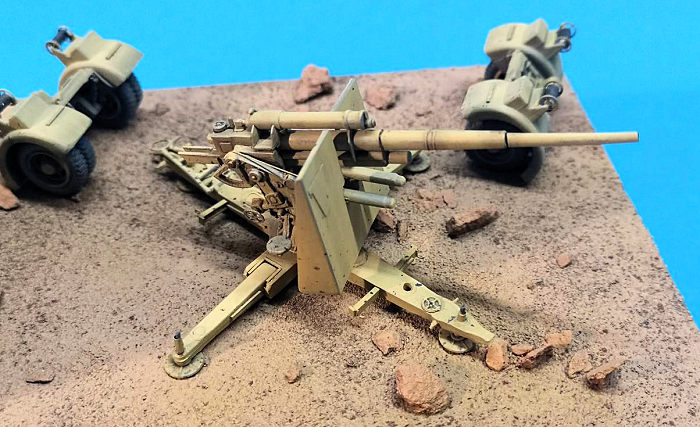
German 88 mm (3.46 in) anti aircraft gun, officially 8.8 cm Flak
18/36/37/41, was a widely built and successful antiaircraft gun with an
important dual role in fighting enemy armour on the ground. It was developed
by Krupp and more than 20,000 of its subvariants were built and still found
use after the war in various countries. In German it was called „Acht-acht“
(„Eight-eight“) after its calibre, and it was used in antiaircraft
batteries, mounted on barges and trains, but mostly in a highly mobile
setup. The gun was mounted on a cruciform carriage with two rapidly
detachable bogies with four wheels each. For use in the ground attack role a
splinter shield was added to give the gunners some protection.
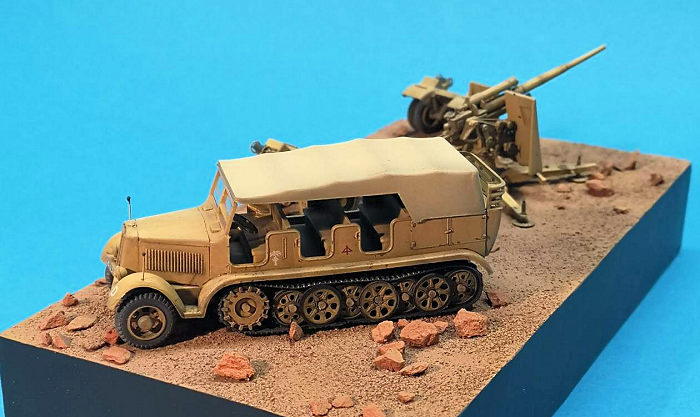
A popular towing vehicle was the Sd.Kfz. 7 halftrack developed by Krauss-Maffei. The abbreviation Sd. Kfz. means Sonder – Kraftfahrzeug (Special Motor Vehicle) and was used for the whole range of Wehrmacht armour. The halftrack weighed slightly below 12 tons and provided space for nine soldiers plus its two-man crew. Its 140 hp engine was good for a top speed of 30 mph and a range of 150 miles by road or 85 miles in the field. Apart from this personal carrier version, numerous others were produced including ones that mounted antiaircraft guns.
Of both the gun and the halftrack, quite a number of examples are still extant, some halftracks even in working condition. I saw examples of the gun both at Museum Stammheim in Franconia and at IWM Duxford.
| THE KIT |
 This
kit by Airfix in their 1:76 armour scale was produced in 1967 as per the
copyright on the body. Real experts will most surely point out its
shortcomings both with the gun and the halftrack, but given its vintage it
still is a fair rendition and the subject is positively recognizable. My
boxing dates from 1980 and has only limited flash. There are some ejector
pin marks that need removing, including one in a really unfortunate place on
the gun barrel. The kit includes four figures, not Airfix´ best from the
outset, and marred by sink marks in their bellies. The typical Airfix vinyl
tracks and an adequate but not really clear instruction sheet complete the
kit. Mine had no decals.
I bought this kit on a very rainy weekend in Franconia in early June 2024, upon visiting the privately owned Museum Stammheim. It is situated near the Main river in the village of Stammheim, near the picturesque town of Volkach. The museum houses a really sizable collection of mostly military vehicles and items. Some of the vehicles are drivable and have been on loan for film work. The small shop had a heap of old model kits for sale. That immediately brought me back to my youth, when I spent most of my pocket money in one of the small stores in our village. They had newspapers, bus tickets, stationery, cigarettes, sweets – and they had Airfix and Matchbox model kits plus glue and paint. I had bought the 88 mm gun when I was about 11 and had liked the model, even though the Schachtellaufwerk wheels had been iffy to assemble. So I bought this kit and the Matchbox M7 „Priest“ for 5 Euros each and looked forward to a nostalgic and hopefully rewarding build.
As neither kit had decals, I looked through today´s vast aftermarket and ordered decal sheets for both. As I never had been happy with the vinyl tracks, I looked for replacements and found very nice resin items by OKB Grigorov. Well, that meant spending 20 Euros on aftermarket for kits priced at 5 Euros, but I´ve done sillier things in my time.
| CONSTRUCTION |
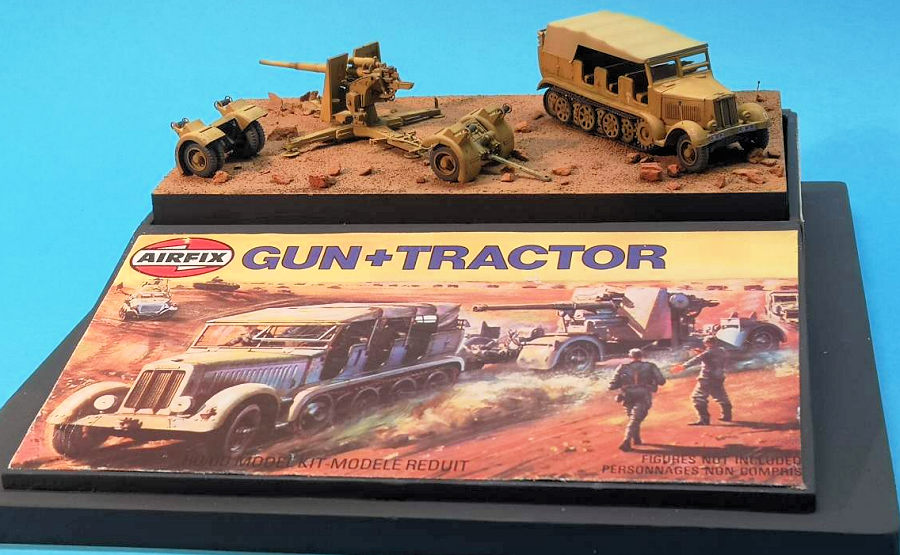
Quite early on I racked my brains about a fitting presentation. I did like the dynamic boxart and the look of the vintage box, and somehow meant to incorporate it into the base. After some false starts, I arrived at a solution that was a compromise compared to my earlier ideas, but a workable one. Using my trusty foam cutter, I made a base the size of the kit box. Around this I made a thin frame and an inclined plane in front of it. The entire assembly would fit into a Trumpeter display box. Having assembled the presentation base, I sprayed it dark grey and carefully cut the boxtop apart. The top of the box with the nice boxart was then glued to the inclined plane, whilst three of the four sides of the boxtop were glued to the thin frame, hinting at an opened box displaying the completed model inside. The model base was left removable, giving ease in construction and photography.
 I then
started removing the parts from the sprues and cleaning them up. Getting rid
of the nasty ejector pin mark on the barrel was the hardest part, the rest
was fairly easy. I then made some subassemblies and found the fit
reasonable, even though frequently ill-defined. That was especially the case
with the gun mounting. I printed out what photos of the gun I could find on
the net, and then looked for ways of adding some detail with inexpensive
means. I find PE handwheels quite useful in my modeling, and here was
another case in point. Apart from that I used various styrene stock, wire
and stretched sprue. I rebuilt the lock that holds the gun barrel in the
traveling position from stock styrene. The muzzle of the barrel was
carefully drilled open.
For the wheels, I glued the halves together and then put them in my rotary tool and sanded the seam flat. The numerous road wheels needed some limited cleanup, and the mounting holes needed some widening. All in all it was a satisfying and hassle-free build.
| COLORS & MARKINGS |
For the very many wheels and tyres, I needed circular masks of 8 mm diameter. So I bought a set of hollow punches and used them with masking tape on a cutting mat. That went better and faster than expected.
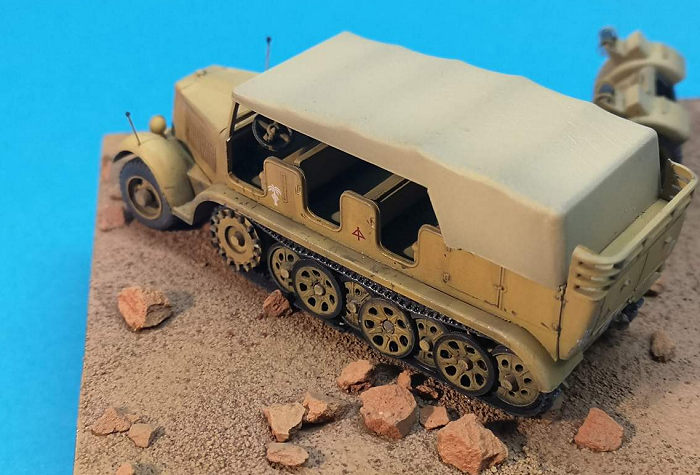 I had
ordered a new shade of Stynylrez primer which I very much like to use, in
Pale Mustard. I started painting the model by spraying it Stynylrez Grey
over all, followed by preshading with Stynylrez Black, and then added the
Pale Mustard. Then came RLM 79 Sandgelb from a new line of paint, MiG´s Atom
Color. I used it upon the recommendation of a friend, and it worked very
nicely. For thinning I exclusively used Sidolin streifenfrei, a window
cleaner. Further accentuations were done with a dark oil-based wash and some
drybrushing using grey oil paint. Paint chipping was hinted at using a very
fine brush and dark grey paint.
That done, I coated the halftrack with clear gloss acrylic by Winsor&Newton. After priming I applied the Peddinghaus decals, which went on very nicely, sadly there were only two Afrikakorps markings when I would have needed four. Whatevs. Microsol worked very nicely with the decals.
After enough curing time, I added another clear gloss coat and then a flat coat, also by Winsor&Newton. At that stage, the gun and the bogies were also flatcoated.
| FINAL BITS |
I only ever wanted some generic desert base. So I sprayed the top side of my base brownish, and applied a layer of PVA glue afterwards. Into that I put some „rocks“ plus some pastel chalk powders and grainy base construction stuff from a box I found in the depths of a modeling cupboard. After curing, the base was sprayed in various deserty hues until I was satisfied.
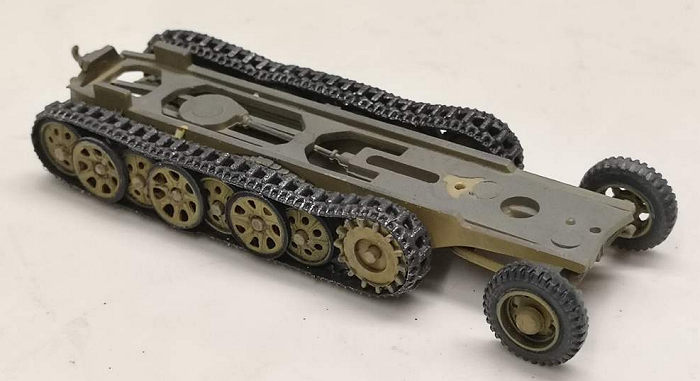
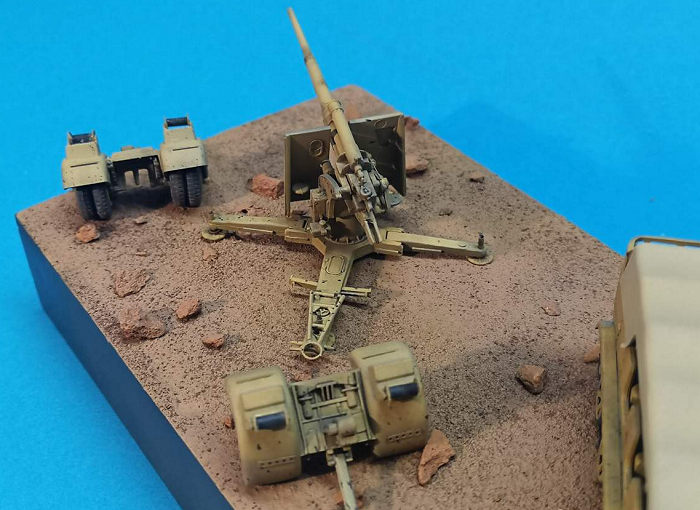 Returning
to the model, now came the time to add the resin tracks. They needed
softening in very hot water and would then conform very nicely to the wheel
assembly. The set contained four segments, but in the event, it was too
short by a crucial link or two each side. So instead of filling the gaps by
buying another set of tracks and putting aftermarket costs into yet more
ludicrous heights, I was forced to use the dreaded vinyl tracks.
Which went way better than expected, both in gluing and painting and in the result. I used Stynylrez on them, which (the clue is in the name) should hopefully do. Which it did. I did not subject the tracks to much handling, but what I did, they coped with. I used Rust Red, Black and Grey primer, followed by some drybrushing with AK´s Tru Metal Gun Metal. Gluing the vinyl had always been a problem, but using a generic „Alleskleber“, Crocodile Glue by Pattex, worked very well. It also worked when I applied it to some of the road wheels, adding some quite realistic sagging to the track.
I could now glue the halftrack body to its chassis, using some pressure. Width indicators were added to the wings using stretched sprue and small blobs of PVA glue. The windscreens were glazed with trusty Glue´n´Glaze by Deluxe Materials.
Now I was able to add the various items to the base using Bindan-RS PVA glue which dries out flat, and I called the project done.
| CONCLUSIONS |
Modelers tend to have some focus and proclivities in their hobby activities. That may encompass broad categories like aircraft or armour, or a certain nation or service, but may also be more specific. Mine tend to reliving and reworking my childhood modeling, and paying homage to the classic kits of those decades. This kit fits very well into that bracket, and gave me some much needed fun and gratification.
But I most probably will not build a Wehrmacht subject anytime soon, they were tools for Hitler´s genocidal assault on mankind, and for me as a German that is a consideration.
As it happened, I visited Wewelsburg Castle near Paderborn on the day after I finished this model. Converting the renaissance triangular castle into a spiritual center for his SS was a pet project of Heinrich Himmler. He even had a small concentration camp built in its proximity to get cheap slave labour for his gigantomaniac building project. If ever completed, it would have replaced the surrounding village with a monstrous multi-layered semicircle of buildings.
Visiting the very comprehensive and well-made exhibition was impressive, chilling and sobering. It made sure to me that all that cool German armour and assorted war machines simply were instruments of one of the most evil empires that ever existed.
| REFERENCES |
https://en.wikipedia.org/wiki/8.8_cm_Flak_18/36/37/41
https://de.wikipedia.org/wiki/8,8-cm-Flak_18/36/37
29 October 2024
Copyright ModelingMadness.com. All rights reserved. No reproduction in part or in whole without express permission.
If you would like your product reviewed fairly and fairly quickly, please contact the editor or see other details in the Note to Contributors.