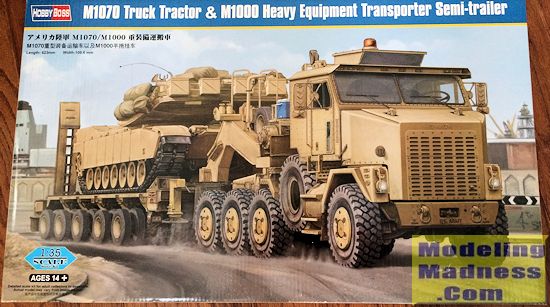
Hobby Boss 1/35 M1070 & M1000 HETS
| KIT #: | 85502 |
| PRICE: | $180.00 MSRP |
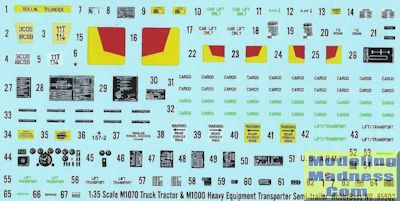
| DECALS: | Two options |
| REVIEWER: | Donald Zhou |
| NOTES: |
Advantage: huge full scale kit of this important vehicle. Contains both the tractor and trailer. Detailed throughout. Disadvantages: Many small parts. Complicated assemblies with multiple multimedia parts. Some mistakes in the instructions. |

| HISTORY |
After the war, despite the fact the Dragon Wagon was
upgraded to carry a heavier load, the weight outgrowth of the “Patton” series
MBT’s (M47, M48, and M60) soon put the Dragon Wagon to pasture. What was needed
was a bigger and heavier vehicle to do the job. That was the M911, a 6x6 vehicle
and trailer system that can haul up to 60 tons. The system was designated “Heavy
Equipment Transporter System”, or HETS. Designed specifically for the Patton
tanks, especially the M60, this vehicle gave many years of good services and is
still in use today in some countries to haul other heavy equipments other than
tanks.
However, during the 80’s, with the introduction of the
M1 Abrams series MBT, the M911 was starting to show its age, especially with the
weight creep of the new tank. When the M1-A1 HA (Heavy Armor) crept up to 70
tons, the M911 proved to have a hard time with it. During the Gulf War, it can
haul away the Abrams, but just barely at very slow speed and without any off
road performance. This resulted in a new requirement for a new HETS.
The fact of the matter is, this requirement was issued
even before Desert Storm. Several companies responded. The eventual winners were
Oshkosh, a heavy equipment producer in Wisconsin, who produces the 8x8 all-wheel
drive tractor, designated as the M1070 and System Electronics of St. Louis, who
produce a 40 wheeled trailer designated as the M1000. Together, they formed the
new HETS. The M1070 + M1000 HETS first entered service in 1993.
The new vehicle specifically fills the new
requirements, up and including able to haul away a 70 ton load (the weight of a
fully loaded M1-A2 Abrams) with off-road ability and minimum turning radius. The
last part made the vehicle a little complicated. The tractor is air ride capable
with the first and last set of axels able to turn. In order to keep the turning
radius to a minimum, the trailer, with 10 wheel arms, 5 on each side, with 4
wheels to each arm, are all hydraulically suspended. This not only provide each
with independent suspension, but also features a computerized weight
distribution system that automatically distribute the weight of a heavy object
evenly on the trailer. The computer also controls the arm’s movement so each of
the arm can be individually or turned together with the tractor to cut down the
turning radius. All the wheels, including the tractor’s features an independent
centrally controlled inflation system. Despite all these complexities, it only
take two crew members to operate although there is room in the cab for six in
order to comfortably seat the four crew members of an Abrams. Top speed is 45
MPH. The vehicle is highway capable, although due to its unusual large size, it
needs a permit to do so and usually only move on highway at night.
The new vehicle entered service in 1993 and slowly
replaced the M911 in the tank transporter role. It proved to be quite adept at
it. During Iraq and Afghanistan, rumors were flying around more than one crew
loaded their HETS with 100 tons of cargo. The vehicle certainly could handle it
albeit with the sacrifice of it’s off road ability and speed. At any rate, any
well trained HETS crew will tell you that the biggest thing to remember about
the vehicle is even with only “70” tons, you have to constantly control your
speed to “pull” your load and never ever let the load “push” you. If that
happens, especially downhill, then good luck stopping cause the only thing BIG
enough, and it have to be BBBIIIIGGG is all too sudden and all too horrifying to
think about! This is why I suspect the real speed of a HETS is much faster than
the quoted 45 MPH…..Although I do suspect with a full load or worse…..If the
vehicle goes faster than 45, than good luck trying to stop it! Currently, there
are 2600 vehicles in service with the U.S. Army, although some of the older
vehicles, whose life span are almost up are being dumped onto the civilian
market. The British also ordered a heavily modified vehicle, the M1070F to
replace the Scammel Commander to haul their Challenger II MBT and other
countries also uses it. In 2013, the new version, the M1070A1 entered service
with a 700 HP Caterpillar C18 engine (200 more than the old one) and an
automatic single speed transfer case is also provided so the crew does not have
to stop to change speed when dealing with a different grade.
| THE KIT |
 This
is another one of those kit that I bought in China so many moons ago and got
left there when I returned back to the States. Now, four years later, I finally
got it back so here it is!
Ohh boy that’s another big box with over 1000 parts
too! Yeah, once again, I got taken into “WTFBBQSAUCE HAD I GOTTEN MYSELF INTO”
land…….again! Maybe it’s because since I got it in China, and Trumpyboss (read,
Wasan Plastic Co.) again is a Chinese company, this means no tariffs, no
distribution fees (or very little) and overseas shipping costs, I got it for the
equivalent of only 85 bucks! Considering the fact the kit goes around $130
minimum these days, that’s a hell of deal so I snatched it up real quick
and…….Sigh………..”WTFBBQSAUCE HAD I GOTTEN….”!!!!!
Once you opened the box, you’ll at the same time giddy
with joy and curse yourself because once again….”WTFBBQSAUCE….” On one side, you
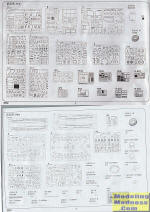
got all the parts for the tractor (Sprues A through K. Guess the Engine “Bonnet”
(sure clue that the translator is British trained) is sprue I). Sprue L through
R (Once again, guess the flatbed top is sprue O) are for the trailer. The middle
is the typical green small box that contains the wires for the winch, tires for
both the tractor and trailer, the single piece engine cab “bonnet” , photo etch
parts and the clear parts. All of the pieces are well molded and in good
clarity.
The minute you start reading the instruction book
(again book, not even close to being a booklet), you will start once again, with
the “WTFBBQ…..” Hey, are we going into a scheme here? You can bet you know what!
This because the complexity just takes your breath away! To tell you in detail,
let’s start in the beginning!
The
complexity starts with the details. I should know cause I already started on
this kit. The first two steps, which deals with the main tractor frame contains
98 parts alone! That’s more parts than even some 1/48th
scale jets! As you can imagine, after the two main frames comes together, put a
heavy book or something on top to keep the frame straight and level is a must
(leave off part A6 to help you with this). This two steps took a better part of
5 days to do, not just because of work, kids, keeping SWMBO waxed and happy and
to keep the frame straight and level, but also there are many small parts and
all sorts of subassemblies that you must be careful and assemble first before
everything comes together. Keep this in mind cause it will be another running
scheme throughout the kit! Also, already on the first step, a part number is
missing. If I remember correctly, part D13, the bottom bumper holder is drawn on
the instruction, but not numbered….So you must look for it on your own.
Steps 3 through 7 deals with all four axels on the
tractor and the main drive train and linkages. There are a lot. Again, pay
attention to the instructions….Wish they can put some words like “WATCH OUT!!!
Notice orientation!” (But then again, I can understand it. This because
especially if you go to places like Europe or Canada, where the French and
French Canadians are adamant on protection their own language, you can’t sell
the kit if it’s just printed in English alone…Then there are the Germans,
Spanish etc etc etc etc….Where will it end?) on some of the parts cause this is
important here. The way the parts are made, you can easily mess up on the
orientations of the axels assemblies, for ex. the main axel housing, the oil
sump hole should be pointed downward. But since the guidance plugs and holes are
made the same, you can easily mess this up and get a great axel assembly with
the hole on top. Not pointed towards the bottom! So study the instructions
carefully here! Another part were you can get the orientation wrong would be the
air bladders. The tractor again, is air ride capable and the air bladders are in
vinyl. Study the diagrams again until you are sure of how it goes before
committing it to superglue!
Steps
8 through 9 complete the mess of linkages and shock absorbers….Now you are
finally done with the frame details and already, I reckon over 300 parts are
gone…That’s more parts than some 1/35th
scale tanks!
Steps
10 through 15 deals with all the details on the side and front of the tractor
including the two big fuel drums, engine grills, and front fenders with details
such as lights, turn signals and light protectors. Now, notice now you are
starting to deal with a lot of photo etch. Be prepared, cause it’s about to get
worse. In fact, this kit contains a lot more photo-etch than even the 1/16th
King Tiger I previewed earlier. It’s obvious why cause this kit demands it.
Step 16 to 22 deals with the crew cab and as you can
expect, its one hell of an assembly! The only thing missing though, are the seat
belts...Guess the manufacturer thought since no Chinese ever put on their seat
belts, so must the Americans….Ohh well. Detailed interior sets are available now
from various third-party manufactures or you can scratch your own. Just to warn
you, the entire cab top is in photo-etch! So get that lighter and etch bending
tool ready! After you are done! Do not. Repeat! DO NOT put the cab onto the
frame! Skip all the way to step 30, where the instruction have you turn the
thing upside down and put in the last few underside parts. As you can imagine,
you do not want to do that with a big cab with some very delicate parts
straddling the frame! On top of that, as can be imagined, the whole entire thing
is quite heavy at this point!
Next, step 23 to 28 deals with the complicate winch
assembly. This one is a dozy and, well, is a kit onto its own. I reckon over
half of the parts are photo etch or in string. Now the string, if you have the
means, I recommend replacing it with copper or metal wires since Trumpeter’s
string flays the instant it touches paint! Take your time here since there are a
lot of metal parts.
Finally, step 29 to 32 deals with the last bit of
details. The mud guards are all in metal so you got your work cut out for!
So now, we start on the M1000 trailer with step 1
again. Through step 4, the “goose neck” is assembled. Again, leave off the tire
winch and spare tires, not unless you want to break them later when you have to
turn the trailer upside down again and again. I’ll deal with that later.
It’s at this point, you will deal with a lot and I
mean A LOT of plastic tubeings since as I’ve stated earlier, the trailer is
hydraulically suspended and the kit give the full details on these. Again, the
steps are in metal so be patient with all these.
Step 5 to 9 covers the trailer bed details. There are
a lot of small parts so don’t try to feed the carpet monster too much. Luckily,
this kit seems to provide a few extra small parts so you have some leeway.
Step 10 15 deals with the truck wheel arms and
hydraulic line assemblies. As you can imagine, studying the assembly diagrams
again and again as these things are a mess of complications of wires and
attachment points. Step 14 will have you attach the goose neck. As much as you
want to delay this, you can’t. Not only are there are some major tubings that
joins the neck with the trailer, some of the bottom parts can not be placed in
until the tubings are in place since they will block the access points if you
put them in early before the neck is attached.
 Steps 16
through 21 deals with some of the trailer details such as the warning lights,
loading ramps and chalk blockers. Once again, be prepared to bend a lot of
photo-etch here.
Finally the last two steps, Steps 22 and 23, deals
with attaching the trailer to the tractor and attaching the blue and red
hydraulic and electrical lines and the black air hose! Recommending buying some
thin copper wire and insert it into the tubing to make them bend easier. It’s
only after you are finished with all of these steps and swallowed up close to
1500 parts are you finally done. Ohh, that’s not including at least 200 photo
etch, what looks like a mile worth of vinyl tubing., 9 tractor tires (8 on the
truck, 1 spare), and finally, 42 trailer tires (40 on the trailer, 2 spares)!
| CONCLUSIONS |
Umm yeah…
This is another one of the Trumpeter/Hobbyboss kit
were the instant you open the box, it gut punches you to the floor. When you get
back up to take another look, it promptly drop kick you back where you belong,
all the while while you are muttering, “WTFBBQSAUCE HAD I GOTTEN MYSELF INTO!!!”
As I’ve said, I already started and two weeks, I still
have not completed the bottom of the frame yet….And this is not even getting
into all the major photo-etch assembly! Currently, there are plenty of
aftermarket makers who are making resin wheels (for those that hate vinyl. But
just be warned, it takes as much as $80 get all of them, for both the tractor
and trailer and the spares!), detailed interior sets and a detailed resin
engine. I say, “why bother?” yes, there is no engine, even though the “bonnet”
moves, yes, there are no seat belts and yes, the interior can be made to look
much better but again, when enough is enough? And what comes out is more than
enough for most people and you can indeed make a showpiece winner straight OOB!
Recommended for experienced modelers with at least
some experiences in annealing and bending photo-etch parts. Not for beginners or
the faint of heart!
July 2015
If you would like your product reviewed fairly and fairly quickly, please contact the editor or see other details in the Note to Contributors.