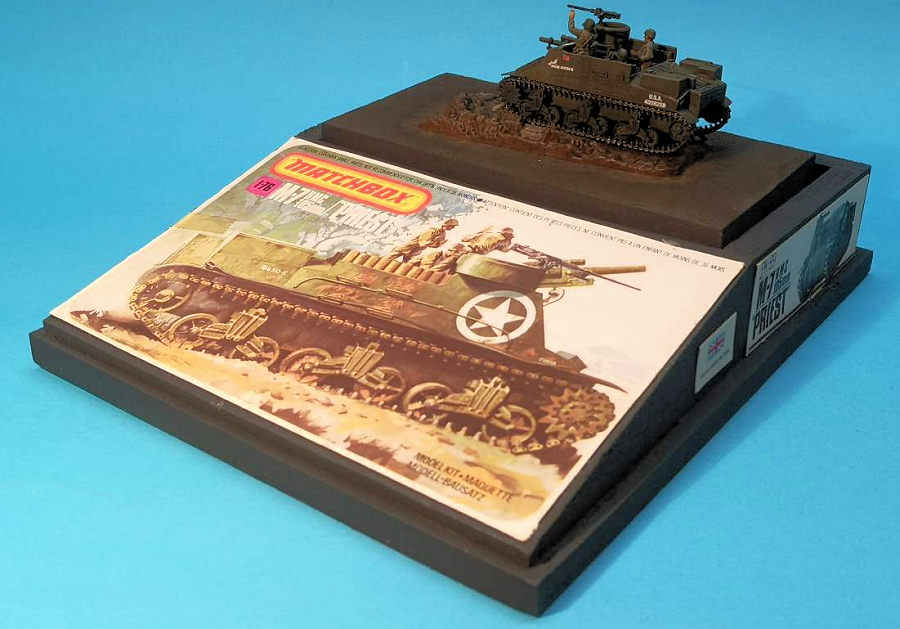
Matchabox 1/76 M7 105mm HMC 'Priest'
| KIT #: | 40089 |
| PRICE: | 5 Euros |
| DECALS: | Two options |
| REVIEWER: | Frank Spahr |
| NOTES: | Currently available as Revell kit #03216 |

| HISTORY |
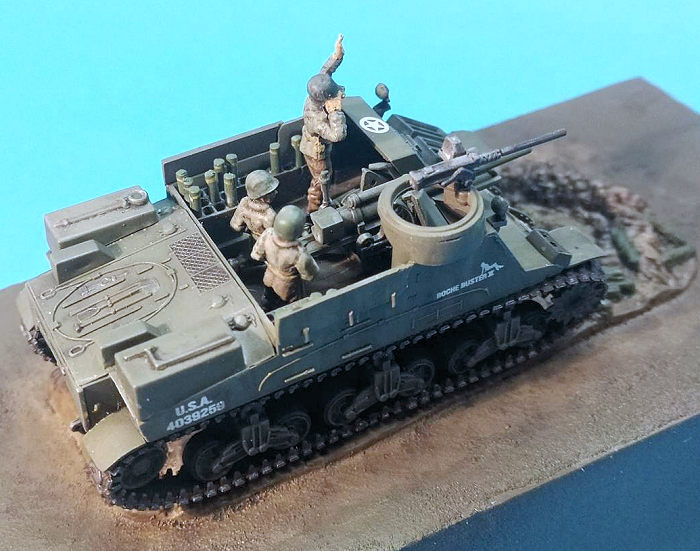 The M7
HMC 105 mm (Howitzer Motor Carriage) was a self-propelled gun developed for
the U.S. Army in 1942. It was widely used by the British and US forces
during WW2, both in the European and the Pacific Theatre. It was based on
the M3 Lee medium tank´s chassis and mounted a 105 mm (4.133 in) howitzer
plus a 12.7 mm (.5 in) Browning machine gun in an elevated position on the
right. The British had the habit of giving their self-propelled artillery
clerical names. As this machine gun position resembled a pulpit to them,
they named the vehicle the „Priest“.
The vehicle had ammunition stowage for 69 rounds for the gun and 300 rounds for the machine gun. Its armour varied between 12 and 62 mm.
Pretty soon in the production run, commonality with the M4 Sherman tank was aimed at, and fully achived in the spring of 1944. More than 4,000 vehicles were produced, staying in service after the war in various countries. Even the new German Bundeswehr received more than 100 Priests as initial supply of howitzers, where they served until the early 1960s.
A number of Priests are still extant in museums and collections.
| THE KIT |
I picked up this kit in the shop area of Museum Stammheim, a private military and technical museum in Franconia, in the wine area near Volkach. They have a sizable collection of military vehicles and loads of other items, and it was well worth visiting on a rainy morning. I tend to look for old kits at shows and shops, and was glad to see a vintage Matchbox kit to go with my vintage Airfix 88 mm gun kit. It would be nice to compare the two, especially in hindsight after 45 years.
So I picked up the kit, copyrighted 1979, in its slightly aged and battered box, for 5 Euros, and was quite happy. I was looking for ways out of my modeling slump and that looked like just the ticket.
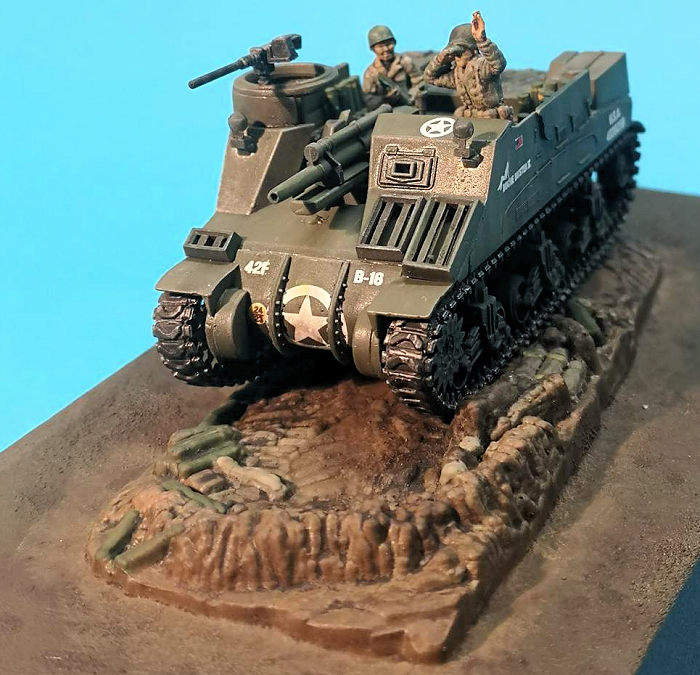 The kit
comprises two styrene sprues, molded in Matchbox´s trademark of different
colours. Back then, not quite everybody (ahum) painted their models, and having
various colours catered to that. Another Matchbox trademark is the small diorama
base included. The sprues are well-cast, and the parts pretty clean and
flash-free, and also quite free of ejector pin marks in visible places. Yet the
sprue attachments are very, very small and narrow, and quite iffy to cut
through.
A vinyl track is included, with a more stable-looking interlocking mechanism for the ends. This track looked markedly thicker and stiffer than the one I found in the Airfix box.
The decal sheet for a British and an American vehicle in Italy in 1943 had suffered in storage and was unusable to me.
The instructions are fairly well done and comprehensive, though not always as clear in parts placement as we of today would like.
As I always had disliked the vinyl tracks, I ordered resin replacement by OKB Grigorov, using their S72173 for the M3/5 family. For decals I ordered Braille Strike´s BRL72008 for Priests in Normandy.
| CONSTRUCTION |
Having just completed the 88 mm gun, I decided to make a similar presentation base, utilizing parts of the nice box. This time, things went a lot faster as I now had the hang of it. I especially liked two markings declaring both the box and kit entirely lead-free. I needed to include those.
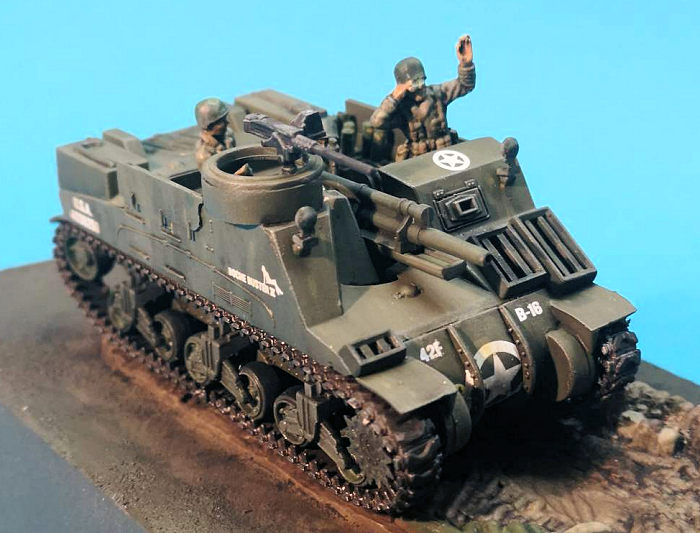 Whilst I
was working on the base, I prepared the kit parts. This time, I only replaced
some handwheels on the gun mechanism, and drilled out the gun barrel and the
ammo stowage racks. So things went a lot faster than with the 88 mm gun. I soon
found out that the styrene was rather hard and brittle. I have no recollection
whether that was generally the case with Matchbox plastic back then, or whether
the material simply had aged. Combined with the hard to reach sprue attachments,
I encountered breakage, especially at the drive sprockets which ended up rather
gap-toothed and needed some work. Yet the plastic glued well with Tamiya Extra
Thin.
On assembly, I found out that the parts fit well, but lacked positive mounting guards. So assembling the kit needed some skill and forethought and quite some patience. I mused about the disclaimer on the box that recommended the kit for kids 36 months and older …
I needed some putty on the chassis, and used Vallejo´s product, which was quite easy and well suited for this task.
Moreover, there are no marks or other guiding helps for some of the interior details, and I glued one part too far forward so it later interfered with the front plate and had to be repositioned.
Pretty soon, I had my subassemblies prepared .
| COLORS & MARKINGS |
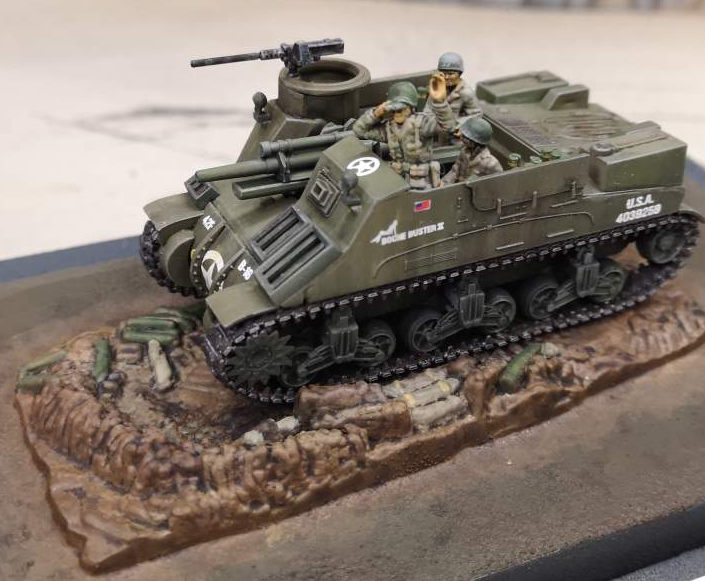 I primed
the entire kit with Stynylrez grey primer, and then started toying around with
my airbrush and first some black for preshading and then various shades of green
until I was quite happy. In fact, the process had been fun.
After looking into US uniform colours, I primed the three figures and then hand painted them in appropriate shades with thinned colour. A dark oil-based wash and some drybrushing in grey completed the work. Only then did I realize I had cleared up the seams not quite well enough, and had to redo them, but it worked out.
The vehicle itself also received a wash, quite some streaking and some drybrushing, plus some pastel chalks for dirtying up the interior.
The kit tracks were glued together and painted prior to mounting any track, to have them as a Plan B. I used Stynylrez Black and Rust Red which worked well on the soft plastic. Some drybrushing with Vallejo Gun Metal completed the preparation.
Work on the base continued. I had spraypainted the presentation dark grey, same as the sides of the base. Its top side was painted green. That cured, I coated the base top with PVA glue, placed the kit diorama base onto it and lightly dusted the entire top with fine sea sand.
That cured, I had fun with paints. I did everything that came into my mind. I sprayed it, I washed it, I applied thinned paint, I picked out details by brush painting, I drybrushed it, I tried to blend the surrounds of the kit base in – until I was finally quite happy and I sealed it with a good flat coat.
| FINAL CONSTRUCTION |
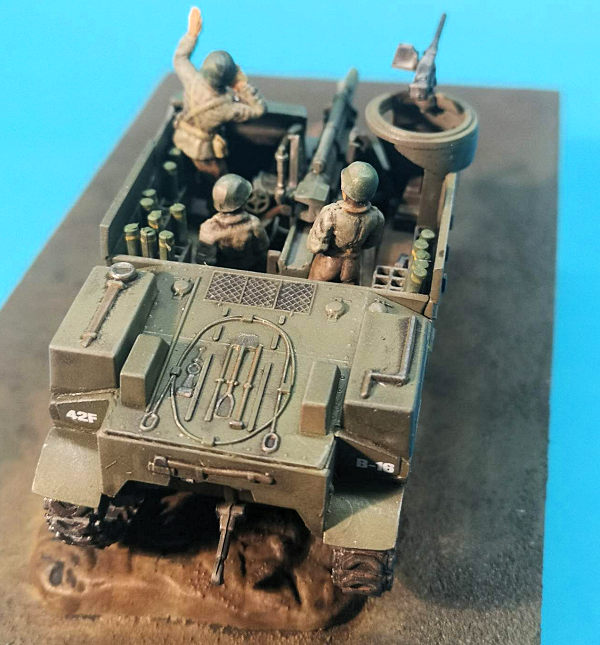 Now I
glosscoated the vehicle using Winsor&Newton´s acrylic gloss varnish. After
proper curing time, I cut out the decals for „Boche Buster II“ and applied them.
I needed to cut the large US star in three pieces to conform with the detail on
the front of the vehicle. The decals worked pretty well, but in spite of a gloss
coat prior to and after decaling, the carrier film still shows.
After that second gloss coat had cured, I applied a flat coat, also using a Winsor&Newton product. Now I was able to mount the various wheels and suspension parts, and add some detail to the hull, though not to the inside yet.
When the wheel assembly had cured, I tried the resin tracks, and found they were not wide enough. The road wheels wpould not fit between the „teeth“ on the tracks. So I had to return to the kit tracks, which proved tricky to mount. I probably should only have glued them after mounting. So I had to remove the rearmost wheel, mount the tracks and then iffily re-attach the wheel. Using Pattex Crocodile Glue, I glued the tracks to the underside of the road wheels, applying serious pressure for several hours.
Now I added the remaining items, as in shells, gun, machine gun and figures. I needed to cut off the gun´s mounting pin to do that, but as I wouldn´t be moved anyway that didn´t concern me.
My usual final flat coat sealed and blended things in. Mounting the vehicle to the base using Crocodile Glue completed the project. It did not fit actually very well to the base, but having the foam board block surrounding it helped.
| CONCLUSIONS |
That was a fun build. Mostly OOB, fun to compare with Airfix, just some building and painting and enjoying myself. On the balance, I preferred the Airfix kit, but not by much. If you can pick up this kit for a good price, why not give it a go?
| REFERENCES |
https://en.wikipedia.org/wiki/M7_Priest
http://www.museum-stammheim.de/
8 November 2021 Copyright ModelingMadness.com.
All rights reserved. No reproduction in part or in whole without express
permission. If you would like your product reviewed fairly and
fairly quickly, please
contact
the editor or see other details in the
Note to
Contributors.